Must-Have Clothes for a Hike in the Irish Hills

a man standing on a cliff near the sea

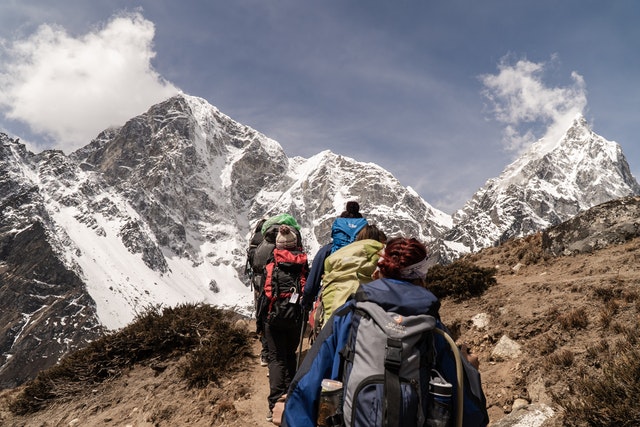
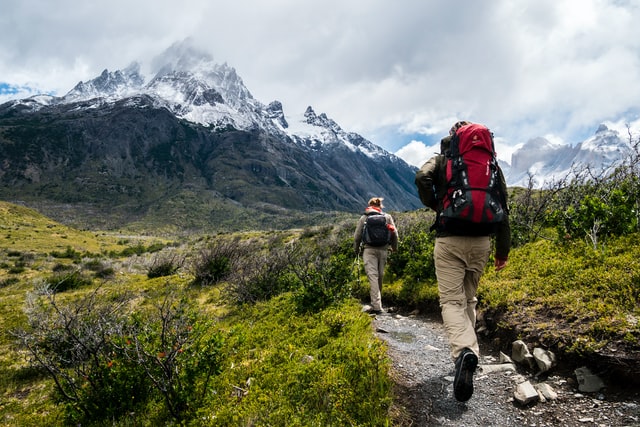
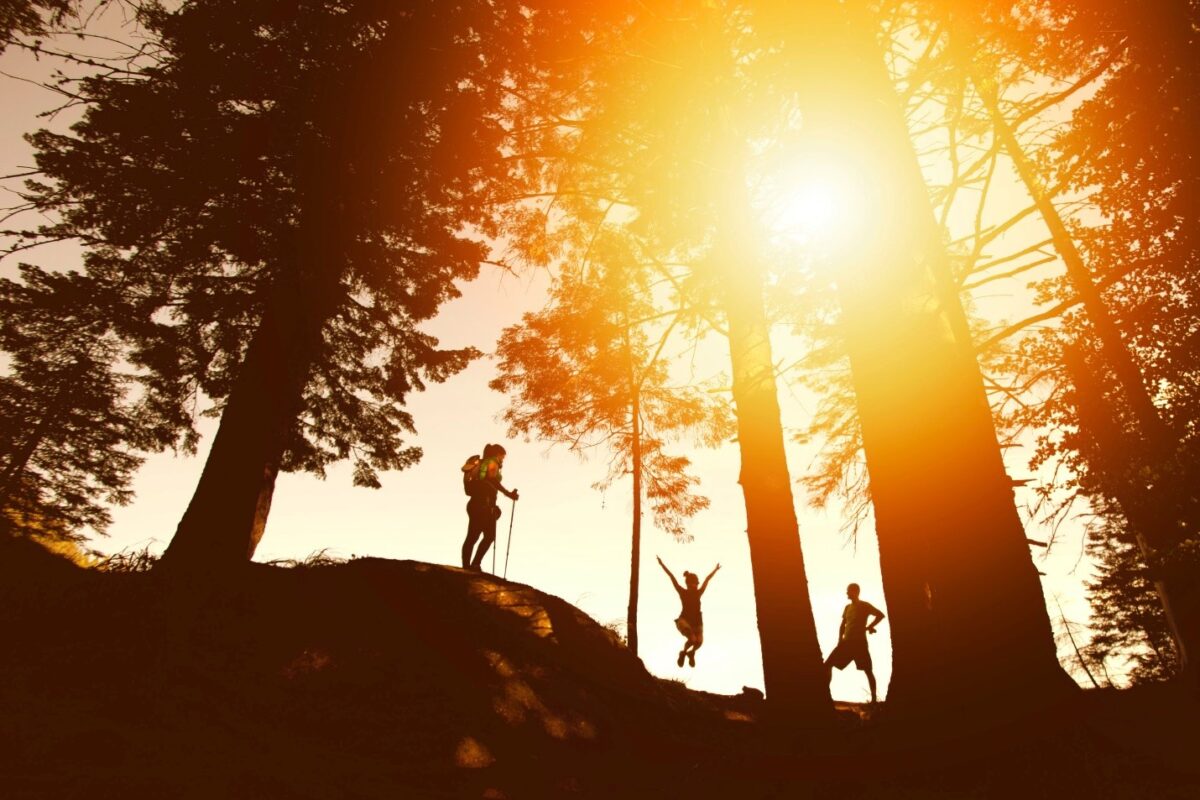
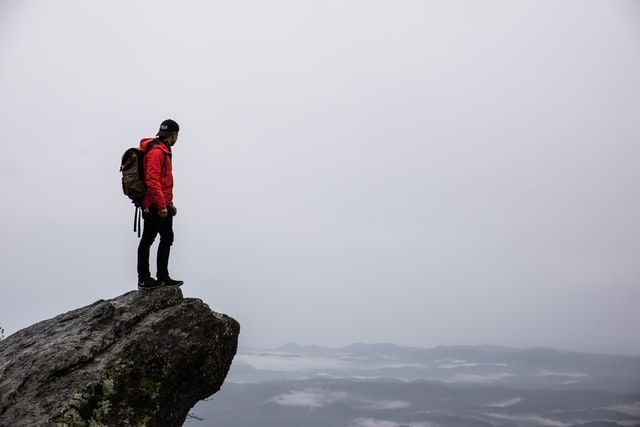
Whether you’re joining a hiking tour or planning on exploring solo, Ireland is here to fill up your awe tank, and unlike fuel, it will only cost you a bottle of water and a snack. Some hiking trails (like the rugged Irish mountain terrain) aren’t exactly a walk in the park. They are demanding, wild, and, most of all, exhilarating. These roads are less travelled. The “Emerald Isle” is any hiker’s dream come true. Why? Although Irish people often pine for a blossoming, Mediterranean summer, hikers and avid walkers couldn’t be happier with Ireland’s weather conditions (with average temperatures reaching anywhere between 12 °C (54 °F) and 18 °C (64.5 °F). If you’re planning on experiencing an unforgettable adventure this summer, get acquainted with must-have clothes for a hike in the Irish Hills. Are we ready? Zip up!

Hiker’s dress code

For all the hiking beginners out there: being in shape is, without a doubt, a good thing. Physical stamina and enthusiasm are essential for a great hike. Still, if you wear your skinny jeans and choose the wrong type of footwear, you’ll be in trouble – instantly. It doesn’t take long for our nerve endings (whether on our delicate skin or the soles of our feet) to throw an unforgettable temper tantrum. This quiet, invisible inner-mutiny will, undoubtedly, fill you with regret, and your heavy heart will stomp on your initial enthusiasm until there’s nothing left to hold on to but a pale shadow of its former glory. So, what type of clothes is suitable for hiking?

man hiking with gear depicts must-have clothes for a hike in the Irish hills
Play it smart; wear the right clothes.

The right footwear

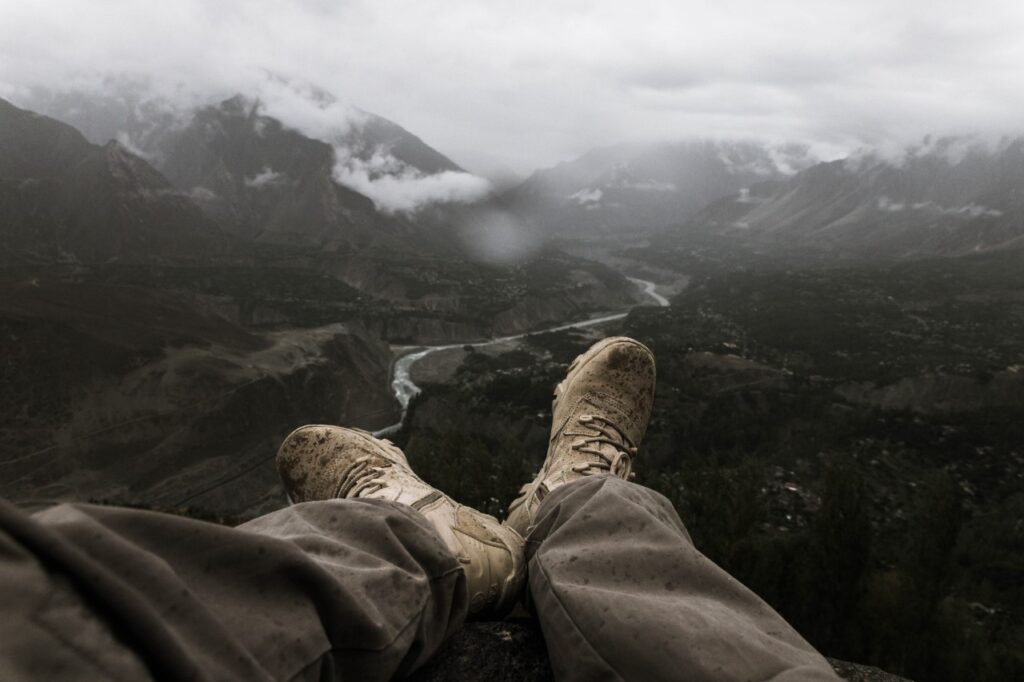
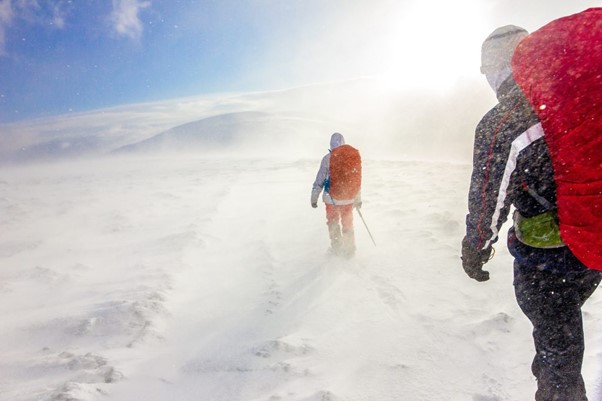
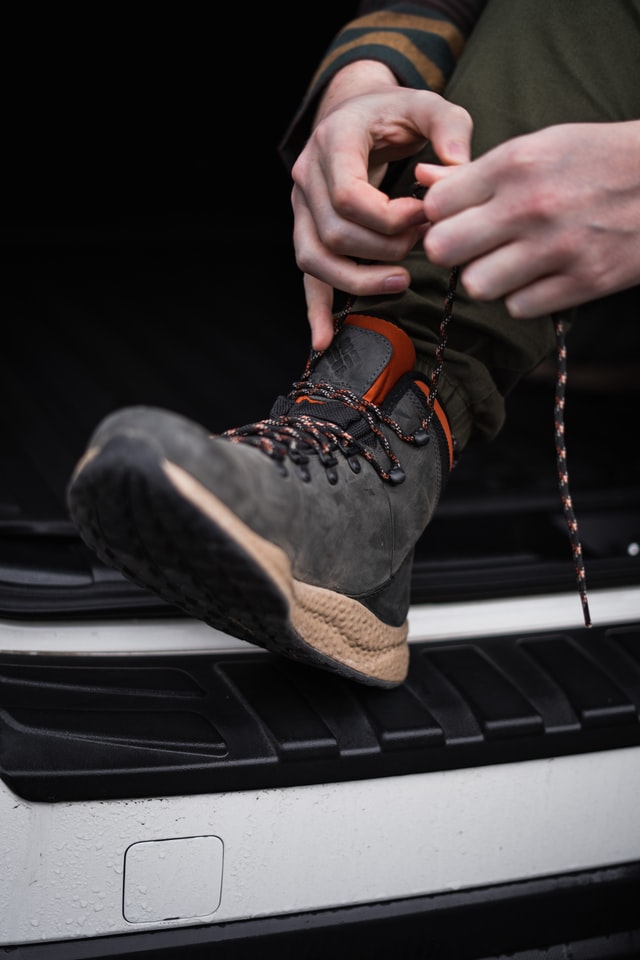
We can’t stress it enough – footwear is everything. What kind of footwear you’ll need depends on your destination, terrain, and weather conditions. Keeping your feet comfortable and dry isn’t the only concern; your hiking shoes should provide safety during a winter hike. Rocky, uneven terrains call for good gripping soles. Rain does too. (a slippery hike is not something we look forward to).

We recommend:

  • Leg gaiters: Silly-looking but extremely useful, they are designed to keep our feet and lower legs from wet underbrush and debris in our shoes. Remember, the weather might be dry, but the grass will most likely be wet. If you want to avoid wearing waterproof over-trousers, this is a perfect time, but the right shoes are necessary.
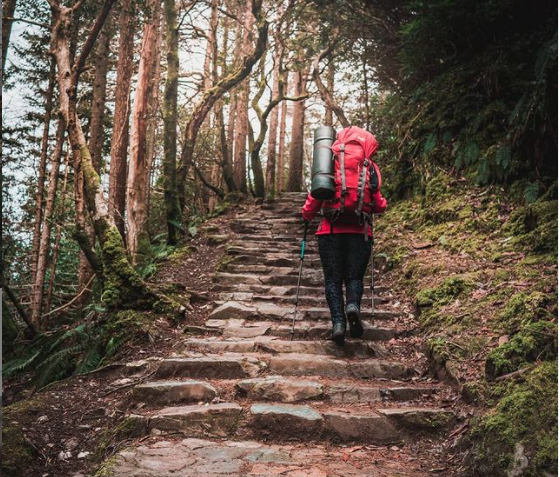
  • Hiking boots: a must-have item for a traditional Irish hike. Ankle support is essential, and so is having an impenetrable sole. Any less common route will require a good, sturdy hiking boot. Opt for a waterproof model, as the weather gods like to spice it up a little, even during summer.
  • Socks: don’t overlook the importance of a high-quality hiking sock. They were invented for a reason. Unlike regular cotton ones, hiking socks are designed for friction reduction and outstanding insulation.

A piece of advice: Be sure to break in your new hiking boots before the trip! (we’ve all experienced this particular type of excruciating discomfort and pain. Sweet sorrow? – Nothing sweet about it.)

man tying hiking shoe
Say no to the unpredictable. Safety and comfort first.

Smart hiking: Layers

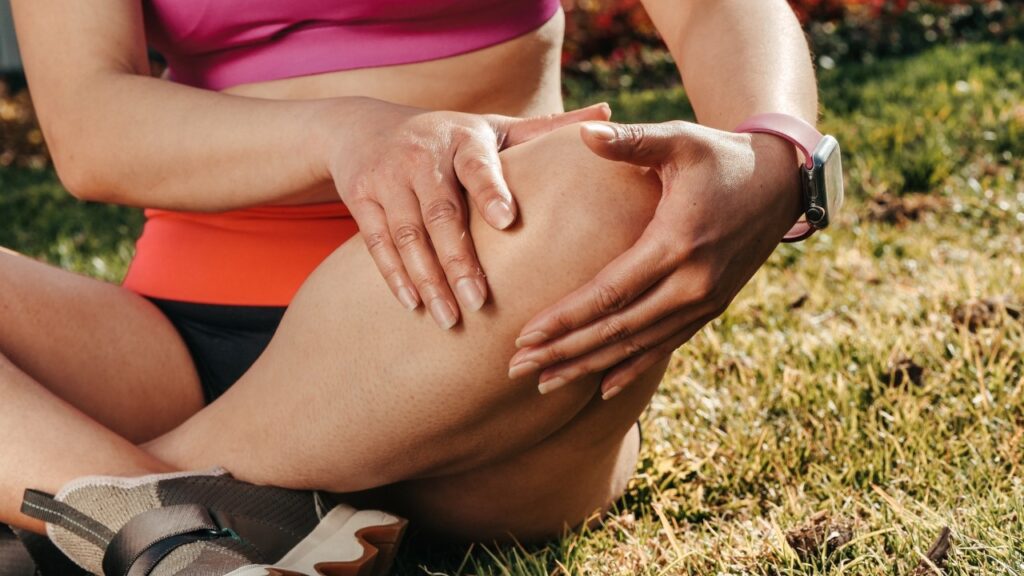
Getting informed on must-have clothes for a hike in the Irish hills beforehand is crucial for a successful trip. The clothes we wear and the footwear we choose prevents us from experiencing common hiking injuries. You must be thinking: Sure, I know, sprained ankle stuff. – Yes, that too, but specially designed clothes protect us from invisible dangers like low temperatures, wind, water, and the sun. So, what do you wear? Layers are the smartest way to ensure a smooth and pleasant walk out in the wilderness.

Why say yes to layers

Unpredictable weather, of course. Regulating your body temperature during a hiking session is exceptionally relevant; you don’t want to get all bundled up and end up hyperventilating due to feeling “unbearably hot.” Adding on a layer (or taking off one) is an easy way to ensure that your body’s feeling just right and all the functions are working properly.

What kind of layers are we talking about?

If you’re unsure what clothes to pack for your trip, you must get some advice for this before closing your suitcase!

First, avoid cotton. Cotton clothing gets heavy when wet and isn’t quick to dry. And quick-drying clothes (upper and lower body!) is what we’re looking for.

  • Lightweight T-shirt: technical t-shirts soak up the sweat from our upper body via capillary action, keeping us dry and smiling
  • Fleece: high-tech fabrics offer incredible insulation; the natural motion of the hiker generates warmth, and fleece regulates the body temperature
  • Rain jacket: a hardshell jacket is there to protect you from chilly weather, wind, and rain; a great piece of garment for any outdoor adventure
  • lightweight trousers: choose quick-drying trousers for your hiking trip, as the ground can get pretty boggy
a woman standing next to a lake
Take your wanderlust for a dress-up with our must-have clothes for a hike in the Irish hills.

Other important must-haves

Getting familiar with essential hiking gear is half the job (the other half being “feet, don’t fail me now!”). If you want your hiking trip to be inconvenience-proof, consider bringing:

  • Headgear: a sun hat or a warm hat (depending on the season) will keep your face safe from dangerous UV rays or harsh wind conditions
  • Sunblock: Yes, this is Ireland, but you’d be surprised how easily one can get a sunburn up in the emerald hills
  • Bug spray: stay away, pests! I mean it! – it does come in handy
  • Comfortable underwear: chaffing sensation? Pass!
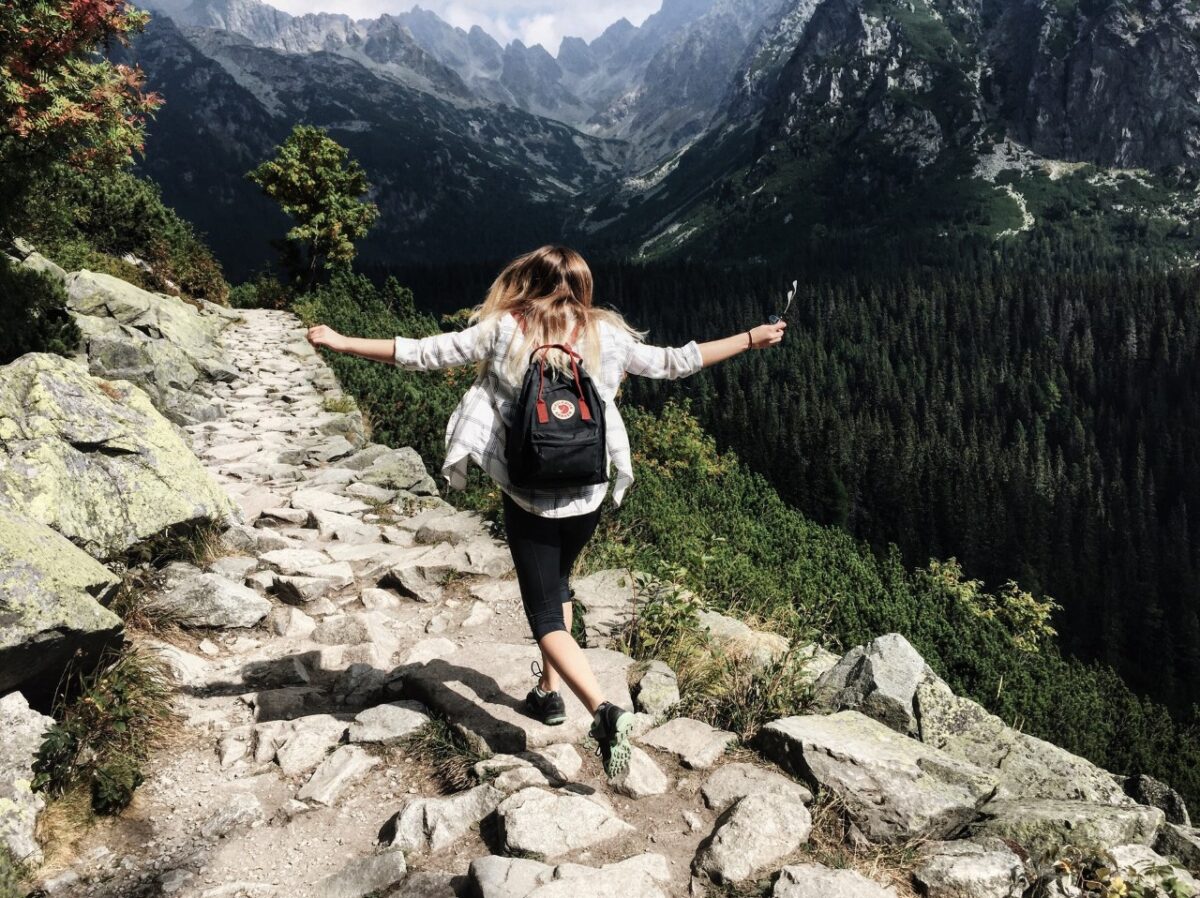
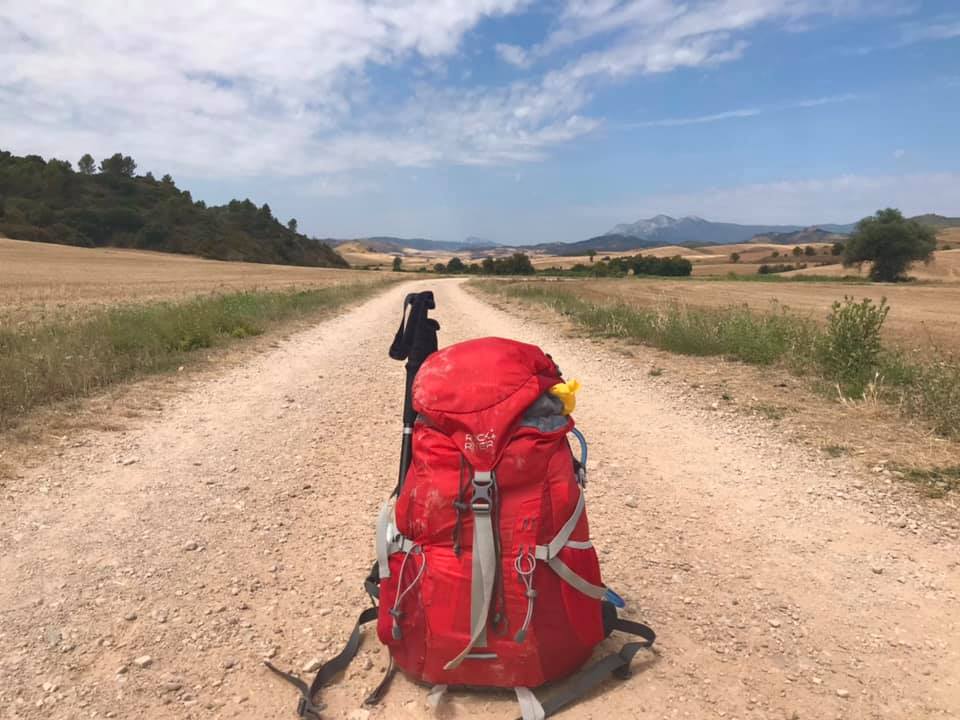
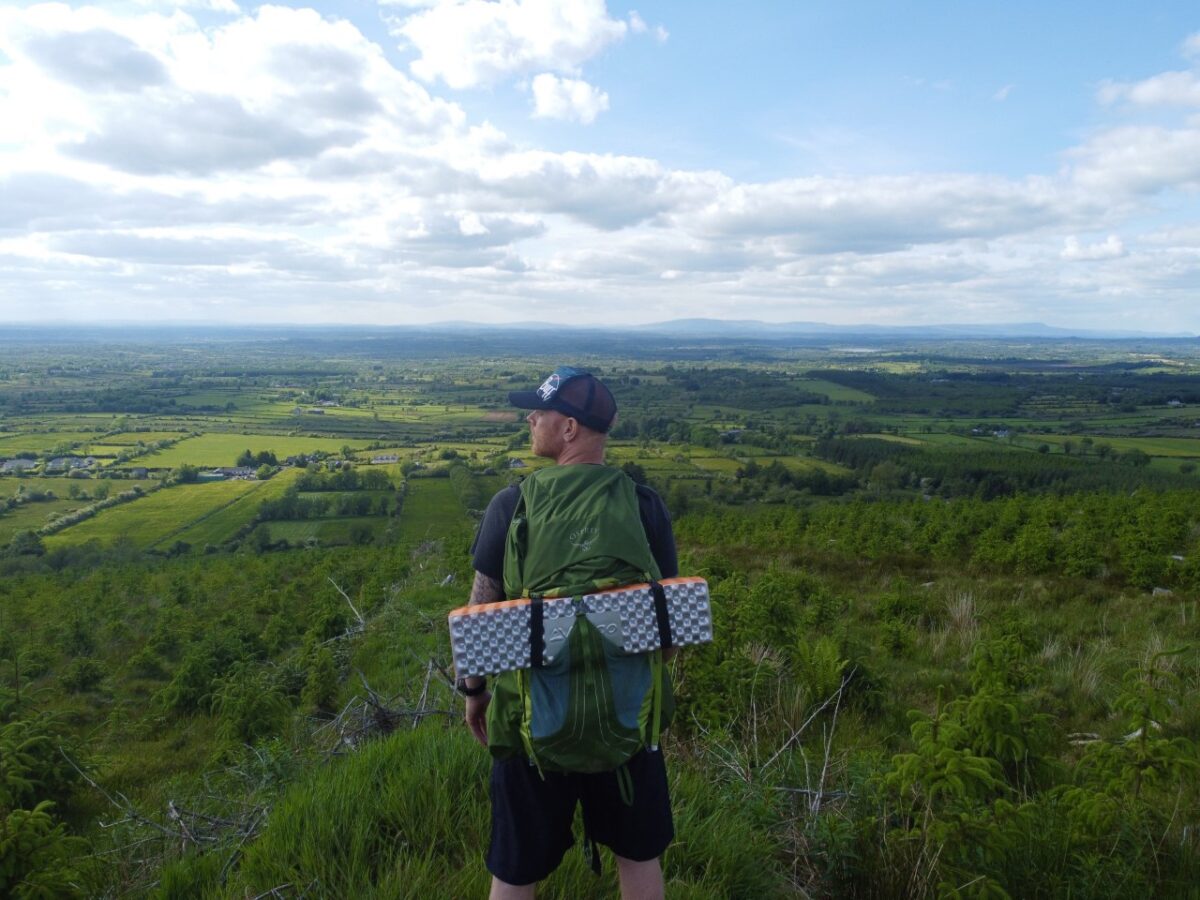
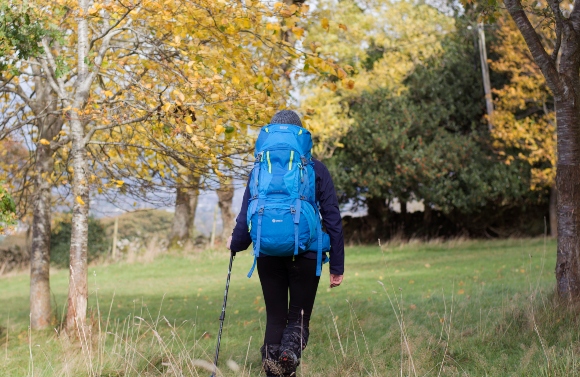
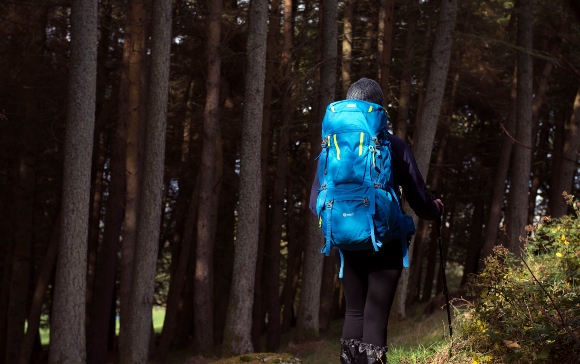
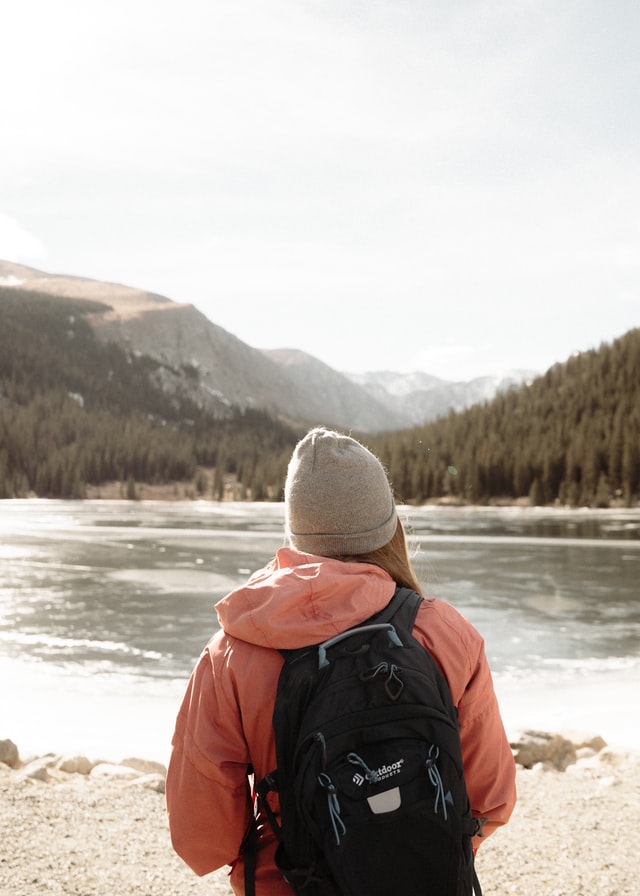
  • Waterproof backpack: unless you want your change of clothes to get wet, invest in a waterproof backpack
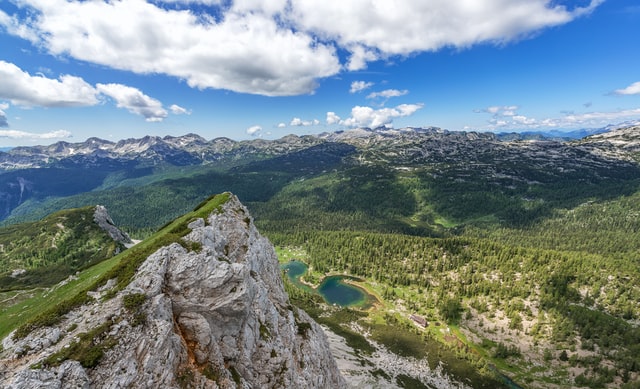
Off to the hills!

If you follow our must-have clothes for a hike in the Irish hills list, we guarantee it will be a hike of a lifetime. Be sure to get a good night’s sleep before the adventure. Stay hydrated and enjoy the view.

https://unsplash.com/photos/Pf5Pj7A5ddA

https://www.pexels.com/photo/man-standing-on-a-rock-1271619/

https://unsplash.com/photos/E8euHYBHRh8

https://unsplash.com/photos/kcxWpnpIXiQ

Guide to Buying Different Types of Outdoor Jackets

People hiking and wearing different types of outdoor jackets

Choosing the right jacket is crucial if you like outdoor activities and have an adventurous spirit. There are many various types of outdoor jackets you can choose from. Of course, you can always buy a jacket that’s suitable for numerous activities. However, if you’re a serious player, it’s better to go for a jacket that’s specifically designed for a specific activity. Believe it or not, a proper outdoor jacket will improve your activity and make it bearable and even possible. That’s why it’s essential to inform yourself about what type of jacket is best for your chosen outdoor activity. This is what we will talk about in this article. So, brace yourself because we’re giving you the ultimate guide to buying different types of outdoor jackets. Let’s scroll!

A tough jacket for mountaineering

Mountaineering can get harsh, and thus the interaction between the rock and the jacket is unavoidable. In addition, you’ll almost always be carrying a (large and heavy) backpack of some kind. That is why alpine and rock climbing jackets must be tough above anything else. This is only logical since you’ll constantly have to contend with rather unfavourable weather conditions at high elevations. And let’s not even mention the wind up there! Even if the weather is lovely at the ground level, the temperature will drop as you climb further up the mountain. Therefore, hard and softshell jackets have become mountaineers’ first choice. Other things to look for in a perfect jacket for mountaineering:

  • Proper fit and flexibility for motion. Mountaineering can be pretty demanding, so if the jacket restricts your freedom of movement in any manner, you are in trouble for the rest of the day. 
  • Good length. It would be best if you made sure the jacket was long enough. Otherwise, it will not fit well beneath a climbing harness and will ride up over it.
  • Pocket position. They should be placed a little higher so that you can still reach them while wearing a harness.
  • Helmet-compatible hood. Only if the hood is helmet-compatible can you wear it over the rock climbing helmet without any trouble. 

Therefore, when it comes to buying different types of outdoor jackets, this is what you should look for in a mountaineering jacket.

A flexible jacket for hillwalking

Man hiking
You need to be weather-prepared, and your jacket needs to be well-fitted.

Hillwalking is another demanding activity that requires a specific and different type of outdoor jacket. You should look for several features when you’re buying a hillwalking jacket, and all of them are conditioned by various factors. So, let’s see the essential elements of this type of outdoor jacket:

  • Excellent weather protection. Whether it’s heavy rain or unbearably strong wind, you’ll have to deal with unpredictable weather and always be prepared. That’s why a technical waterproof jacket or softshell jacket is what you can rely on in these conditions. 
  • Breathability. Whether you get wet from heavy rain or it’s hot, and you’re sweating like crazy, you must wear a jacket with good breathability. 
  • Toughness. Remember that you might be carrying a large rucksack. Therefore, your jacket must be constructed to handle all of that extra weight and friction and thus be strengthened at the shoulders.
  • Easily-adjustable hood. You don’t want your hood to fall off when it gets windy and starts to rain at the same time. So, make sure you can adjust it easily according to the current weather. 
  • Proper size. Choose a large enough jacket so you can wear it comfortably over a warm layer of clothes.

A functional jacket for cycling

Winds may be a cyclist’s worst nightmare, whether on the road or on the mountain. That’s why cycling jackets that flap around or fill up with air are entirely useless. Therefore it’s critical that a cycling jacket fits appropriately and is somewhat close-fitting. This is the only way to prevent blowing out like a drogue parachute at greater speeds. In addition, cycling jackets have a slightly different overall cut compared to other outdoor jackets. They frequently have an extended back, which assists in safeguarding your lower back, especially while leaning forward.

Additionally, cycling jackets frequently include a pocket on the back. This is particularly useful not just because you may keep all types of bits and bobs in it but also because they are constantly within reach. Moreover, the jacket should be as light as feasible and fitted with reflective components for all those night crawlers out there.

A cycling jacket needs to be functional above anything else.

A lightweight jacket for trail running

Trail running is an endurance sport that requires a lot of effort. That’s why you can’t overlook breathability when buying thy type of outdoor jacket. Excellent moisture management must be prioritized. The jacket should not only fit nicely, but it should also be as snugly as possible. Only then will water vapor be able to escape with the least amount of resistance.

Furthermore, every ounce matters, especially on long runs. If you intend to carry the jacket in your backpack, it should be as light as possible. Additionally, it would be best if you fit it in the smallest pack size you can. 

Don’t forget about the weather protection. Trail running jackets must be both water and windproof, depending on the weather conditions you have to deal with on the trail. Hoods can also come in handy, but you should know they add extra weight.  

When it comes to storing this type of jacket, you need to be extra careful. So, when preparing clothes for storage during winter, make sure to keep them safe and dry, especially this type of jacket. You can keep them in weather-controlled storage and protect them from bugs. The truth is, you don’t want to buy a new trail running jacket every season. 

Additional outdoor jacket features

Now that you know the essential features you should look for when buying different types of outdoor jackets, let’s take a look at the additional features that can come in handy:

  • Water bottle compartments on the inside
  • Internal smartphone pocket with access to headphones
  • Pockets for everything you intend to bring with you
  • Zippers that work with climbing harnesses
  • Secure passport pocket
   Couple in nature
You need to find a perfect jacket that fits your outdoor activity which is why buying different types of outdoor jackets is a must.

The final zip

As you can see, the jacket plays a significant role in your outdoor activity. It can determine its overall quality. It would be best to consider plenty of factors when choosing your next outdoor jacket. Anything from weather to flexibility should be on your checklist. With this guide to buying different types of outdoor jackets, you’re ready to make an educated pick. So, what are you waiting for? It’s time to buy the perfect outdoor jacket!

Most Common Hiking Injuries and How to Treat Them

Nothing compares to feeling the sun on your face, the breeze in your hair, and being closer to nature. This is what hiking can provide if you give it a chance. Don’t worry if you’ve never hiked before; everyone (even families with children) can do it. Of course, whether you’re a novice or a seasoned pro, you should always exercise caution. But remember, regardless of how much preparation and prevention, sometimes accidents happen, and injuries can occur. Here are some of the most common hiking injuries and how to properly treat them.

Blisters

Blisters are one of the most common hiking injuries that even the most experienced hikers can suffer from. They are caused by friction between your skin and your socks and/or footwear. There are several ways you can prevent this type of injury, such as keeping your feet dry by

changing socks if necessary, making sure your socks do not slip down as you walk, and investing in suitable hiking footwear. Also, make sure to break into your shoes before hiking!

Do not fret if this injury happens. You may easily treat it with simple medical tape, blister tape, or even duct tape. If the blister becomes too painful to tolerate, use a sterilized needle to burst it and administer antibiotic ointment to the affected area.

A person sitting with their legs stretched in front of them on the edge of a cliff.

Reliable hiking shoes will be a lifesaver if you wish to avoid some of the most common hiking injuries.

Cuts and scrapes

Cuts and scrapes can occur at any time and for numerous reasons. They’re challenging to avoid, but they’re usually harmless. The best way to prevent them is to be wary of your surroundings, avoid branches, and be cautious on uneven ground. Additionally, always chop away from you and remember to place sharp objects safely in your bag.

When it comes to minor cuts or scrapes, you should disinfect the area and cover it with a bandage of your choice. However, the treatment is different if the cut is deeper and won’t stop bleeding. To stop the bleeding, wrap a belt or piece of cloth around the area and apply gauze from your first-aid kit. Once the bleeding has stopped, secure the gauze by bandaging the area.

Joint Injuries

Hikers (like runners) may be more susceptible to joint injuries than others. Those who have had a previous injury, have weaker leg muscles, ill-fitting footwear, or traverse difficult terrain are at a higher risk. Even if these factors aren’t present, you may get joint injuries or inflammation from the stress imposed on the joint when hiking. It is critical to find information on what type of trail you will be heading on. So if you’re, for example, looking for hiking spots while in LA, remember to check if these trails are tamed or not. Untamed trails, when visiting an area for the first time, can be difficult on your joints. So, when you’re hiking down some of the most popular destinations near LA, remember to be careful since your joints will be put under a lot of strain.

If you are hiking and feel pain in your joints, do not disregard it; you must treat the joint right away. Depending on the pain, you can rest, loosen the load, ice the area, take painkillers, or walk using trekking poles. If the pain persists even after the hike, get medical assistance as soon as possible.

A woman sitting on the floor and holding her aching knee

Knee pain: the most common hiking injury that can occur in the joints.

Dehydration

Dehydration is one of the most common hiking injuries, but it’s also one of the easiest to remedy. To prevent it from ever occurring, you must have enough water on hand. You can bring water with you in many ways, whether in a bottle, flask, or bladder. Also, pay close attention to how you’re feeling. The initial sign of thirst indicates that you have been without water for some time. Thus, you must drink some water immediately.

To treat dehydration, use the same actions as you would to prevent it. Take a break in the shade, sip some water, and observe the beautiful environment around you. If needed, consume some rehydration salts, and you’ll be good to go. However, if you have severe dehydration that has not been treated promptly, you will require immediate medical attention before the situation worsens.

Hyperthermia

Summer is a terrific time to go hiking in many places. However, the weather can often present as many obstacles as opportunities, significantly so when the temperature rises. Hyperthermia (aka hot injury) is a common hiking injury that can happen when exposed to high temperatures. This injury causes your body and many of its essential processes to malfunction. Wearing hiking clothes made for higher temperatures, using sunblock, and staying hydrated are just some of the ways to prevent it.

However, if you have hyperthermia symptoms like nausea, vomiting, headaches, or cramping, you should stop and try to cool down. When taking a break, eat high-energy foods, drink electrolyte water, and do whatever is needed to cool down, such as pouring water over your head. Seek medical attention right away if you develop more severe symptoms, including dry skin, quick pulse, disorientation, or seizures. Heatstrokes are uncommon, but they can happen when hiking, so be prepared to act quickly if these urgent symptoms appear.

A man drinking flavored water while holding a cold rag next to his neck while trying to cool down

Pressing a cold rag onto your skin can help cool you down so you may continue on your hiking adventure.

Hypothermia

On the opposite side of the coin, there’s hypothermia (cold injury). This is one of the most severe hiking injuries where your body’s core temperature lowers to dangerous levels. Frostnip and frostbite are more common and much milder injuries that you should be aware of, too. To ensure safety during a winter hike, you must wear insulated clothing, keep yourself dry and only go on short expeditions in such harsh temperatures.

The majority of these most common hiking injuries could be avoided with proper preparation. Nevertheless, be cautious if you lose some sensation in your skin or if it turns white, waxy, or hard. These are some of the first warning signs of frostnip and frostbite. For mild cases, you must immediately try to raise your body temperature. You can do so by drinking a hot beverage or finding shelter. Call for immediate assistance for harsher symptoms such as confusion, fumbling hands, or drowsiness. While waiting, do whatever you can to raise your temperature until help arrives.

Knowing the most common hiking injuries and how to treat them will help you prepare for your next hiking adventure. It will also ensure you stay safe and have adequate supplies if something unfortunate does happen.

10 Best Hikes in Europe

Europe is abundant in beautiful landscapes. It is possible to explore high-peaked mountains, magnificent coasts, or flowery meadows. In Europe, you will find practically every sort of terrain you might want, and almost all of it is accessible. Also, you can choose to go on a one-day hike or take a tour of multiple hiking destinations. Furthermore, some hiking trails are excellent in the winter, while others are ideal in the summer. Therefore, to help you choose your next hiking destination, we made a list of the ten best hikes in Europe. So prepare your hiking gear, and let’s explore the beautiful landscapes of Europe.

Plitvice Lakes, Croatia

For some of the best treks in Europe, you must visit Croatia. It is a beautiful country with many fantastic places to visit that display incredible nature and history. However, the Plitvice Lakes National Park is the best spot to visit. It has been on the UNESCO World Heritage list since 1979 because of its outstanding landscape features. For instance, there are 16 lakes distributed throughout 300 square kilometres, several spectacular waterfalls, and majestic woodlands. Eight hiking trails lead you throughout the region, each with a different level of difficulty and time. So pack your rucksack and head to Croatia for an unforgettable trekking experience.

Retezat Mountains, Romania

The Retezat mountains in Romania are a less popular hiking destination. The mountains are in the Retezat National Park and include 20 peaks, the tallest of which is 2,509 metres. The area is also UNESCO protected, and it is a small piece of heaven. The Peleaga summit, the tallest in the region, offers breathtaking views of the landscape below, such as glacial lakes. You don’t need a permit to trek in the Retezat mountains, but you will have to pay a small fee for entering the reservation. Also, here you will find designated camping points where you can set up your tent and mountain huts where you can spend the night. However, keep your eyes open for bears, lynx, and birds, or you might miss them.

Mount Triglav, Slovenia

Mount Triglav is close to the capital Ljubliana, and it’s one of the best hikes in Europe. The mountain’s summit is 2,864m high and accessible via two routes. One of them starts in Bled and implies going on a via ferrata, which are protected climbing routes along the Alps. Also, you can choose to go on this hike alone, or you can have a guide. We highly recommend having a guide if you are not an experienced mountaineer or don’t have the appropriate equipment. The paths can be pretty narrow, and the hike might take you longer than expected.

View from a mountain peak.

Triglav mountain offers some of the best hikes in Europe.

Doolin Cliff Walk, Ireland

Many must-see destinations in Ireland are worth including in our list of ten best hikes in Europe.

But, here we want to present to you the Doolin Cliff Walk. This hike is along the sharp cliff edges on a narrow path that overviews the Atlantic Ocean. It is also called the secret passageway and takes you to the Cliffs of Moher. The starting point is from the village of Doolin, and it’s the best way to reach the cliffs by avoiding the crowds. On the way, you will be able to admire stunning views for around 13 km. However, you should be careful when hiking on this trail. There can be strong winds that can make the hike a bit harder and more dangerous.

Via Dinarica, Balkans

The Balkans are the best place to experience tasty food, good music, and historical sites. And the best way to experience all of them is by going on the via Dinarica. This trail crosses through the Dinaric Alps and the Shaar Mountain range. It passes through eight Balkan countries, and it’s 1,930km long, taking you through more than 120 stages. However, if you do not want to make a longer journey by following the entire trail, you can divide it into smaller sections. For example, you can make an eight-day trip from Croatia to Bosnia. Or, you can start with the easy parts and raise the difficulty gradually.

Norwegian Fjords, Norway

The fjords of Norway are a hiker’s dream come true. There are so many beautiful scenes to be seen that you just wouldn’t believe it. For instance, you can walk through lush woods, admire glacier lakes, and view beautiful snow powdered mountains. Also, there are hikes of varying difficulties for all types of hikers. And the best part is that in Norway, people are aware that hiking can boost the quality of life and the benefits it can have on health. As a result, they have the Allemannsretten, which represents the right to walk freely on Norwegian lands. So if you want to wander around the Norwegian fjords, you can do so free of charge.

The Norwegian fjords, one of the best hikes in Europe.

Norwegians appreciate the importance of hiking and encourage people to explore the lands.

Tour du Mont Blanc, Switzerland, Italy, France

This hike is one of the most popular and best hikes in Europe. Unfortunately, it can be dangerous for those that don’t prepare for such a hike. You must have excellent navigation abilities, a high level of stamina, and a lot of tenacity. The whole tour is around 170 km, takes you through three countries, and takes about ten days to complete. You can stay overnight in mountain refuges or look for accommodations in the picturesque Alpine villages. Also, you can start the trail from any of the sides in France, Italy, or Switzerland. Wherever you choose to start from, rest assured that you will see some of the most beautiful views in Europe.

El Caminito del Rey, Spain

The King’s Little Pathway is located in Malaga’s Gaitanes Gorge and provides breathtaking views of the Andalucia area. This well-known yet risky hiking trail is located 105 metres above a river and can take up to four hours to complete. It is eight kilometres long, but you can exit at different locations to make the hike easier. After all, you will want to admire the scenery of the gorge, canyon, and river below. But, if you are afraid of heights, you might want to reconsider going on this trail. Specifically, there are two portions of the route that you should avoid. One section is made of a glass floor, while the other is a high-altitude wire suspension bridge.

Rennsteig Trail, Germany

This German trail is the most popular in the country, being walked by around 100,000 people each year. The route is 170 kilometres long and has breathtaking views. Also, the Rennsteig path is in Thuringia, which hosts the unique Thüringer Winterspiele Olympics. This German state is known for its love of outdoor activities, and the Rennsteig trail is 700 years old, being the oldest in the country. However, if you want to hike on this trail, you should prepare for a long walk uphill. You will need proper hiking boots and all the equipment for such hikes. Also, the trail will require you to have at least a moderate level of fitness.

Deer in a forest.

On the Rennsteig Trail in Germany, you have a high chance of meeting the wildlife.

The Gap of Dunloe, Ireland

This route starts in the Killarney National Park, at Kate Kearney’s Cottage. You can choose between a short 11km trek or a round trip that begins and ends at the cottage. The tour can take you up to five hours, but it will be worth your time. On the way, you will be able to admire impressive mountains, five beautiful lakes, and the famous Wishing Bridge. Legend has it that the wish you make while standing on the bridge will come true. So, even if this route takes your breath away, literally speaking, it will also reward you with beautiful views and maybe even a wish come true.

Final thoughts

If you want to have the perfect hiking experience, choose one of the ten best hikes in Europe as your destination. You will be able to have a fantastic hiking experience while passing through stunning landscapes with gorgeous flora and fauna. Good luck and remember to have fun!

5 Best Training Exercises for Hiking

written by Sophia Perry

Hiking is not just a not-so-leisurely stroll through the woods. It involves scenic routes, stunning views, and an escape from the hectic buzz of the city. However, to enjoy all these perks, you have to be in shape. You have to agree that you can’t fully appreciate the beauty around you if you struggle to catch your breath and feel worried about the journey back. Many believe that training for hiking only involves, well, going on hikes. However, that’s not all it takes. While you definitely should do that, you should introduce some exercises into your routine that can help tremendously. Therefore, to help you get in shape and relish everything that nature can give you, we have prepared the 5 best training exercises for hiking. Also, we will provide you with a quick overview of what to focus on when training to become a strong hiker.

How to train for hiking

While hikes have a lot to offer, you will hardly enjoy them if you simply wake up, throw on some hiking shoes and find the nearest trail. Unless you are highly active already, you will have to prepare for a hike. 

And the reason for that is pretty evident. Hiking trails are not flat surfaces you regularly walk on. They are uneven, there is often some elevation, and you will likely encounter some obstacles. The good news is that training exercises for hiking won’t require hours at the gym. So, here is what you will have to focus on.

  • Strength. You must strengthen the major muscles hikers use. These are your leg and core muscles. If these are strong, it will be easier to support the load you carry. And you will be able to hike for longer.
  • Endurance. Hiking can take all day. Therefore, you have to build endurance in those muscle groups you use the most: legs, core muscles, shoulders, lower back. 
  • Balance. Since you will have to navigate uneven terrain, you need a more stable base.
  • Cardio. It would be best to complement your exercise plan with a form of cardio workout. Choose an aerobic exercise you enjoy, for instance, running or cycling.
Two people hiking towards a snow-capped mountain
If you want to enjoy your hikes you have to be ready and healthy.

Important tip: Before you begin training, consult your doctor and a certified trainer. It’s imperative you ensure you are in good health. Also, if you don’t know what you are doing, you can easily get hurt performing different exercises.

Training exercises for hiking

Now that you know what your focus should be when preparing to become a hiker, here are the best exercises that will help you get there. You could soon be exploring different hiking trails around the world. And believe it or not, after seeing some places, many people have decided to move. For example, New York is a popular destination for hikers, and those who live in Brooklyn often enjoy hiking tours. Besides being one of the most beautiful, it is also a very family-friendly neighborhood. So, if you decide to make Brooklyn your home, you won’t lack activities to enjoy with your family, and you will undoubtedly have many trails to tackle.

1. Goblet squats

This exercise is essential for hikers as it helps strengthen all of your major leg muscles (quads, hamstrings, and glutes). These are also the muscles you will use the most on your hikes. 

A woman performing goblet squat

Goblet squat strengthens all your leg muscles.

How to: Take a dumbbell or kettlebell and hold it between your hands near your chest. Your feet should be hip-width apart. Stand so that you place your weight on your heels. Slowly start descending into a squat until your thighs are parallel to the floor, and your legs are bent at a 90-degree angle. Also, make sure your knees don’t bow inwards but try to keep them right above your feet. Sit back into the squat so your knees don’t go over your toes. When your thighs are parallel to the floor, start going up, pushing from your heels. Once standing fully extend your hips and squeeze your glutes. As you progress, gradually increase the weight of your dumbbell or kettlebell.

2. Downhill lunges

Lunges, in general, are an excellent exercise for hikers. It strengthens your leg muscles while improving your balance. But downhill lunges do you one better. Many hikers think that going up is the challenging part. However, the descend will actually lead to pain in your quads. Thus, downhill lunges will prepare you for this, even more strengthening your balance and core.

Two girls doing lunges, one of the best training exercises for hiking

Lunges are an excellent exercise for hikers as they strengthen leg muscles and improve balance.

How to: Find a downhill. Stand keeping your upper body upright. Relax your shoulders, back, and your chin. Step forward with your leg ensuring your core is engaged and lowering your hips until your knee is at a 90-degree angle. Again, your knee must not go over your toes. Keep them right above your ankle. As you start standing up, keep your weight in your heels and step forward with your back leg, placing it next to the other leg. Then do the same with the other leg.

3. Deadlift

The deadlift is another excellent exercise for hikers as it strengthens the hamstrings. You will use these muscles a lot on your hikes. Also, it is a complex exercise that engages many muscles. 

A woman doing a kettlebell deadlift

Another excellent training exercise for hiking is the deadlift.

How to: Start with a lighter kettlebell until you are confident in your form, then begin increasing the weight. Align your feet with your hips and hold the kettlebell with both hands between your thighs. Your spine must be in a neutral position as you hinge at the hips. Stick your bottom out a little as you bend forward, paying attention to keep your back straight. Then, slowly squat until you touch the ground with the kettlebell. On your way back up, hinge at the hips and squeeze your glutes.

4. Hanging knee raises

This exercise will strengthen your core, which will help you support your heavy hiking backpack while you overcome various obstacles. 

How to: Find a bar you can safely hang from. Keep your arms fully extended and your legs straight. Slightly roll your pelvis backward. Raise your knees until they are at a 90-degree angle with your torso, and roll your pelvis up a bit. Hold for a second and slowly lower your legs back to the initial position.

5. Any form of cardio workout

A woman stretching

Stretching is an essential part of every workout plan.

You have to develop some stamina if you don’t want to be huffing and puffing your entire way up. As we have mentioned, you can do whatever you enjoy. Speed walking, jogging, swimming, and even dancing are solid options as long as they increase your heart rate. Getting your heart rate up will build your lung capacity and improve your endurance.

Don’t forget to stretch

No workout plan is complete without stretching. Stretching is a must because it reduces the chances of injury and ensures quick recovery. At the beginning of training, do some dynamic stretching to warm up (a light jog, jumping jacks, high knees, etc.). 5-10 minutes is enough to prepare you for the strength training. Once you have finished training you should do 5-10 minutes of static stretches. Static stretching implies holding one position for some time and are suitable when your body is warmed up and flexible. It will also reduce the risk of injury, speed up recovery, and improve flexibility. So, after the workout, stretch all those big muscles you have used – quads, hamstrings, glutes, back, and core. 

Now that you know what some of the best training exercises for hiking are, you can begin preparing. If you are a beginner, you will be more than ready come spring. But if you feel confident, you can enjoy some winter hiking tours. Just make sure you take some precautions, so you stay safe.

What Does a Typical Day Look Like on the Camino?

Have you ever wondered what happens on the Camino de Santiago in between walking from one town to the next? After all, most pilgrims are finished walking by early afternoon which leaves a lot of time to fill until the following morning.

In this article, I’d like to give you a better idea of what to expect on the Camino and as to whether this long distance walk might be for you or not. But let’s take a look at a quick overview of the adventure before taking a peek at everyday life on the Camino.

Walking the Camino Frances – A Quick Overview

I finished walking the Camino Frances last week. It was my second time to walk this particular route and the logistics of this adventure is one of my reasons for wanting to return. In other words, it’s easy to organize a dander on the Camino and you will meet people of all ages and shapes and sizes and pilgrims from all walks of life.

What exactly is the Camino Frances?

The Camino Frances is one of the many long distance walking paths in Spain that leads to the main Cathedral in Santiago. Just so you know, there are several other paths that lead to this same Cathedral such as the Camino del Norte or the Camino Primitivo. However, the Camino Frances is by far the most popular route with more accommodation and resupply options and a lot more fellow pilgrims too!

It stretches for 790km across the top of Spain. Some pilgrims choose to walk the Camino Frances in stages every year, while others walk the entire path in one go. It takes most people between 30 and 40 days to complete the walk. The starting point is at a town called St Jean Pied du Port on the French border. This walking path is marked with yellow arrows and travels through many villages, towns, and cities that have a long lineup of places to stay including hotels, guesthouses, and albergues (hostels). Now, let’s take a closer look at day-to-day life on the Camino… 

Guiding arrows on the Camino de Santiago

The Morning Routine and Breakfast on the Camino Frances

Pilgrims tend to rise early and start walking as soon as possible. It’s up to you of course but it gets really hot on the Camino and an early start will help you avoid walking for too long in the hottest part of the day. That being said, most pilgrims end up going to bed rather early which means it’s not such a big deal waking up at 6 am. In my own experience, I also found most pilgrims really enjoyed walking during these quiet and peaceful hours and being able to start their day with a walk at sunrise.

While some Albergues or hotels offer breakfast, some do not. I also noticed that many pilgrims prefer to start moving and wait until the next town for breakfast. This is usually within a one-hour walk (5km) from where they slept the night before. Coffee with tortilla (potato omelette), eggs on toast, or pastries are common staples for breakfast on the Camino. I sometimes carried my own which might consist of rice crackers with avocado and cheese or rice crackers with banana and peanut butter.

Summary: Every morning is a simple affair and you simply rise early and start walking until you feel hungry or reach a nice cafe in which to enjoy some coffee.

Assortment of breakfasts available on the Camino.

Mid Morning and the Actual Walking Itself

This part of the day goes by really quickly on the Camino. It might take a week or so to get used to walking long distances but there comes a point when you settle into the experience and process. If you like talking with other pilgrims or listening to podcasts and audiobooks as you walk, you should find this time goes by even faster. Believe it or not – walking 20km every day will eventually seem like a very normal thing to do!

Every five or ten kilometres, you will also encounter small villages and towns and these are usually equipped with albergues, cafes, shops, and a fountain to refill your water bottles. This also means that pilgrims can stop for the night if they don’t wish to walk any further – *unless they have made a booking elsewhere that day/night.

The scenery is spectacular on the Camino Frances and changes a lot as you proceed from east to west across the top of Spain. The beginning is quite lush and cool but the middle section is extremely flat, dry, and open, while the latter stages of the Camino Frances are very mountainous and green. It’s a lovely aspect of walking the Camino because you get to see these landscapes change slowly over time and this also makes it very easy to notice and appreciate the present moment.

I really enjoy talking with other pilgrims on the walk each day but I also like to spend time alone. During this time, I sometimes listen to podcasts or music or plug out entirely and drink in the scenery and spend some time alone with my own thoughts.

Either way, you should find the mornings and the walking itself to be a rather spontaneous affair with stunning scenery and interesting conversations.

*About making bookings: Some pilgrims make all their bookings before arriving on the Camino. While this ensures they will never be stuck for somewhere to stay, it also means they will be tied to a specific and rigid schedule that may not suit later on. I believe a better way to organize accommodation is to book the first few days/week and then make the rest of your bookings as you go along. This means you might make bookings just one day in advance or even that same day which will allow for more flexibility and the option of taking a day off whenever you want.

A long stretch of trail on the Camino de Santiago

About Meeting Other Pilgrims on the Camino

Meeting other pilgrims is a magical part of this journey and the Camino is “a place” that makes it easy for people to connect – even the socially awkward. This often means pilgrims will strike up a conversation with you at random coffee stops or while waiting for your laundry in an albergue. There’s also a sense of openness and trust with these interactions which seems to allow for quick and easy connections between friendly people who just want to be part of one another’s journey.

If you are more introverted, like me, you might be a little concerned about this side of the experience. However, it’s just as easy to spend time alone and even avoid such interactions. I actually spend at least half of my time walking alone on the Camino and simply do this by either walking ahead or dropping back from other pilgrims. It’s perfectly okay to do this on the Camino and nobody is likely to feel offended.

Moral of the story: You can be alone or you can be with others – it’s up to you!

Pilgrims on the trail

Reaching the Next Town at the End of Your Daily Walk

As enjoyable as the walk might be, it’s always a welcome relief to reach your destination each day. I like to celebrate this part of the day by going straight to the room, taking off my hiking boots and socks, and lying down for ten or fifteen minutes.

I’m also very hungry at this point and after a quick shower, I like to get straight out to the nearest restaurant for something to eat. Food is really good on the Camino Frances and there is plenty of meat, fish, and vegetarian options along the way. As a long distance walker, you might also start to notice a lack of expectations and appreciation for any kind of food that can replenish the lost calories from that day.

Dinner options on the Camino

But what else is there to do?

It’s then common for pilgrims to take a short nap but I myself like to stay awake and wait for an uninterrupted sleep in the evening. You will also need to do laundry every few days and this can take an hour or two – depending on the facilities available. And then there’s time for reading or writing, chatting with other pilgrims, or enjoying a glass of wine and just putting the feet up in a quiet spot in town.

In the evening, “pilgrim meals” are arranged in many of the Albergues which is another nice aspect of the Camino. These home-cooked meals are usually very healthy and cheap and provide an opportunity for pilgrims to get to know one another. Although I do quite enjoy these occasions, they normally commence at 7/8 pm which is a little late for dinner in my opinion. For this reason, I will often have dinner much earlier and be relaxing with a book or movie on my iPad by that time instead.

After that, it’s lights out and time to prepare for repeating this process the next day!

A signpost in Camino Frances

Final Thoughts

It might seem like there’s a lot of space and time on the Camino Frances and this is true, but time goes by really quickly. After a long walk, it’s even nice to “do nothing” and the routine of shower, food, and laundry is often more than enough activity to fill your afternoon and evening. This is also another lovely thing about life on the Camino; you get to focus on the basic necessities in life. You gradually forget about the many distractions and needless thoughts that tend to occupy one’s mind back in the real world. If you feel intrigued by any of the above, I believe you will enjoy the Camino!

How to Ensure Safety During a Winter Hike

written by Sophia Perry

Hiking in the winter is not for everyone – it can get cold, wet, and very slippery. But between the snow-covered treetops, frozen lakes, and the glittering sun, the views are stunning. So start looking up the best winter trails in the area now because you don’t want to miss out on spending this beautiful season in nature. However, before you put on your hiking boots and jacket, remember that hiking in the winter is most definitely not the same as hiking in the summer. Even for experienced hikers, it can be risky. That’s why you need to learn how to ensure safety during a winter hike, or your pleasant day outside can quickly turn sour.

The importance of ensuring safety during a winter hike

Every time you go on a hike, you take a risk. Typically, this risk isn’t major – you might fall and get scraped up, you’ll probably get a few insect bites, and on rare occasions, you might twist an ankle at worst. But winter weather brings different dangers.


Hiking in the winter is very different from hiking in the summer.

Cold is the obvious one. Prolonged exposure to low temperatures can affect you physically, making it harder to breathe, move, and even think clearly. This is why a wild camping adventure should be relegated to another season – spending a few nights outside in the winter is only for the most dedicated among us. Decreased visibility and difficulties with navigation are other things you need to prepare for. Even on a clear day without snowfall, it can be hard to find tracks when they are covered in snow. This can easily lead to getting lost in the wilderness. So how do you enjoy your favorite hobby and avoid these dangers at the same time?

Tips for increasing safety during a winter hike

It is perfectly possible to minimize risks and enjoy one of Ireland’s best winter hikes safely if you know how to prepare. So follow these tips:

Get an early start

You don’t get a lot of daylight in the winter, so use it wisely. Look up must-see destinations near you, so you don’t have to travel far, pack the night before, and start your hike early in the morning. No matter how weak, the sun will make it warmer while it’s out. The visibility will be better too. So don’t wait until later – when it comes to winter hiking, the early bird gets the worm every time.

Keep it short and sweet

The longer you stay outside, the more exposure you’ll experience and the higher the risk of something going wrong. So during the winter months, plan shorter hikes. How short exactly depends on your skill level. For some experienced hikers, a whole day in the mountain is not a problem, even during the colder months. But if you’re going with a less fit or less experienced group, and particularly if the group involves children, you’ll want to contain yourself to a couple of hours of outdoor activities at most. For example, kids love to do things outside, so you may want to make hiking a family affair. That’s a great idea as long as you keep in mind that children can’t regulate body temperature as well as adults. So you’ll need to stick to shorter trails during the winter as a safety precaution.


Don’t spend too much time outside when it’s cold; short hikes are safer and can be just as satisfying.

Don’t go alone

Hiking alone means not having anyone to rely on in case something does go wrong. During the winter, this can be an especially serious problem. Even a minor issue will turn into a crisis if you end up stranded on the trail without the possibility to contact anyone as the temperatures steadily drop. So it’s best to hike with others, especially if they have more experience than you. Not only will you be safer, but you’ll also have more fun!

If you insist on going alone, alert someone of your plans. Better yet, set up a check-in system where you contact them every so often to confirm everything is okay. If they don’t hear from you in a while, they can call for help in your stead.

Stay hydrated and eat well

Poor hydration and nutrition will only make your hike physically more demanding and more dangerous. So make sure to take sips of water whenever you stop and bring some nutritional snacks to eat when you get hungry. Warm drinks like tea and coffee are not a bad idea either; just remember that they are not a replacement for regular water. A water bottle is still one of the most important things to have during a hike, regardless of the season.

Dress for the occasion

One of the best ways to protect yourself from hypothermia is to wear the right shoes and clothes. You’ll want to dress in layers so you can maintain body heat and adjust your clothing in case the weather changes. Your outer layers (including footwear) should be waterproof, while the inner layers should be something that keeps warmth close to your body, like wool such as a great quality Helly Hansen Jacket or a Trespass Fleece. Depending on the difficulty of the hike, you may need snowshoes or crampons. At the very least, however, wear boots with a good grip and use trekking poles.


Proper clothes and gear will make all the difference and ensure safety during a winter hike.

Always take emergency supplies with you

Winter hikes typically require more equipment than summer ones. With all that you need to pack and strap to your back, you may be tempted to leave behind some emergency supplies. After all, what are the odds you’re going to need them? The truth is – slim. But you should still never leave emergency supplies behind when going on a winter hike. A proper first-aid kit, navigational items, and communication tools could literally save your life if something goes wrong. Thus, find the space for them in your rucksack!

Develop the necessary skills in advance

Simply having the right gear is not enough – you need to know how to use it. So before you go on a hike, test out your abilities with the tools you’re bringing along. Take your winter gear out for a spin, make sure you know how to navigate with a compass if something happens to your technology, and brush up on your first-aid using the supplies in your kit. On the off chance that something happens, being able to use your gear quickly and without thinking can make a huge difference.

Preparing for a winter hike

Preparation is vital when it comes to hiking in the winter. Not only does it ensure safety during a winter hike, but it can also make the whole experience more pleasant by eliminating stress and uncertainties. So the night before or even the morning of your hike, make sure to read up on the trail conditions, look at the weather forecast, and check that you’ve packed everything. Knowing what you’re getting yourself into is crucial; it’ll impact how you pack, how you plan, and even whether you should take the hike at all. So keep yourself safe by being well-prepared.

Want to write a guest blog on OAS.ie? Email us at online@oas.ie.

The Ireland Way: My Struggle, Experience and Decision to Keep Walking

I’ve been walking the Ireland Way trail for the past few weeks and just recently passed the halfway point. It’s been a very challenging and interesting walk but mostly for reasons which I did not expect. That is to say, I expected this walk to be rather “easy” compared to my previous trips and largely focused on the places, landmarks and culture that I might encounter along the way. Instead, I’ve really struggled with anxiety and loneliness and the motivation to continue!

In this post, I would like to talk about some of these issues and my experience on the Ireland Way.

– My feelings at the beginning of the trip.

– some early thoughts/opinion on the Ireland Way.

– Highlights of the trip so far.

– My experience with hiking and camping gear.

– My struggle with anxiety and decision to continue walking the Ireland Way.

– Making videos, going viral and getting recognised on the walk.

How it Felt to Begin an Adventure After a Year of Uncertainty

The start of every adventure is filled with a mixture of nerves and excitement. But it’s a long time since I took a long distance trip and this left me feeling especially anxious up near the Giants Causeway. We’ve also endured an incredibly weird year of uncertainty and I did very little exercise or preparation for this walk. As a result, this did nothing to alleviate my growing sense of fear and anxiety.

However, even with 25lbs of weight on my back, I noticed a certain weight lift off my shoulders in those first few steps. It sounds rather silly but everything feels different on the move. I felt a great sense of purpose return as the sound of the ocean replaced the noise of a fast-moving world.

It stayed like this for the first week. I was still quite nervous about looking for suitable wild camping spots each night but the absence of stress and noise was notable with every passing day.

MSR Hubba Hubba NX 2 Person Backpacking Tent

Some Thoughts from the Halfway Point of The Ireland Way

The Ireland Way connects two long distance trails that run from the top to bottom of Ireland – the Beara Breifne Way and the Ulster Way. Most hikers walk this trail from south to north but I decided to walk in the opposite direction so that I could finish in West Cork. While it’s possible to stay in guesthouses the entire way, I couldn’t afford that option and wanted to wild camp along the way.

Although the very first section (the Causeway Coast trail) was almost entirely off-road, a very large portion of the Ulster Way consists of road. I’m used to quiet country roads since my walk around Ireland two years ago. It felt like many parts of the Ulster Way were more suited to cycling as opposed to walking. Signage on the Ulster Way is also really bad and I was delighted to have the Hiiker app for company throughout this section. That said, there were several highlights including Downhill Forest, the Sperrin Mountains and Little/Big Dog in County Fermanagh. The people were lovely at every turn and the towns were nice but many shops seemed to be closed down (COVID).

After some long road sections, the Cavan Way was an absolute delight when I crossed over from Co. Fermanagh. This was followed by an equally impressive trail, the Leitrim Way, and both of these trails were mostly off-road and extremely well signposted. I also really enjoyed the Suck Valley Way but took an alternate route across Roscommon which saw me miss the hugely popular Miners Way.

And you know what I found most challenging?

Being alone with my own thoughts for so long. But more on that in a moment.

Derek Cullen Outdoors on The Ireland Way trail.

Highlights of Walking the Ireland Way (So Far)

The stretch of coastline near the Giants Causeway is truly spectacular. I genuinely believe County Antrim is one of the most underrated counties in terms of both scenery and places of interest. Dunluce Castle is an awe-inspiring sight and sandy beaches come thick and fast all along the north coast. Downhill Forest near Castlerock feels magical and the Sperrin Mountains have a kind of rugged and lonely beauty that reminds me of parts of Mayo. The lakes near Little/Big Dog in Fermanagh were a lovely surprise and the Cavan Way is one of the most interesting trails in Ireland. In fact, for whatever reasons, the trails have been much more impressive and well-maintained over the past week which leaves me hopeful for a big finish as I near the mountains in County Cork.

About My Experience with Hiking and Camping Gear

Firstly, the MSR Hubba Hubba NX 2 is the best backpacking tent that I have ever come across. It’s extremely light and surprisingly durable/strong for such light fabric. It stood up reasonably well to a night of heavy wind and rain and there’s so much space inside – more than enough for two people.

I’ve been using the same socks (1000 Mile Socks) as my previous long distance walk but this was my first time to use a pair of Merrell Moab 2 GTX hiking shoes. I now understand why the Moab 2 GTX are one of the most popular hiking shoes in Ireland. They are very sturdy and watertight and not heavy like a boot which is one of the reasons I most often wear trail runners on my long walks. I got a very bad pinch blister in week two but this is due to my slightly deformed toes and not the shoe.

I’ve also been using an APG stove which is similar to the Jetboil and very impressed by its’ performance. Similarly, it’s my first time to use a Vango Cobra 400 sleeping bag which is extremely comfortable and packs down really small. I recommend carrying a sleep liner and a trespass Fleece for extra warmth.

My favourite accessory? My colourful Buff hat which you can buy here.

Wild Camping spots on the Ireland Way

Making Videos and Getting Recognised During My Walk

Making videos on the trail is one of the most challenging thing about the walk. I’ve been carrying power banks to keep everything charged but it takes a push to edit and upload videos after a long day of walking. Interestingly, these videos mean that I am sometimes recognised by locals. It’s always lovely to meet followers but if I’m honest, it’s also an incredibly bizarre experience and one that often leaves me feeling rather bewildered. I had a waiter buy me coffee in Dungiven and another lovely man give me £20 for lunch roadside in Derry. The thing that really strikes me about such interactions is that people will “give” something without expectation of receiving anything in return – even my time.

Going Viral on Facebook and a Wave of New Followers

I recently posted a video on Facebook that went viral. It was just a short morning update for my trip followers to tell them about a farmer that caught me camping on his land. There was no home/building/farm nearby and nobody around when I pitched the tent so I used this opportunity to ask permission. He was a lovely man and perfectly fine with the situation.

Anyway, this particular video received a lot of attention (1.5 million views) after the Facebook algorithm decided to pick it up. To be honest, there was a number of very abusive messages. However, I’m delighted with how this video brought thousands of really positive, like-minded people into my online community.

Staying positive on the Ireland Way Trail

My Struggle with Anxiety and Decision to Continue Walking the Ireland Way

I had what you might call a successful year for both personal and professional reasons. After all, this time last year, I was working at a supermarket and sweeping floors in a warehouse and now here I am back working as an adventurer. I also spent a lot of this time ignoring the news, reading about spirituality and planning for the future. With this in mind, I was expecting an enjoyable and worry-free walk along the Ireland Way and not the anxiety issues that encompassed week three of the walk.

I was feeling somewhat lonely and anxious at times but this anxiety became more and more apparent in the third week. It got to the point where I felt overwhelmed and decided to take a few days away from the walk. This worked and I felt great (back to normal) for three full days but then as soon as I returned to the road, I felt that same anxiety rising back to the surface. I could have stopped the trip at this point and it did cross my mind, but only for a day or so.

It’s been a crazy year for everyone. In my own instance, I either ignored or miscalculated how much this strange period has impacted on my mental health. In fact, I don’t believe I would have encountered these problems or come to this way of thinking without walking the Ireland Way. This journey has made me feel deeply uncomfortable at times and brought forward a range of suppressed feelings and thoughts from which I am easily distracted in my every day life.

As for why I decided to continue my walk, I believe that some of the hardest questions are best answered in the dark. Turning my back on this uncertain journey would be to ignore the very path that might reveal why I’m feeling this way and how I can make everything right again. I’m also privileged to be healthy and able-enough to take this walk – another reason to do anything in life.

Hiking on a Budget? Check Out this Gear by Rock N River

I’ve been trying out different types of gear lately and it strikes me that most of my hiking and camping gear comes from the same brands. But the best brands really do produce some of the best value gear. I personally like to stick with MSR and Vango for my tent and sleep system. I’ve also favoured Osprey backpacks down through the years and Black Diamond for my hiking poles on long distance trails. However, my recent review of Rock N River budget hiking gear has opened my mind to new affordable brands.

I know that not everyone can afford Osprey backpacks or a set of hiking poles by Black Diamond, Leki, or one of the other big names. With this in mind, I recently acquired some hiking gear from Rock N River with the intention of testing this gear out and then doing a giveaway with my followers on social media.

This post outlines my experience and some thoughts on budget hiking gear:

My Experience with the Budget Hiking Gear by Rock N River

Rock N River AirTrek 35 Backpack

I’m a little obsessed with backpacks and the comfort of Osprey bags in particular. For this reason, I was pleasantly surprised to find such impressive (and effective) padded straps and ventilated back system on the AirTrek 35 by Rock N River. If you have never experienced this type of back system, I can assure you that hiking with a backpack will never be the same.

The straps and hip belt fit snug to the body which is probably the first thing you’d hope to find with a hiking backpack. But the ventilated back system with mesh makes this an absolute joy to carry and noticeably different from carrying a standard backpack. The mesh pockets on each side are useful for water bottles and there are also two fixed loops on the back for hiking poles. With plenty of space inside and a pocket for a hydration bladder, it’s the ideal bag for day hiking at the very least.

It was my favourite item by Rock N River. Mostly because of the ventilation system, which I really didn’t expect for a hiking backpack in this price range!

Rock N River AirTrek 35

Rock N River Carbon Superlight Hiking Poles

Okay, I cannot recommend these hiking poles enough – they are amazing! But can I quickly tell you why I’m such a big fan and advocate for hiking poles in general?

It took me six weeks of recurring injuries on the Pacific Crest Trail to realise the importance and practicality of hiking poles. Until that time, I just didn’t believe they were necessary and that they looked rather silly! But every other hiker was using them (even the kids). These hikers were mostly without the kind of persistent injuries that I was incurring time after time. There were a lot of big climbs on that trail and I was naive in terms of the general strain and heavy load that comes with multi-day hikes. This strain is caused by the inevitable pounding of one’s feet on the ground, while the extra weight brings untold pressure on the body – especially the knees, feet, and ankles. Anyway, once I began using my Black Diamond poles, the injuries went away and every climb/descent was suddenly a lot easier.

But do you really need to invest so much money in hiking poles?

Carbon hiking poles are so much lighter and worth the money and I believe this is especially true with the Rock N River carbon super-light hiking poles.

I ended up losing my Black Diamond poles (don’t ask) and picked up a cheap replacement in Asia. It was to my surprise that my new/cheap hiking poles were just as good in terms of performance – albeit much heavier than my previous set of poles.

With all this in mind, I was amazed to find such an incredibly light and durable set of hiking poles as this set by Rock N River. I’m just as amazed with the cost, for this standard of hiking poles often comes with a hefty price tag. Aside from the cost, the poles are lighter than any of my previous hiking poles and with all the same features.

I was actually sorry to be giving them away on social media…lesson learned!

If you need a set of hiking poles for walking the Camino or any of the trails on our doorstep, I fully recommend picking up this wonderful set of super-light poles!

Rock N River Carbon Superlight Pole

Rock N River 2L Hydration Bladder

I began using hydration bladders on my year-long bicycle ride through Africa. They were the easiest means of carrying water and I never did like the idea of using one disposable bottle after another. But convenience and functionality is the main reason for using a hydration bladder. You can fill, filter and drink from a bladder much faster than a standard water bottle.

Fill – You can dunk a hydration bladder into a river easier than a bottle. I also find it easier to wash/clean the inside of a hydration bladder.

Filter – Some water filtration systems work better with a hydration bladder because you need to squeeze water through the system. It’s also somewhat easier for this process because you don’t need to stand it up or hold it still like you do with a bottle.

Drink – The Rock N River hydration bladder comes with an attachable tube which makes it really easy to drink at any time. I find this not only more convenient but also more practical because you never need to wait, stop or stretch anytime you wish to re-hydrate.

In short, there’s a lot to be said about using a hydration bladder for hiking, and the Rock N River model is just as good as any other model at a lesser cost.

Rock N River 2L Hydration Bladder

Rock N River 4+2 LED Head Torch

I have quite a few head torches at this stage and count this as an essential piece of hiking gear. It’s an emergency item that you should keep in your backpack at all times. They’re obviously useful for rustling through your backpack or hiking in the dark.

The Rock N River 4+2 LED Head Torch has everything you could really need and features four different modes. There is a flood and spotlight mode and then also two red-light options which you might use for reading maps after dark etc. I think this is best suited to anyone but especially young scouts or those who might be new to hiking.

Also, while I often suggest the Petzl Actik Core or Ledlenser MH5 to other hikers, I always recommend carrying a backup light like this nice little head torch by RnR!

Rock N River 4+2 LED Head Torch

Some Thoughts about Using Budget Gear for Hiking in Ireland

When I first got into hiking, I ran into several safety problems that could have been avoided. I also experienced the same persistent injuries (mostly knees/feet) on my long-distance trips and a general issue in terms of overall comfort while hiking.

For Example, I got heat exhaustion on a trip through Namibia and this was mostly due to not using a water hydration bladder. On my first long walk in Ireland, my gear was soaked through because I didn’t have a waterproof cover for my backpack. During my hike on the East Coast Trail, I used a rather old backpack that didn’t have the same kind of support or comfort that you find with modern backpacks. My lack of hiking poles on the Pacific Crest Trail almost brought an end to my entire hike.

I think it’s most important to buy gear that will keep you safe and warm. However, I am finding more and more affordable gear by brands that produce high-quality items. I found this to be true about both the camping and hiking gear by Rock N River this week and I regret having to give away some of these items which I actually need!

The Moral of the story: There’s a difference between cheap gear and budget hiking gear and Rock N River hasn’t sacrificed quality in their quest to offer such low prices.

Final Thoughts

I’m always happy to use budget hiking gear if it does the job. Now, that’s not to say I’m cheap (even though this might be true). But rather I look for value and try not to buy over-priced items that I might be able to get for less. If you are new to hiking or looking for some low-to-mid priced gear, I think you will notice and appreciate the quality and performance of this hiking gear by Rock N River. This is also an Irish brand that helps support and supply the scouts which can only be a good thing!

What to Expect and How to Prepare for Hiking the Kerry Way

The Kerry Way is one of the most popular hiking trails in Ireland that starts and ends in the busy town of Killarney. It traces a loop around the Iveragh Peninsula and features a nice mix of quiet country lanes and rugged trails through the mountains. In fact, the Kerry Way is best known for being home to some of the tallest mountains in Ireland. Its awe-inspiring peaks really do validate its nickname – “The Kingdom”.

For tourists, Kerry itself is a chance to visit idyllic towns in Ireland. But the surrounding countryside is the real jewel in the crown. The Kerry Way is well-marked with a lot of food and water re-supply points along the trail. You will also find great infrastructure for hikers and great campsites and towns to enjoy the occasional rest day.

But that’s just part of the story…

What to Expect in General on the Kerry Way?

Hiking the Kerry Way is by no means easy. This mountainous terrain is a proper physical endurance test for most hikers. It can feel rather remote in places. This is certainly true if the wind and rain shows up as you navigate the higher section of the trail. Some sections of the trail pass through open farmland, while others follow quiet roads. But, there’s little to no traffic in comparison with the main roads around Kerry.

As for water, you can source and filter water quite easily. The towns are fairly reliable for picking up food supplies. Most stages/sections involve 20km+ hiking per day. But the Kerry Way is easy to follow with regular signposts from start to finish.

What’s the Best Time of Year to Hike the Kerry Way

The summer months are always best for hiking the Kerry Way. Expect campsites and accommodation to be busier during the peak months. I don’t like to fear monger but sections of the Kerry Way would be rather dangerous during the winter months and campsites etc will be closed.

At the same time, the weather in Ireland is always unpredictable. You should always pack sufficient warm gear and rain-gear for the Kerry Way such as Helly Hansen Jackets or Trespass Clothing. I personally like to hike these trails in late May or June. There are less people on the Kerry Way and a reasonable chance of some sun!

📷 @climbersinnglencar

Where to Start and Finish the Kerry Way

The Kerry Way starts and finishes in the same town – Killarney. However, it’s recommended to hike this trail anti-clockwise as it’s easier to follow the signs in this direction. I also think it’s best to start with the section between Glencar and Killarney as it’s good for camping. Either way, it’s really easy to reach Killarney from just about anywhere in Ireland. You literally start walking from the town on day one. If driving, I recommend staying at Flesk Caravan and Campsite as it’s located near the beginning of the trail. They have great facilities and staff that give you advice of where to leave the car while you are hiking.

Wild Camping Versus Guesthouses on the Kerry Way

The Kerry Way is lined with a host of guesthouses and the occasional hotel or hostel. There are also campsites and I was really impressed by the standard on my last outing on the Kerry Way. As for wild camping, it’s quite easy to find secluded spots on many sections. The tricky part is finding a spot that’s not overly exposed. It may be necessary to hike a bit further some days in order to get down from a a mountainside and closer to a lake or sheltered area. The Climbers Inn is a handy spot to camp in the middle of nowhere. It has a small shop and lovely rooms if you’d like a shower and bed for the night.

Food and Water on the Kerry Way

I carry between two and three days food at all times on the Kerry Way. This allows for the option to wild camp each night. Otherwise, it might be necessary to hike on to the next town in order to find more supplies. Either way, you should find the towns are well stocked. It’s only really the valleys (eg. the mountainous section between Glenbeigh and Killarney) in which you might not see a proper shop for more than one day. But make sure to have a water filter in your backpack at the very least!

📷 @Climbersinn

Day-to-Day Itinerary for Hiking the Kerry Way

Killarney to Black Valley – 22km

Black Valley to Glencar – 23km

Glencar to Glenbeigh – 18km

Glenbeigh to Caherciveen – 28km

Caherciveen to Waterville – 29km

Waterville to Caherdaniel – 13km (Coastal Route)

Caherdaniel to Sneem – 18km

Sneem to Kenmare – 30km

Kenmare to Killarney – 24km

About Hiking Sections of the Kerry Way

Maybe you don’t have time to hike the Kerry Way in full? In that case, it’s still worth hiking a section or two of this amazing trail. I’ve mentioned the section between Killarney and Glenbeigh a few times already. This is because it’s my favourite part of the Kerry Way. After climbing up over Torc Waterfall, the scenery is some of the most spectacular in the country. The same can be said for Black Valley shortly afterward. Either way, it’s always possible to pick out a section or two of the Kerry Way and then take a local bus back to your starting point in Killarney.

Navigation on the Kerry Way

The Kerry Way is remote in places and climbs up around the mountains next to Carrauntoohil. This means you are hiking in the middle of the MacGillycuddy’s Reeks which is the highest mountain range in Ireland. Now, I don’t say that to dissuade anyone from hiking the Kerry Way but rather to highlight the importance of navigation and staying safe on the trail. More specifically, I’m trying to say that it’s crucial to carry the right maps on trail and use a form of GPS as backup. It’s true, the Kerry Way is well-marked but these maps and GPS will not only provide peace-of-mind but also ensure you will not end up in trouble when it comes to navigation. As always, you should do your own due-diligence on the Kerry Way. Make sure to study the maps and day-to-day itinerary before setting off on the hike.

What Gear to Pack for the Kerry Way

It’s important to pack sufficient hiking boots, warm and wet-weather gear and to know the mountains can experience all kinds of weather – even during the summer months. You will need to carry everything on your back, from your tent and sleep system to clothing, food and water. So, make sure to pack your gear with all of this in mind. I highly recommend hiking poles and believe that every hiker should carry and use them on the various climbs. But for more information on what to carry on this trek, check out this packing list for a multi-day hike in Ireland.

📷@zuzka_world_wanderer

Pros and Cons to Hiking the Kerry Way

Pros

Incredible scenery from start to finish.

Well-marked trail at all times.

Great towns and infrastructure for rest days.

Big wide open spaces on the trail and never feels overcrowded.

Some sections are really suitable for wild camping.

Possible Cons

Busy campsites on occasion and may need to book ahead of time.

May not suit beginners due to remote and mountainous nature of terrain.

Very exposed terrain for some sections and weather can change really quickly.

Final Thoughts

I believe the Kerry Way is one of the top three hiking trails in Ireland. It offers a nice stretch for those who might have ten or more days at hand. However, while most hikers will find a comfortable hiking experience on the Kerry Way, it’s much more than a walk in the hills. You will need to prepare for all weather conditions and be ready to hike up the side of some very remote and exposed mountains. If you don’t have any wild camping experience, I suggest making a day-to-day itinerary with set distances and places to stay. That is, it might be best to reserve beds, rooms or campsites instead of having the added pressure of wild camping for the first time. I also recommend carrying more food, snacks and water than you might need.