The Essential Safety Tips for Outdoor Activities

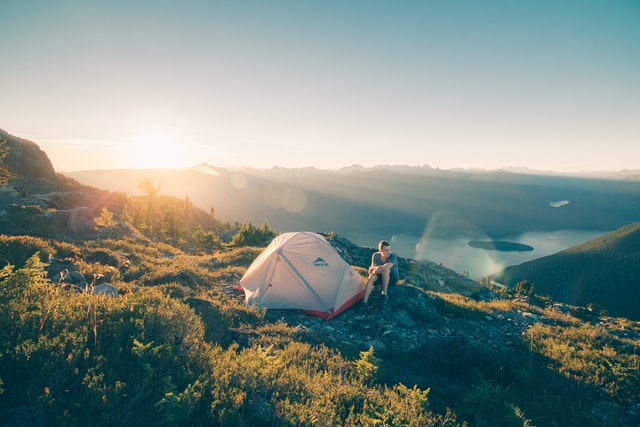
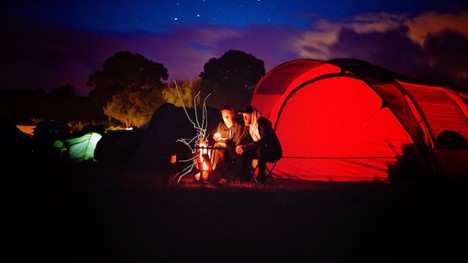
Are you ready to embark on exciting outdoor adventures? Before you hit the trails or dive into new experiences, it’s essential to equip yourself with the right knowledge and precautions. In this article, we’ll explore a comprehensive guide filled with invaluable safety tips for outdoor activities. We’ve got you covered, from researching and planning to packing the right gear. Discover how to stay hydrated, navigate unfamiliar terrains, and ensure group safety. We’ll also delve into environmental awareness, recognizing natural hazards, and emergency preparedness. Get ready to make the most of your outdoor pursuits while staying safe and having a blast! 

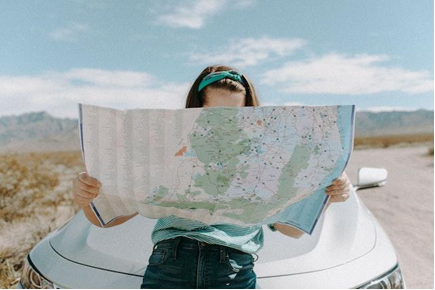
Researching and Planning 

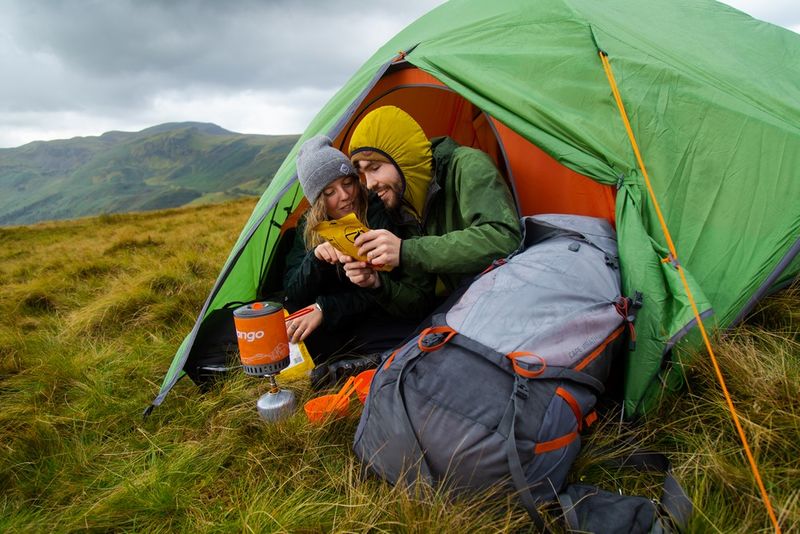
Before embarking on any outdoor adventure, conducting thorough research and meticulous planning is crucial. Start by selecting an activity that suits your skill level and interests. Once you’ve chosen, dive into researching the location, identifying potential risks, and understanding local regulations. Check weather forecasts and consider season-specific precautions to ensure a safe journey. Transitioning into the planning phase, make sure to pack appropriate clothing for protection against varying weather conditions and terrains. Additionally, gather all essential equipment and tools required for your chosen activity, such as hiking boots, helmets, or ropes. And don’t forget to carry a well-stocked first aid kit for any unexpected situations that may arise. 

A men in a blue leather jacket and brown backpack hiking.
Having the appropriate safety equipment is a crucial safety tip for outdoor activities. 

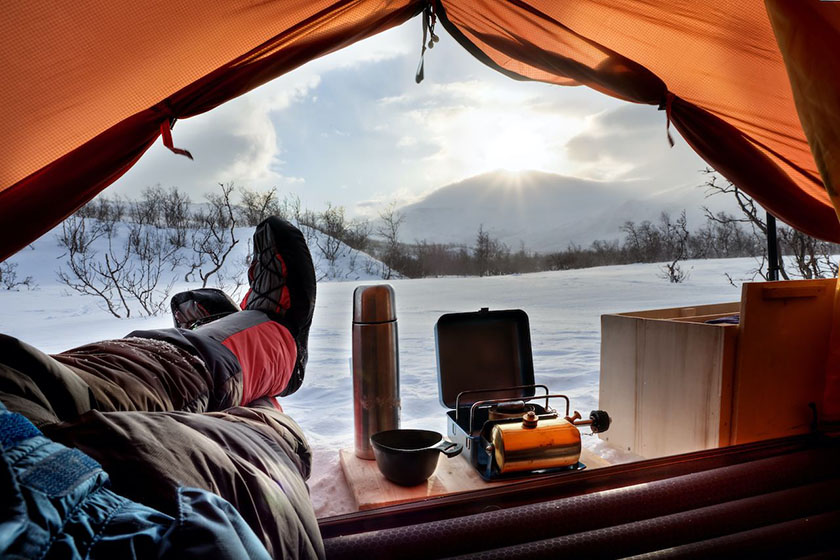
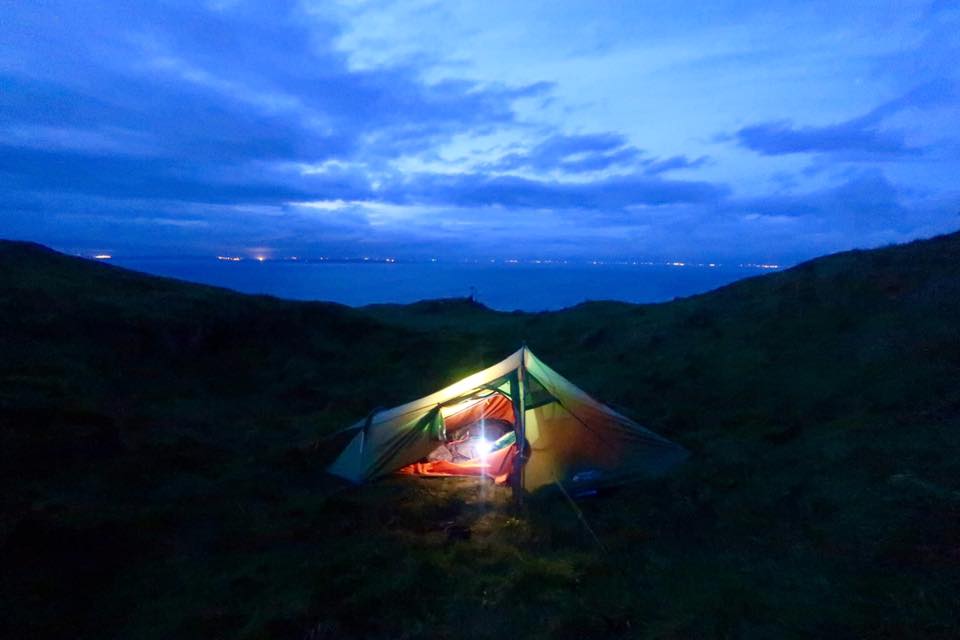
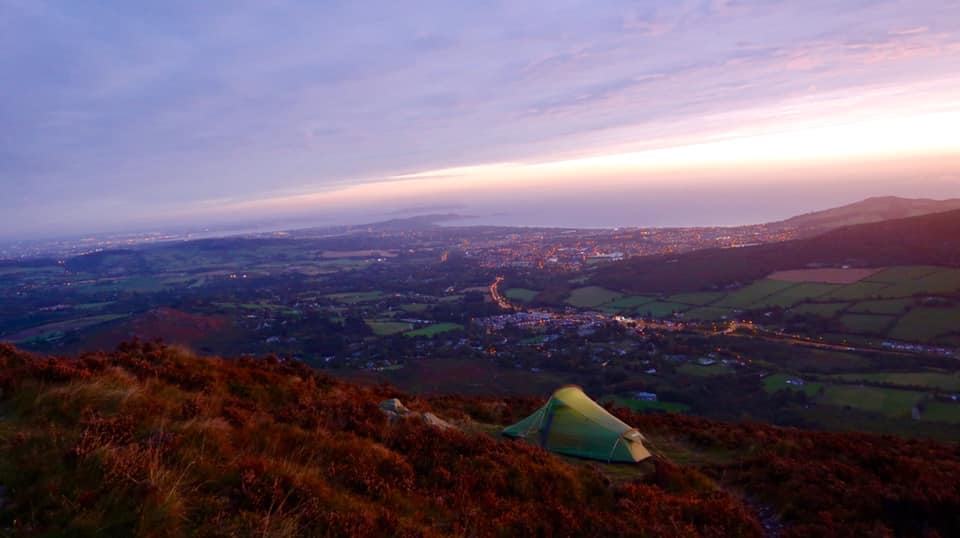
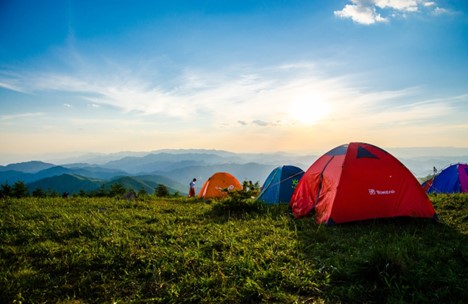
Essential Safety Gear 

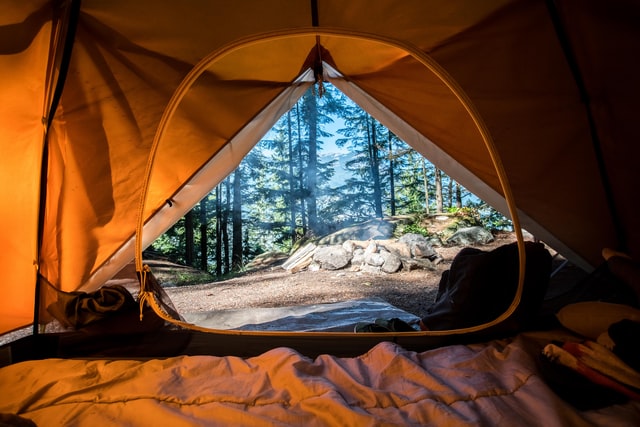
When it comes to outdoor activities, having the right safety gear is paramount. Start by ensuring you’ve dressed appropriately for the adventure ahead. Select clothing that suits the weather and terrain, from waterproof jackets to sturdy footwear. 

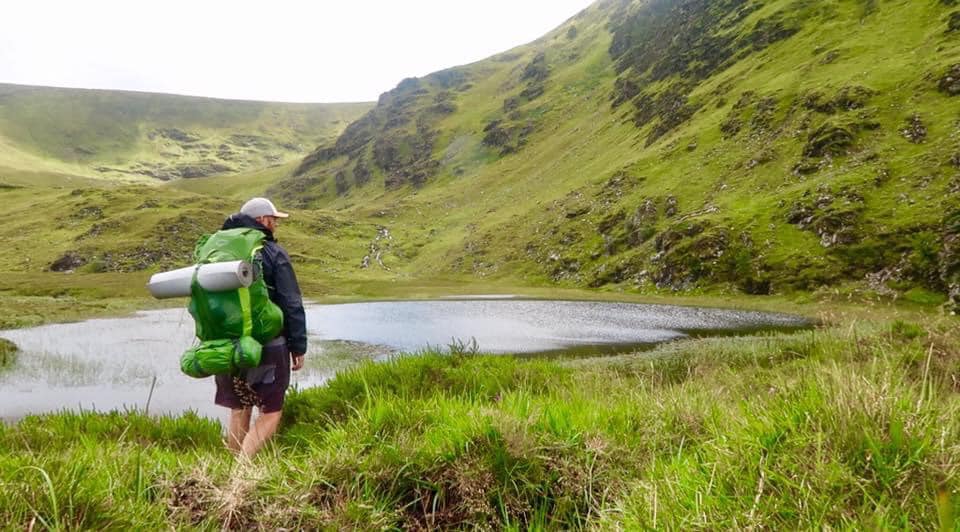
Additionally, pack essential equipment like helmets, harnesses, or life jackets, depending on the activity. Don’t forget to carry a well-stocked first aid kit to handle any minor injuries that may occur. As you embark on your journey, remember to pack and move your camping gear with care to prevent any damage. And most importantly, take your gear with you – keeping it close ensures you’re prepared for any situation. 

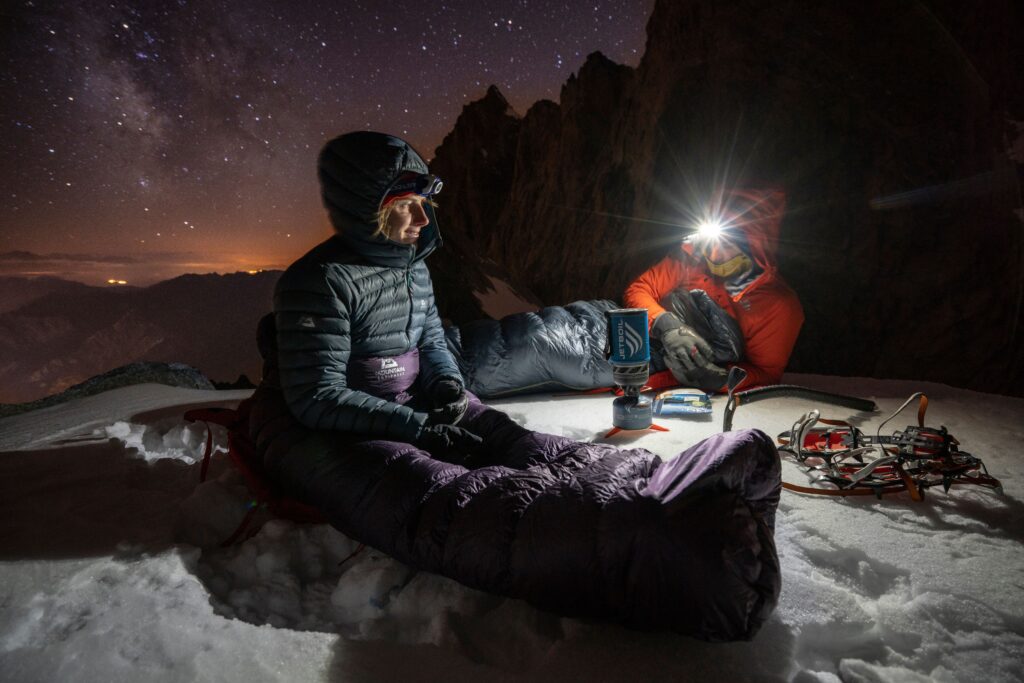
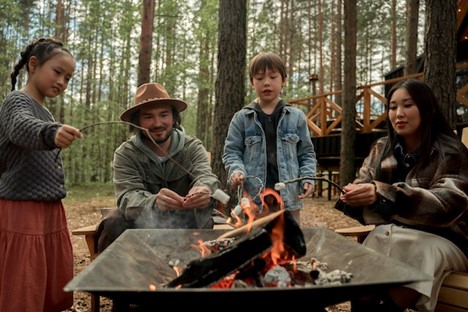
Stay Hydrated and Nourished 

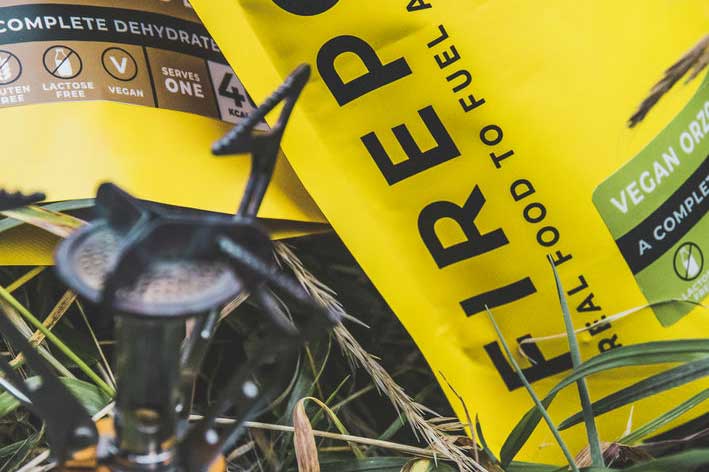
Staying hydrated and nourished is vital for your safety and enjoyment during outdoor activities. Make sure to carry ample water to keep yourself hydrated throughout the journey. Pack nutritious snacks and meals that provide sustained energy, such as granola bars, trail mix, and fruits. 

Remember to take regular breaks to refuel and replenish your energy levels. Hydration and nutrition are key to maintaining physical endurance and mental alertness. So, don’t overlook this aspect of safety tips for outdoor activities. Treat yourself to a well-balanced adventure by keeping your body fueled and hydrated throughout the experience. 

A woman looking at the map.
Become familiar with the region by using maps, GPS navigation, or guidebooks. 

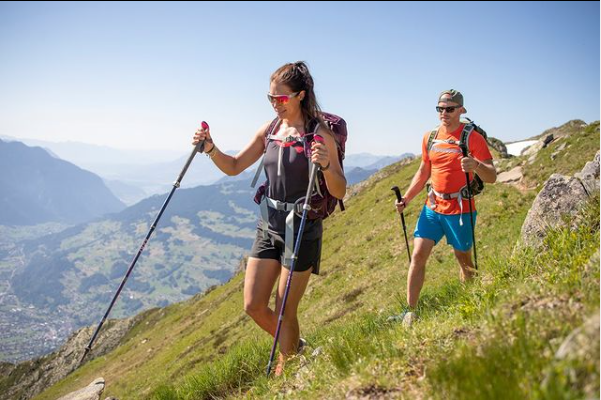
Navigation and Orientation 

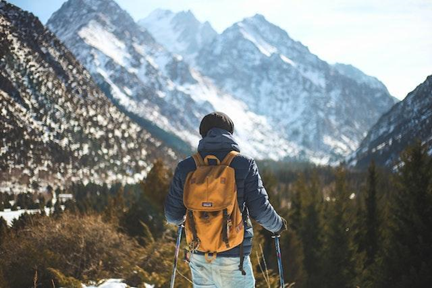
When it comes to navigation and orientation during outdoor activities, a few key tips can ensure a smooth journey. Start by familiarizing yourself with the area using maps, GPS devices, or guidebooks. Take note of landmarks or waypoints along the route to help you stay on track. A compass can be a handy tool for direction, so learn how to use one effectively. 

Remember to communicate and coordinate with your group to avoid getting separated. And if you encounter any challenging terrains or unfamiliar paths, don’t hesitate to seek guidance from experienced hikers or park rangers. With these navigation and orientation tips in mind, you’ll navigate the great outdoors like a pro. 
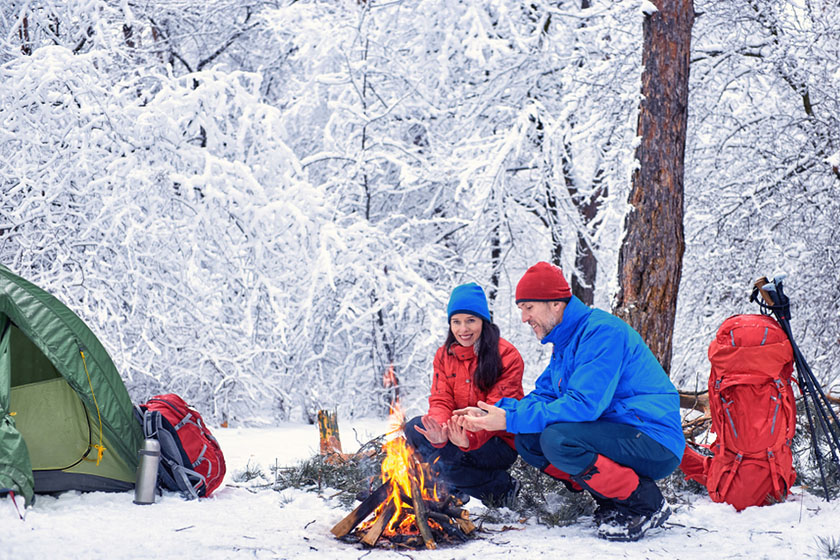
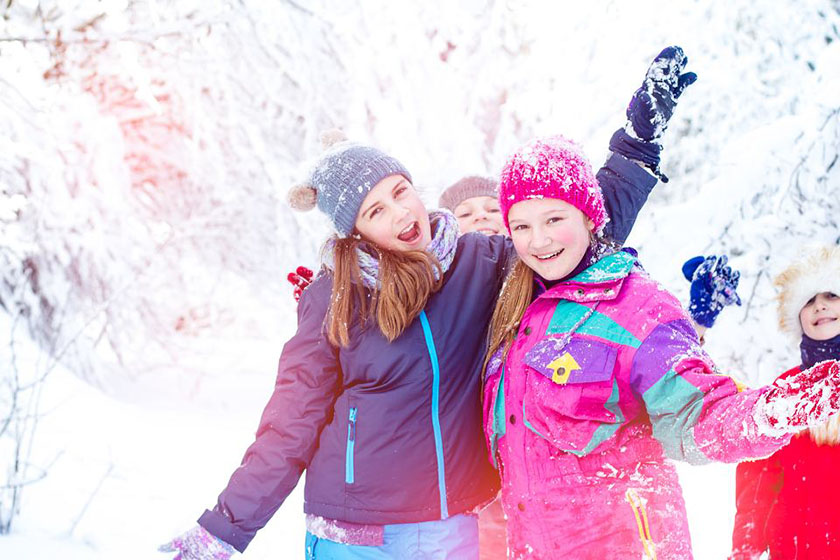
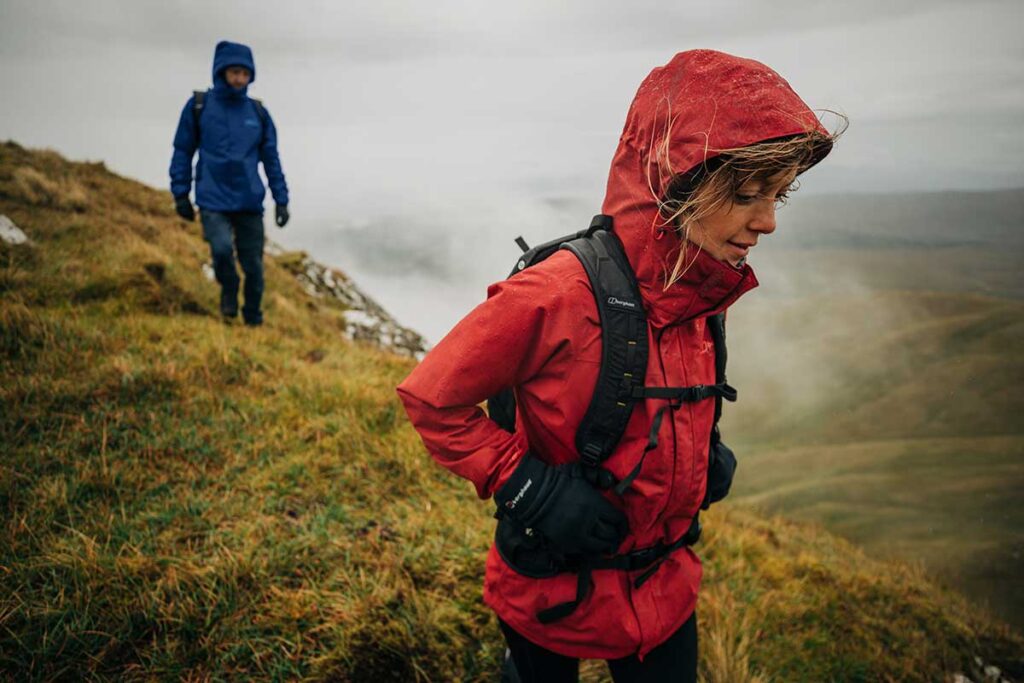
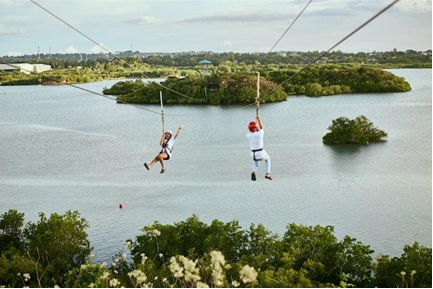
Safety in Groups 

Exploring the outdoors in a group adds an extra layer of safety and fun to your adventure. Establish clear communication and safety protocols within your group before setting off. Use walkie-talkies or mobile phones to stay connected. Keep an eye out for each other, especially in challenging terrains or unfamiliar areas. If someone falls behind, slow down or take breaks to regroup. Encourage each other and offer assistance when needed. 

Remember, the buddy system works wonders. Share responsibilities and distribute necessary equipment among the group members. You’ll create unforgettable memories with teamwork and camaraderie while ensuring everyone’s safety during outdoor activities. 

People zip lining above water.
Keep an eye out for one another, especially in challenging conditions or uncharted territory. 

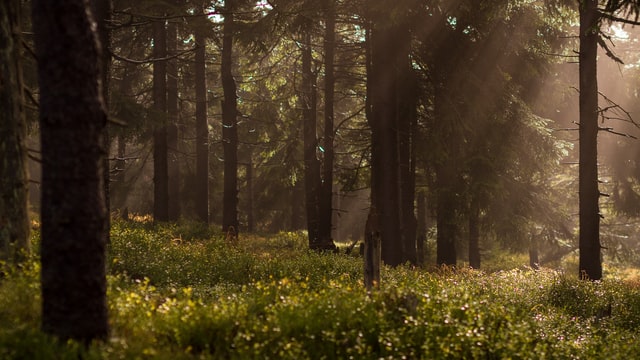
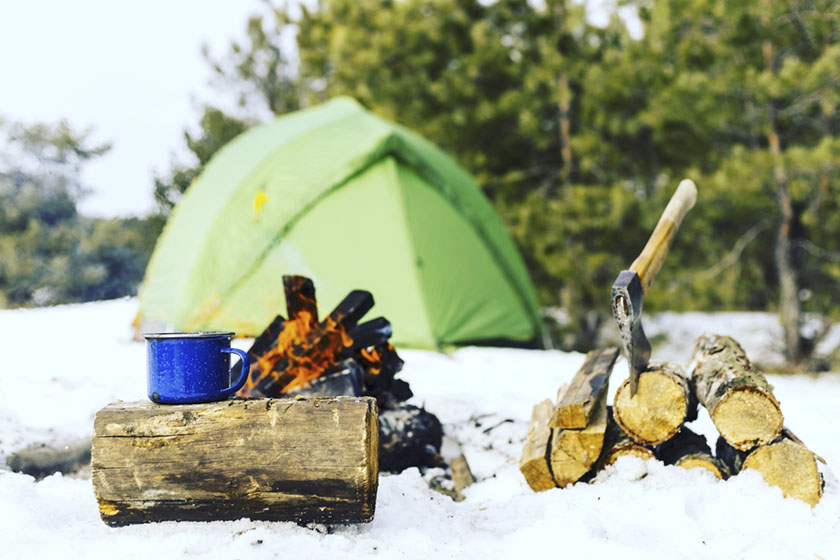
Environmental Awareness 

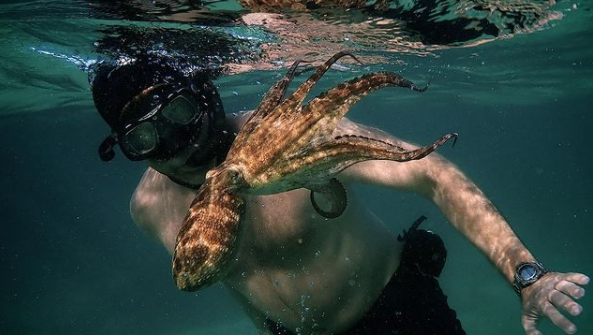
As outdoor enthusiasts, it’s crucial to cultivate environmental awareness and minimize our impact on nature. Respect the wildlife and their habitats. If you spot something interesting, observe it from a safe distance. Under no circmustances should you feed or disturb them. Practice Leave No Trace principles by disposing of waste properly and carrying out any litter you find. Follow local rules and regulations to preserve the natural beauty of the area. Consider volunteering for conservation projects or joining clean-up initiatives to give back to the environment. By being mindful of our actions and fostering a love for nature, we can ensure that future generations can enjoy the beauty of the outdoors just as we do. 

Emergency Situations 

While we hope for smooth outdoor adventures, preparing for emergencies is crucial. Familiarize yourself with signaling techniques, such as using a whistle, mirror, or phone to attract attention. Learn basic first aid skills to address common injuries or emergencies that may occur. Create an emergency action plan with your group and discuss how to respond to unexpected situations. Stay calm and assess the situation before taking any action. Remember, safety is paramount, so don’t hesitate to call for help if needed. By being proactive and knowledgeable, you’ll be equipped to handle emergencies and ensure the well-being of yourself and your fellow adventurers. 

Conclusion 

Incorporating safety tips for outdoor activities is essential to ensure a memorable and enjoyable experience. By conducting thorough research, planning your adventure, and packing the necessary safety gear, you’re setting yourself up for success. Stay hydrated and nourished, navigate with confidence, and prioritize group safety. Let’s not forget the importance of environmental awareness and preparedness for emergencies. Safety should always be a top priority, but that doesn’t mean you can’t have fun and create amazing memories along the way. So go out, explore the great outdoors, and embrace the adventure with caution and excitement. Happy and safe trails! 

Photos used:
https://www.pexels.com/photo/woman-standing-on-green-grass-547116/
https://www.pexels.com/photo/men-s-blue-leather-jacket-and-brown-backpack-868097/
https://www.pexels.com/photo/woman-looking-at-the-map-3935702/
https://www.pexels.com/photo/people-ziplining-above-water-9223080/

How to Prepare Your Kids for Their First Camping Adventure

Photo of pitched dome tents overlooking mountain ranges.

Some of us have been going on camping trips ever since we were little kids. We only had a few responsibilities while others took care of us. The first time you take your young children camping, you quickly learn how much work is involved in getting ready. This guide will help you prepare your kids for their first camping trip, including where to stay, what to eat, and what to bring along.

Camping is a different dimension than the one you remember when you were a kid

Most families use camping as a way to create fond memories for generations. Children’s camping trips are the kind of memories that can be passed down through generations.


But camping with kids is an entirely different experience than your childhood camping trip. As we age, we appreciate the effort that goes into our youth’s seemingly uncomplicated family camping trips.

Some parents are so overwhelmed with the responsibilities of camping with kids that they give up before even setting up a tent. Parents often ask themselves many “What if” questions, such as:

  • Kids can’t sleep
  • They come across a wild animal
  • Hate camping food
  • They are not having fun

Following these guidelines will ensure that your trip goes smoothly. When everything is planned and prepared, you can give all your attention to your children without worrying about whether or not you forgot something. If you want to take camping with your family to a higher level, include the children in the preparations. This way, you inspire children to appreciate the outdoors and look forward to their next trip.

A family roasting marshmallows by the campfire.
Nothing is better than family stories before bedtime by a warm campfire

How to choose the best possible campground?

Before leaving, you should choose a campground and a spot for your family camping trip. Remember to prepare your kids for their first camping by picking a campground oriented for families and a suitable campsite.


After settling on a campground, it’s time to choose a specific spot. Throughout your visit, you’ll be resting there. If you want to have a great time camping with your family, you should be as selective about your campground as you would be when choosing a new place to live. For simplicity’s sake, you should ensure that the campsite is close to the bathroom; in case of night departures. Additionally, try not to camp too close to the water for the safety of your children.

Your first night at camp

A million possible scenarios run through parents’ minds when planning a family camping trip. But for every problem, there is a solution. And, as we mentioned earlier, things will be challenging. But that’s what makes it an adventure. It’s essential to pack the camping gear and bring your gear with you, and the rest of that you can compensate in another way. The necessary equipment includes sleeping bags, as well as pads, blankets, and sheets.

Men talking by a campfire about how to prepare your kids for their first camping.
Camping does not represent constant care for children; everyone should enjoy it.

Choose a tent that fits the size of your family

Tents are generally made according to how many people they receive. If you bring a tent for two people, it will be difficult for you. As an investment, you can buy a tent for three or even four people so that they can enjoy even greater comfort. Of course, remember things like sleeping pads, mattresses, or portable cribs.

Choose a camping bag according to the weather conditions in which you are camping

It is essential to choose the right camping bag. This means you choose a bag that suits the weather conditions you are camping in. For example, you will not take a bag for winter in sub-zero temperatures if you are camping in the middle of summer. Children can be nervous because of the heat, and if their sleep is disturbed, the nightmare begins for you.

When it comes to sleep, don’t be strict with your children. Let them stay up later than usual. Nothing is better than family stories before bedtime in front of a warm campfire.

Tent with an opened side looking at waterfalls.
If you want to prepare your kids for their first camping, pick a good camping tent and a suitable bag.

Tips for preparing and enjoying meals while camping

Camp meals are often simple and back to basics. Children usually love the simplest options. Don’t worry about what the child will want to eat on the camping trip. After an exhausting day where they run and have activities in nature, they will not be very picky when tired. If you want to play it safe, you can create meals ahead of time at home, so all you do at the camp is reheat pre-prepared meals.

Some of the most common meals you can take are sandwiches, meals you have already prepared, and snacks. When camping, children are always hungry. Pack healthy, high-energy snacks. Remember to bring water. Plenty of water. Due to numerous activities throughout the day, children will always be thirsty.

You can have a barbecue to give them an authentic experience during camping. This means you can arrange pieces of meat on sticks and place them on the fire. These meals are prepared quickly, and children love to lick their fingers after them.

It’s not a nightmare if you have to prepare your kids for their first camping

If you and the kids need a break, go camping and have fun. Since you made a plan, packed all your things, and showed up on time, you can enjoy it. Take in the crisp air, breathtaking views, and smokey smell of a bonfire as it drifts through the woods. It’s time for youngsters to use nature as their playground, school, and soccer field.

Join them in discovering the wonders of nature and spending time together outdoors. Simply said, camping is for everyone, not just the young. Everyone in the family can enjoy camping. No, it won’t be as carefree as when you were a child. Overall, if you follow up on how to prepare your kids for their first camping and put in the necessary preparations, you shouldn’t have any major concerns. To put it simply, the greatest is yet to come.

A Backpacker’s Guide to Australia

If you are thinking of heading to Australia you can be sure you’re not alone in your thoughts. Why wouldn’t you go? You get great weather, affordable accommodation, great paying jobs, and much more. It can be daunting to commit to leaving home and flying a day away. Keep reading to check out how to get yourself started on your Australian adventure.

Applying for your Visa

If you are planning on staying in Australia for longer than a year you’ll have to apply for a Working Holiday Visa (417). You can apply for your visa here. You will first have to create an immi account and once you’ve created that you can sign in and begin your application for your visa.

With the 417 visa, you can work short-term to help pay for your travels, study for up to 4 months, travel to and from Australia as many times as you like within the year, and do 3 months (88 days) of specified work in order to qualify for your second-year visa (462). The cost of the WHV 417 is
€330 (510AUD).

You can check your eligibility here. A few key things to note if you are Irish; you must be aged 18-35 years and you must have €3,000 (5,000AUD) and the cost of a flight out of Australia in your account when applying for your visa and upon entering. Usually, you get a response to your application within 24 hours. From the date your visa is granted, you have one year to enter Australia. i.e if you are granted April 1st, 2023 you have until April 1st 2024 to enter. Your 12-month visa begins on the date you enter.

Kangaroo on the beach in Gatton, Australia

I’ve Arrived, What Now?

There are a few things that you have to get sorted out when you arrive. Some of these things can take up to a week to process so best to do them as soon as you can.

Get an Australian sim card

Telstra was recommended to me by fellow backpackers and I have no complaints so far. Great coverage and plenty of different data plans to suit your needs. Make sure you bring a phone with you that is unlocked so you can use sim cards from other countries.

Open an Australian bank account

The four biggest banks in Australia are Commonwealth Bank of Australia (CBA), Australian and New Zealand Banking Group (ANZ), Westpac Banking Corporation (WBC), and National Australia Bank (NAB).

The most common bank amongst backpackers is CBA. You can apply online here or head to your nearest branch to set up an account. Make sure to bring your passport with you as you will need identification. The bank will help you set up your mobile app and then they will post your card to you. This can take up to 5 business days to receive.

Apply for a Tax File Number (TFN)

You can apply here. You need a TFN to work. It is sent via post and can take up to a week to arrive. If you want to start working immediately be sure to sort this out sooner rather than later.

Open a Super Account

Super is basically a retirement fund. It is money put aside by your employer over your working life. If you are a temporary resident, you can claim the balance when you leave Australia. You must claim the balance within 6 months of leaving. A popular super account for backpackers is HostPlus. You can become a member here.

White sandy beach in Australia

Completing my 88 Days

As I mentioned before, you must complete 88 days of specified work in order to qualify for your second-year working holiday visa. This means that different forms of work can count towards your 88 days depending on what part of Australia you are in. You can check out the approved areas and industries for specified work here.

Completing your 88 days can be stressful. Some weeks you will work 60 hours over 6 days and other weeks you will only work 2 days. Although this won’t be great for the wallet it is normal and you shouldn’t worry too much about your 88 days. The Australian government said that so long as you attach 13 payslips where you worked whatever you could you should be approved for your second-year visa.

How do I find work?

There are multiple ways to try and find specified work. If you are looking to work on a farm with plants or animals you can call up the Harvest Trail on 1800 062 332. I would recommend completing your 88 days at the beginning of your visa. If you leave your specified work until the end of your visa you may not complete your days due to unforeseen circumstances such as weather, illness, or lack of work.

The Harvest Trail will help to guide you on what areas can supply the most jobs and accommodation but will not source a job for you. I recommend talking to fellow backpackers when you arrive and getting phone numbers for employers and for accommodation. COVID-19 has had an effect on regional farms so finding a farm to work on now is not as easy as it was before the pandemic. The time of year will also play a factor in what part of Australia there will be work and how much of it.

You can also look for jobs on Indeed, Jora, Workforce Australia, and backpacker job board. If you see a contact number on a website don’t hesitate to pick up the phone. Being eager to work in Australia is better and you’ll get a job before someone waiting on an email.

How do I know what is in season and where?

You can check out what is in season at this website for the time of year that you will be working.

A day on the farm in Australia

Apps to download

There are a few apps that you should download for your time in Australia. These apps range from accommodation to transport to casual working jobs.

  • Airbnb
  • Hostelworld
  • Booking.com
  • Domain
  • Flatmates
  • Homely
  • Realestate
  • Tenant App
  • Hostplus
  • Jora Jobs
  • Airtasker (Casual jobs)
  • Sidekicker (Casual jobs)
  • Mad Paws (Pet Sitting)
  • Uber

A Backpacker’s Guide to Cambodia

Zoe Kinsella

Cambodia was the one country on my travels that I was hesitant to visit. Whenever I met other backpackers it was always 50/50 whether they loved or hated it. They had regaled me with tales of how they had been robbed and I was petrified to go. My boyfriend and I decided it was better to wait until our friend had arrived so the 3 of us would go together. Strength in numbers and all that.

To say the state of the 3 of us when we landed in the airport in Phnom Penh would be putting it mildly. I had a decoy bum bag on the outside of my t-shirt and a secret money belt underneath.

I got a Tuk-Tuk outside the airport and drove 10 minutes to our hostel. I’m sure I looked like a lunatic clutching my backpack to my chest inside the Tuk-Tuk so nobody on a motorbike could swipe my belongings from me while driving. We had planned on a short visit to Cambodia. ‘Let’s go just to say we’ve been’ sort of thing. I look back and laugh now as I write this because Cambodia is one of my top two favourite countries in South East Asia.

Entry Requirements and Visas

Something for you to note. Before you can board any vehicle headed for Cambodia you need to have proof of onward travel i.e a ticket to show when and how you are leaving Cambodia. As a backpacker, with plans that are ever changing, it can be hard to decide how long you will spend in a country. To allow me the flexibility while travelling I used a site called onwardticket.com for proof of my onward travel. This site lets you reserve a flight for roughly €15 and holds your ticket for 24 hours. You simply show this at the desk and the reservation expires after 24 hours. This will give you the freedom to travel without a deadline date. You will never be asked for proof on onward travel after entering Cambodia.

The visa process is super quick and easy. You will fill out a visa form on the flight and present it when you land. The visa fee is $35, you have to have this in cash as they do not accept card. USD is used widely in Cambodia along with their own currency Riel. They will not accept any USD that have a slight tear or look worn so be careful when handling your money so as to avoid being out of pocket. I have found while traveling that USD come in handy a lot of the time so if they won’t accept it in Cambodia you will be sure to be able to use it elsewhere.

The Route

When backpacking around Cambodia you will either travel from North to South or vice versa. There is an airport in Phnom Penh (N) and Siem Reap (S) which makes it easy to travel to and from other countries from Cambodia. I began in Phnom Penh as I flew from Thailand. You can also opt for a land crossing which is much more budget friendly. Once you are in Cambodia you will travel quite cheaply via bus, train or boat to the other destinations.

Phnom Penh (2 Nights)

A cell in the S21 prison in Phnom Penh

I spent two nights in total in the capital and this was plenty of time. I stayed in Mad Monkey Hostel which is a chain hostel found in South East Asia. You can be guaranteed to meet plenty of other backpackers in these hostels as they are sociable and always have plenty of events on. It cost roughly $8 a night for a shared dorm.

I booked through the hostel to visit the S21 prison and the Killing Fields. These tours give you an inside look into Cambodia’s dark history – the genocide killings committed between 1975 – 1979 by Pol Pot, the Khmer Rouge leader. This tour is not for the faint hearted but I would highly recommend going.

I booked my 3 hour transfer bus from Phnom Penh to our next destination through the hostel. Plenty of mini buses depart a day so you’ll have no issues booking one. The bus cost us roughly $10 and will leave you in the centre where taxis will be waiting for you with a fare as low as $3 to your accommodation.

Kampot (3 Nights)

Pepper plantation in Kampot

I spent 3 nights in Kampot in Karma Traders backpacker hostel. The accommodation cost roughly $5 a night for a shared dorm room. They had events on every night like Taco Tuesdays, Burger nights and table quizzes. If you do stay in Karma Traders be sure to lock away your valuables especially if you are staying in one of their outdoor dorms that can be accessed by the general public.

Another accommodation option popular amongst backpackers is Arcadia. A sociable hostel located on the river that has a selection of water activities for you to try out.

There’s plenty to do in Kampot if you’re looking for an adventure. You can rent a motorbike from your hostel or you can hire a driver for a few hours to bring you around if you are not a confident driver. Check out a list of things to do in Kampot here.

From Kampot I planned on getting the 5 hour train to Koh Rong however, when I arrived at the train station the train was sold out. Be sure to go over a day in advance of your trip or book a train ticket online to avoid disappointment. The views from the train are breathtaking and it makes for a smooth, comfortable journey.

Alternatively, you can get a mini bus from your hostel that will drop you to the ferry point in Koh Rong. If you suffer from motion sickness I would avoid the minibus option as the roads are full of potholes. There is one stretch of road that should take 10 minutes to drive that takes an hour due to the potholes. Make sure to wear your seatbelt as you’ll be bouncing off the roof (I’m not even joking). The minibus seats 12 and it cost roughly $20 each.

When you arrive at the ferry port you will purchase an open return ticket for roughly $30. This boat will make two stops. First stop is to Koh Rong and the second is to Koh Rong Samloem. You can choose to do these islands in whatever order you please. I went to Koh Rong Samloem first but I would recommend going to Koh Rong first.

Koh Rong (3 nights)

Stunning beaches found in Koh Rong

There’s not a huge amount to do in Koh Rong and you can walk the entire island in about an hour. This was a great place to simply chill and recharge. There are plenty of lovely restaurants along the beach front that are super cheap, tasty and give generous portion sizes. A backpackers trifecta.

I needed a break from the hostel lifestyle so I booked a bungalow for our stay in Koh Rong. I would recommend your stay in Koh Rong overlap with a Saturday because there is a hostel called The Nest that runs a day festival called ‘Nestival’. They hold plenty of games similar to a school sports day with the inclusion of alcohol. It is a great day that helps you meet people and spend your day doing something different. You can opt to stay in The Nest hostel or stay in local bungalows.

I stayed in Happy Elephant Bungalows. My room slept 3 people, had a private bathroom, a porch with a hammock, fans and towels were supplied and it only cost $46 between three people. Absolute bargain!

Make sure to bring enough cash with you for your time on the Koh Rong islands as there are no ATMs on these islands. There is one restaurant on the entire island that will double as an ATM but charge you a surcharge of 10% to withdraw money. You also have to pay for your accommodation by cash as the entire island is run off of a generator.

Koh Rong Samloem (3 Nights)

One of the many lounging areas in Koh Rong Samloem

You can get a quick 20/30 minute boat from Koh Rong island to Koh Rong Samloem. I recommend going to Koh Rong Samloem first as there are plenty more boat times going in this direction. You can get an early boat to arrive in Koh Rong Samloem early and have two full days on this island as I felt 3 nights was too long.

I stayed in Mad Monkey hostel for roughly $6 a night for a shared dorm. You will definitely experience the remote island life here. I stayed in a 6 bed dorm that is in a hut, there are a couple of fans in the dorm room and a hammock outside on each porch. Be sure to bring mosquito repellent with you for your sanity.

The hostel runs daily excursions and you can also get a daily boat over to the mainland as Mad Monkey is more remote than the other hostels. This does add to its charm. Mad Monkey have a bracelet payment system so you top up your bracelet by X amount using your card (again, you’ll incur a surcharge) or by cash. What you don’t spend on your bracelet will be refunded to you on your departure.

Another hostel option, located on the mainland of Koh Rong Samloem, that is popular amongst backpackers is Onederz. A dorm in Onederz is roughly $9 a night.

Siem Reap (5 Nights)

One of the temples found in Angkor Wat

The journey from Koh Rong to Siem Reap is not one to be taken lightly. I began by getting a boat from Koh Rong island back to the ferry port. I had to reserve a time slot for my return trip. Once I arrived back at the port I hailed a taxi to drop me to the bus terminal for a sleeper bus to Siem Reap. This bus is advertised as a 10 hour sleeper bus it actually takes 15 hours. There are no single beds only doubles so if you are travelling alone prepare to have a bunk buddy. The beds are not your typical sized double, more like a large single so it will be a tight squeeze. The bus also picks locals up along the way so the pathways on the bus will be full of people and luggage.

I arrived in Siem Reap centre in the early hours of the morning and there were plenty of taxi drivers waiting. Don’t be afraid to barter with them as they tend to ask for double the going rate. Be sure to check how far of a drive your hotel/hostel is from the bus terminal so you’ll have an idea of what you’re happy to pay.

I stayed in Lub d hostel for roughly $6 a night in a dorm with a shared bathroom. The bathrooms in Lub d are sex segregated. I love staying in Lub d hostels as they are super clean, kitted out with everything you’d need, and the food on site is always delicious. Usually Lub d is a treat as they can be expensive to stay in, especially in Thailand, however, this was not the case in Cambodia.

Siem Riep was definitely my favourite place in Cambodia. You could easily spend 3 days in Siem Reap and see all you need to see but I wouldn’t spend less than that. I was located in the centre which gave me the freedom to walk most places. There is a bustling nightlife, amazing restaurants and plenty to do in Siem Reap.

The main tourist attraction is Angkor Wat – a temple complex and the largest religious monument in the world. You will also recognise it from the Tomb Raider movies. I booked my tour through the hostel so that transportation and a tour guide was included. You can purchase a day ticket or a multi-day ticket depending on your interests. This tour is a full day tour as you are up at 4.30am to make it to the temples in time for sunrise. Other tours you can embark on are to the landmine museum, national parks, dance and dinner shows and much more.

If you are thinking of heading to Cambodia as part of a backpacking trip across South East Asia or as a stand alone trip I would highly recommend it. You can experience Cambodia as a budget backpacker or a luxury traveller. The Khmer people are so friendly and helpful, the food is delicious, and the views are stunning. What more could you want?

7 Backpacking Essentials for Travelling

Zoe Kinsella

So, you’ve finally booked that flight and you’re heading off backpacking. Whether you’re going for 6 weeks or 6 months you need to figure out what backpacking essentials you need to pack. This should be an exciting time and not a stressful one so I’ve compiled a list of the must-haves for you. Sit back, click away and with OAS’s super quick delivery you’ll be ready to jet off in no time.

Here’s a list of 7 backpacking essentials for you:

1. Universal Adapter

This USB world travel adapter is a backpacking must have. You can charge up to 3 devices at once with the 2 USB ports and the plug socket. Not all plug sockets are the same in each country you visit so this all in one adapter will save you buying an adapter in each country you visit.

USB World Travel Adapter

2. Document Holder

Keep all of your travel documents at arms reach and together in a safe holder. This document holder is RFiD protected which means your cards cannot be scanned reducing the risk of identity theft. You can wear it as a waist pack or stow it away when it is not in use. 

RFiD Travel Belt Pouch

3. Bum Bag / Money Belt

A bum bag will be your new best friend while travelling. Think about it, you’ll be spending most of your days in your swimsuit so where do you keep all of your valuables? I would recommend a money belt for underneath your clothes if you’re travelling to any countries that have high theft rates. There have been cases where people’s bum bags have been torn from their shoulders as they are walking down the street so a more discreet bag will put you at ease.

4. Travel Towel

You’ll find that while travelling and staying in hostels some hostels will supply a towel but that is not always the case. Microfibre and softfibre towels are a Godsend while you’re travelling. Anti-bacterial, quick drying, lightweight and compact, what more could you want? 

5. Powerbank

Think about how much time we spend on our electronic devices. We read our books, book our flights, answer our emails, update our social media accounts and watch our favourite movies and shows on them. The battery on our devices can’t keep up with the amount of time we spend on them so a powerbank is essential. Travel days while backpacking can be excruciatingly long, I mean like 20 hours long. You could be left at a bus station waiting 3 hours for a bus with 50 others all crowded around 4 sockets. Do yourself a favour and get a powerbank – you’ll thank me later.

6. Padlock

This resettable 3 digit lock is perfect for keeping your valuables safe while you’re travelling. All hostels will have a locker for you to store your valuables in but they won’t have a lock for it. This lock means you use a code and don’t have to worry about losing a key. I’d get two locks if you’re backpacking for a few months as things tend to get left behind as you jump from place to place.

TSA Combi Lock

7. Packing Cubes

Imagine storing all of your clothes in your wardrobe in a heap on the floor. That’s what backpacking with a rucksack is like without packing cubes. Pack all of your clothes into 4 cubes to keep them clean and organised. Unfortunately, packing cubes are not available at OAS yet but they are coming soon and of course for the best value in Ireland.

There you have it. 7 backpacking essentials to pack for your next trip that won’t break the bank. Only at OAS, Ireland’s best value outdoor store.

Common Camping Fears and How to Overcome Them

tent and outdoors

Why does the very thought of our hypothetical camping trip open our mind’s Pandora box? Are we being cowardly, or is human fear of the wilderness an integral part of our nature? Without any hanging suspense, we can sigh with relief. It’s the latter. Fear of the unknown is nature’s work at its best; it’s a mechanism protecting human beings from harm since the beginning of time. Is this mechanism becoming redundant? Are we ashamed of our primordial instincts, and does it hinder humanity’s evolution? Is fear capable of impeding our sense of joy and adventure? Maybe, but it’s still our reflex survival strategy, as our sense of safety depends on its continuum. Modern humans have become estranged from nature; camping is our best remedy. Now, let’s dig deeper into common camping fears and how to overcome them.

Boredom, incoming

Oh, this one’s not that scary. First-time campers often fear empty hours and doing nothing. There are myriad breath-taking outdoor destinations in Ireland, but younger generations seem to prefer street noise to bird songs. Indeed, we have become too dependent on technology and outer stimuli to keep us entertained. Are we underestimating nature? It’s a thing of wonder; it’s where we witness unison and the cruelty of simply being alive. Forget TV shows; this is a Netflix documentary live broadcast. And it’s for free. Don’t miss out.

Boredom remedies:

  • JBL Bluetooth speakers
  • books
  • good friends
  • David Attenborough hour – plant identification app
  • night time fun: stargazing app
  • bring your dog
a dog in a tent depicts common camping fears and how to overcome them
Shoo, boredom, shoo.

In the dark places

Oh, yes, primordial fear hour. Our favourite. Why are we so afraid of the dark? Well, why wouldn’t we be? We get robbed of our senses at night; it’s hard to recognize the sounds and the direction they’re coming from, and unless we’re strapping on our night vision goggles, the power of our eyesight is restricted. That’s no fun. We fear the unknown, the pending danger. Fight or flight. I still experience swamp waves down my back when I hear something during sleep. And that’s okay.

Darkness remedies:

  • embracing the dark is all about practice
  • begin by enduring the night without any source of light in your own home
  • take your experience to a controlled outdoor area – a friend’s backyard
  • Bring flashlights and portable chargers
  • Keep the campfire burning

Wild animal terror

There are very few people out there with getting mulled by a bear or bitten by a snake on their bucket list. Creepy-crawlies are also not that popular among nature lovers. Waking up to gentle nostril tickles is adorable, as long as an 8-legged creature is not executing it. So, we fear animals. But, guess what? The feeling is mutual. You will never come across a snake that’s been dreaming about sucking the life out of a human being ever since childhood. So, how do you plan your first wild camping adventure and stop fearing unexpected visitors?

Fear of animal remedies:

  • if it’s your first time, go with an experienced camper
  • learn how to store away food to avoid attracting curious noses
  • knowing where to position your tent is crucial
  • get acquainted with the campsite’s wildlife beforehand, understand their behaviour
  • talk to camping veterans
a man sitting outside a tent
The best advice for common camping fears and how to overcome them: Get to know the site before camping.

Two-legged danger

Reptiles, insects, carnivorous mammals – fearing them only makes sense. But what about something more familiar? A fellow human certainly deserves to be on our “Common camping fear and how to overcome them” list. Strangers in the night? If you’re camping out in the wilderness and you spot a moving human shadow, – “Care to join me, creeper?” will probably be the last thing on your mind. More along these lines: HEY, CRICKETS, HAS ANYONE SEEN MY PEPPER SPRAY? Fearing someone will raid your campsite and steal your valuable possessions or camping gear is more than rational.

Unwanted guest remedies:

  • talk to people who frequently camp in the area
  • find reviews, connect to fellow campers online
  • learn Brazilian Jiu-Jitsu (it’s beautiful to watch)
  • let your family and friends know your campsite location
  • bring your guard dog (Yorkies are welcome, too)

I don’t want to get lost

Getting lost in your imagination is beautiful; getting lost in the woods is a thing of potential terror. We rely on our Google maps to take us anywhere we need to go. But, the woods; it’s one tricky terrain. Tree after tree after tree. Thinking you’re never going to find your way back is something all beginners experience. The heart starts racing, your soul is sweating, and you just want to get back to your campsite, pack your camping gear, and leave within a nanosecond. Hold on, hold on. It’s just fear talking. Plus, you must safely pack your equipment. Once you overcome your camping fears, you will need it.

 Wander-proof remedies:

  • compass is your best friend
  • learn how to use it before camping
  • don’t wander off too far from the site
  • if you’re a beginner, never wander alone
  • get familiar with the site before exploring it on your own
forest trees
Beginners, tread carefully. Seek company.

Cryophobia

The fear of freezing to death. It’s relatively common for first-time campers. If you have no experience spending the night outdoors, it’s only normal to feel anxiety. The only thing protecting you from the chilly weather is your tent. Learning about different types of outdoor jackets is crucial if you’re planning on becoming a serious camper. Do your homework, and you’ll be just fine. Warm clothes + campfire; how cold can it get?! If you want to be 100% sure, portable heaters may come in handy.

It takes more than 24 hours…

…to become a camper. Give yourself time and permission to be afraid. Keep coming back, and I promise you, you will find it to be the love of your life. Face your worst camping fears and you will overcome them. Tents up!

Photos:

https://unsplash.com/photos/y8Ngwq34_Ak

https://unsplash.com/photos/J_XuXX9m0KM

https://unsplash.com/photos/mzZVGFfMOkA

https://unsplash.com/photos/2ShvY8Lf6l0

The Best Outdoor Movies on Netflix in Ireland

Nothing interests me more than movies about the outdoors. That is why I wanted to share the best outdoor movies on Netflix that I think you should check out.

Believe it or not, even when I’m wild camping, I’m watching movies. It’s true! I will usually have a movie downloaded onto my iPad for bedtime and often think about “what to watch next” when I’m hiking a trail. A few years ago, I even listened to an entire podcast called “The Rewatchables”. They pick an iconic movie and talk about it for two hours – at which point I can’t wait to get back and watch it again!

The Best Outdoor Movies on Netflix in Ireland

1. Arctic

Plot – Danish man (Mads Mikkelsen) is stranded following a plane crash in the Arctic. The protagonist spends his time searching for food and surviving while making attempts to escape the frozen land around the plane wreck.

My Verdict – Arctic was one of my favourite movies from last year and one that is filled with stunning scenery as you might expect. It’s like a cross between Alive and Interstellar. Mikkelsen puts in a very strong and convincing performance. While this traumatic experience was anything but solitude for the protagonist, I couldn’t help but appreciate the simple pleasures he often found. For instance, the moment he catches and cooks a delicate fish beneath the ice or how cosy it looked as he curls up in a warm sleeping bag at night. It’s true, my romantic notions are not what this film is about. These moments highlight the real necessities in life and a certain luxury that we often take for granted – the company of another person. A must-see outdoor movie.


📷 @arcticmovie Instagram

2. The Dig

Plot – An excavator is asked to dig up a burial ground on a private estate just before World War I. His team discovers much more than they could ever have imagined.

My Verdict – The Dig is a bit different from all of my other suggestions for outdoor movies. I watched this recently and absolutely loved it. The Dig is quite slow-moving and won’t be for everyone. I enjoyed the story and found the protagonist’s love for the land very admirable. Carey Mulligan and Ralph Fiennes are also fantastic. While I mentioned “slow-moving”, I’m fully aware of how this movie/story and this way of life (archaeology) is not about time and much more about the richness of the present moment.

Note – Some of you may find The Dig to be quite a sad/melancholic movie.


📷 @thedigmovie Instagram

3. The Dawn Wall

Plot – Tommy Caldwell and Kevin Jorgeson attempt to make history by free climbing one of the most forbidding rock faces in the world.

My Verdict – I should premise this verdict by pointing out that I have no interest in mountaineering or climbing. Not to mention climbing without ropes! Watching The Dawn Wall left me with nothing but admiration for the climbers. You see, the plot above is accurate but doesn’t really outline the depth of this documentary. It is just as much an insight into human nature as it is about climbing itself. Tommy Caldwell is also a very endearing character from the outset. You can’t help but want him to overcome his personal problems and the many obstacles he faces during the climb.

The cinematic shots are nothing short of spectacular in this documentary. My sofa felt like an especially comfortable place to sit when they were sleeping on the side of a 3,000-foot monolith. There is pain and athleticism involved but overall; this is another amazing outdoor movie/documentary that will inspire – even if you don’t enjoy climbing!


📷 @dawnwallfilm Instagram

4. The Last of the Mohicans

Plot – After being raised as an Indian by a native tribe in 1757 America, Hawkeye (Daniel Day-Lewis), with the help of his tribe, must rescue the daughters of a British colonel during the French/Indian War.

My Verdict – It’s strange to think this movie is nearly 30 years old. The soundtrack is epic, and the acting is even better! There is also a great story behind it all. It’s an insightful look back to a very primitive time. One in which it would seem the land, customs, and traditions were much more important. This outdoor movie is filled with iconic landscapes and remote stretches of wilderness that incite a sense of wanderlust. I must have seen this movie ten times over the years and it’s a brilliant watch – even with the cinematics looking rather outdated on a smart tv.


📷 Netflix

5. Everest

Plot – Everest tells the story of a group of climbers who got caught up in the infamous 1996 climbing season on Mount Everest. Featuring a star-studded cast which includes Josh Brolin, Jake Gyllenhaal, and Keira Knightley. The movie also chronicles some of the story told in Jon Krakauer’s best-selling book – Into Thin Air.

My Verdict – It took me a while to get around to watching Everest. Into Thin Air is one of my favourite books and I was afraid to see what Hollywood made of this tragic story. Great movies rarely follow great books. While many facts in the movie often appear to stray from the truth, it’s definitely worth watching. Everest is also quite Hollywood-esque but the cinematics are really stunning. This outdoor movie managed to capture the realities of wind, cold, and serac collapse, without becoming too depressing or sad. After all, there’s nothing good about what happened during this disastrous season on Mount Everest but many of the best movies made are about the most unfortunate events.


📷 @everestmovie Instagram

6. Jungle

Plot – Yossi Ghinsberg is a 21-year-old backpacker looking for an adventure in the Amazon jungle. A dodgy guide escorts Yossi and a new friend into the jungle. They run low on supplies pretty quickly and split up during a disagreement. Yossi and his friend now venture further into the Amazon as they search for a way out of the jungle.

My Verdict – I read “Lost in the Jungle” more than ten years ago on a trip through Africa. I wasn’t surprised to see it was being adapted for a movie. This survival story is both terrifying and exciting at the same time. If you’re like me, you might feel some sort of disdain for Yossi near the beginning. Most people can understand and relate to the naivety of the 21-year-old backpacker. There are some cheap effects in the second half of the movie, and some of the flashbacks were unnecessary. The overall story is brilliant, as is Daniel Radcliffe.

Note – There’s also a really good account of this story on YouTube.


📷 @junglethemovie Instagram

7. My Octopus Teacher

Plot – Craig Foster is an amateur filmmaker who happens upon a small octopus just off the coast of South Africa. He then decided to document his interactions and aims to free-dive with this same octopus every day for one year. As for what happens next, I’d like to give my verdict but not say too much at the same time…

My Verdict – I’m still amazed that most of this documentary was made with a GoPro. Some shots are taken with a drone or alternative cameras, but the most spectacular shots were captured with quite a simple camera setup.

But that’s not what makes this documentary so special…

My Octopus Teacher is a profound and unusual documentary that truly steps into the unknown and asks questions about the impossible. In fact, it’s a remarkable story that would seem unbelievable without the actual footage. Craig Foster really does become familiar to this wild octopus and is visibly moved by their encounters. The intimate footage of the octopus was something I really did not expect to intrigue me so much. This story will evoke a sense of mystery in just about anyone. To say any more than the above, might spoil the experience.


📷 @myoctopusteacher Instagram

Am I missing anything? Let me know in the comments about some of your favourite outdoor movies on Netflix?

My Top 6 Must-Have Hiking Accessories

If you’re like me, you think that getting outdoors is more interesting than going to the pub and you have zero regret for any money you spent on hiking gear over the years. I suppose it’s okay to enjoy both but I’m just saying – hiking gear is a much better investment. However, there are certain items in my backpack that I recommend more than others and many of these come without a hefty price tag. That’s not to say “cheaper is better” but I appreciate a bargain and don’t believe a price tag is always a reliable indication of quality or practicality. And let’s assume that you already have the shoes and backpack and focus on the hiking accessories that not everyone carries on the trail.

My Top 6 Must-Have Hiking Accessories

1. A Portable Stove for Coffee and Food on the Trail

If you’ve followed any of my social media accounts over the years, you will know that I rarely go hiking or camping without coffee and a hot meal. It just makes sense to do this and the weight is no longer an excuse with the arrival of portable stoves and lightweight pots!

I even use this portable setup on brief forays into the outdoors. For example, I often take a walk to a nearby hill and spend thirty minutes making coffee. When it rains, I have a lightweight tarp at the ready in my backpack and a warm jacket for when it gets cold. I just cannot express how much I enjoy making, eating and drinking something warm on my trips and this really does add some excitement or interest to spending time outdoors.

I bought this nifty little teapot recently but the MSR mini cook set is amazing value and I also have my eyes on this really cool toasted sandwich maker. If you just wanted a small portable stove, take a look at the MSR Pocket Rocket or something similar (and cheaper) like this tiny Rapid stove by GoSystems.

Mini Trail Solo Cook Set

2. A Tick Remover to Be on the Safe Side

Ticks are something we all hate to think about but they inhabit the wild places in Ireland. You will find these pests in moist, shady areas around Ireland. They cling to bushes and tall grass and almost always inhabit the ground level. You might have also noticed these ticks on your family

pet and this is because they enjoy spending time in gardens and next to forests or stone walls. Anyway, you get my point, you will encounter them at some point.

I was plagued by ticks while camping on the Kerry Way (Sorry, Kerry) and many more parts of the country. They are also such an unpleasant thing to find and trust me, you will be thankful to have invested in a tick remover when they come. A tick remover is a very small and simple device that can help remove these ticks quickly and safely. The stainless steel tick remover is effective but this tick remover card works just as well.

Tick Remover

3. A Portable Water Filter to Help Avoid Illness

I’ve been relatively fortunate to avoid injury on most of my hiking trips. However, I did fall ill with giardia in both America and Ireland after drinking contaminated water. I was unable to hike for several days afterward and truly regretted not having filtered my water.

In case you might not know, a lot of fresh water sources in Ireland are relatively safe but there is always a risk involved. There is also no way of knowing when or if a water source is contaminated and drinking this unfiltered water is never worth the risk.

A water filter is also something that you will keep for many years. While some of my past water filters were small, lightweight and cheap, they were often slow or somewhat unreliable. This is why I like the TrailShot filter by MSR which is so small it can fit inside a jacket pocket and can be used to drink directly from a river or bottle of unfiltered water.

Trailshot Filter

4. The 2-Litre Platypus Water Bottle for Sheer Convenience

I don’t like to preach about the environment or the principles of ‘Leave No Trace’ but, that’s not to say I don’t follow or appreciate such guidelines. In fact, I carried the same 2 litre plastic water bottle for much of my walk around Ireland and always bring my re-usable coffee cup to the shop. It’s a way for me to “do my bit for the environment” but the plastic water bottle caused problems on my walk around Ireland and other long distance trips.

It’s a health issue. Plastic water bottles have a tendency to fill up with grime/bacteria and they are simply not designed to be washed and re-used. A platypus water bottle is far more durable and easier to clean on a regular basis. And you need to pay attention to this on a multi-day trip in particular or risk falling ill – as has happened with me in the past.

But that’s just part of the story…

The Platypus water bottle holds 2-litres of water and packs down to a really small size. This means you can easily fit two of these into your backpack and you will certainly need more than two litres of water if you plan to hike or cook in the mountains/wilderness. A platypus is also very useful in hot weather, for they can attach a straw system which will save you reaching for a water bottle every few minutes and hence, keep you hydrated.

Platypus Water Bottle

5. A Head Net for Mosquitos/Midges

I’m not sure whether you know this but midges have the potential to destroy what should be a straightforward hiking trip. It’s true that both mosquitos and midges are unable to keep up while hiking but in midge-country they’re a huge nuisance anytime you stop. They’ve literally ruined more than a few of my wild camping trips and remain the biggest frustration that I can recall from any of my hiking trips in Ireland.

The worst part about it? A mosquito head net is one of the lightest and smallest items you can carry. They are also super cheap and no fancy design or style is necessary for this little life saver. In fact, I now keep one of these nets in the side pocket of each backpack to ensure I can at least stand a chance with these relentless pests in the future.

Mosquito Head Net

And the one I always tell my friends about…

6. A Pair of Adjustable Hiking Poles to Protect from Injury

I wrote an article 3 years ago in which I talked about my experiences with and without trekking poles. I used to think they were unnecessary and looked rather silly. But long story short, I came to the conclusion that trekking poles are 100% necessary for mid-long distance hiking. In fact, I would go as far as to say that the vast majority of my hiking injuries in the past were as a result of not using hiking poles. Whether you want to climb a peak or tackle a section of the Wicklow Way, hiking poles help with your posture, while reducing the amount of wear and tear in terms of your body.

By the way, I also use my hiking poles for putting up a tarp when it rains and for crossing rivers and bogs or any other time I might need some extra balance. But which poles?

I suggest the Leki Journey hiking poles or iff you are looking for a more affordable option the Rock n River twin pack. Either way, these hiking poles are adjustable which also means you can fold them up and pack them away when you’re not using them.

Leki Journey Pole

Some Other Hiking Accessories on My Wishlist

A Sit Mat – I know this seems rather silly to some hikers but I’m getting a little tired of sitting on the ground. It also makes sense that a rest-break should be comfortable and this is not always possible hiking in the mountains and certainly not when it’s raining!

High-Tech Watch – It’s certainly not essential but it would be fantastic to have a watch on which I could check the altitude or temperature.

Vibrant-Colour Rain Cover – A super bright rucksack rain cover is ideal for hiking at night and on stretches of roads in particular.

Waist Bag – You’ll appreciate this one if you carry a camera. The pockets on a backpack are rarely useful for carrying a camera and I’m eager to try this waist bag by Osprey.

Osprey Waist Bag

Aside from the wishlist, I never go hiking or camping without the above items in my backpack. While it’s true that some of these are not essential such as the platypus or portable stove, they certainly make life easier and a hiking trip – more enjoyable.

In praise of Winter Camping

Winter is the perfect time for camping.  Yes, we know that this is a controversial statement and are well aware most people see it as an activity only suited for days when the sun is busy splitting stones and a heat haze rises off the horizon.   If you curtail your camping only to the hazy days of summer, you will miss cold misty mornings, an unshared wilderness, the high starlit skies of winter and the joy of hot drinks cupped in warm hands around the campfire.

Ireland often has ideal hiking weather from late Autumn to Early Spring.  Dry cold days with winter sunshine are perfect for taking to the trails. Camping at the end of a long trek, under a clear starlit sky can be idyllic end to an expedition and although you don’t have to worry about insect bites, dehydration and falling over other hikers, there are other considerations to winter camping  The secrets to successful winter camping is quite simple!  Take the right gear with you and follow some common sensical advice!

The right Winter Camping gear

You can expect to pay a little more for winter weight camping gear.  That pop up festival tent is not going to cut it.  The Outdoor Adventure Store selection of cold weather Trekking Tents gives you plenty of options. To make that escape to the winter hills, you’ll need a lightweight tent that is strong enough to withstand the toughest weather conditions. Explore our range of mountaineering tents from top brands such as MSR, Force10, Snugpak and Vango.  They are all still relatively light for carrying, yet provide great space to weight ratio, plus strength and stability so you can simply enjoy the adventure.   Choose a decent sleeping-bag designed for the cold.  A mummy bag with a hood is ideal.  Don’t try to get away with a summer weight sleeping bag, unless you have also invested in a good liner and some thermal sleeping gear.  There is nothing worse than a lousy night’s sleep after a great day in the outdoors, so put a little thought into the ground mat too.  Investing in the right ground mat will keep a high-quality insulation barrier between you and the cold hard winter ground and reduce the loss of body heat.

Choose the Campsite carefully

You can have a wilderness experience not too far from the general population just in case the weather turns fierce nasty.  Camping in winter in Ireland is all about the wind chill.  Pitch your tent using natural windbreaks such as tall hedges and trees and always face away from the prevailing wind.  If there is a bit of a slope on the ground, then face the front of the tent downward as cold air will flow into a tent facing uphill.  Surprisingly enough, a valley may be a colder spot in the winter. If you fancy beach camping, keep an eye on incoming tides and perhaps pick a more inland spot for your winter outdoor adventure. Choose campsites that allow fires and/or use a safe fire pit. This amazing Irish hand-made Midos phoenix fire is perfect for toasting your toes and the ubiquitous campfire marshmallows!  Pitch your tent in a safe place and not too far off the beaten track.  You can have a wilderness experience not too far from the general population, for safety and security.

Dress for the weather

Layers are the secret to keeping warm on the winter trail.  Layers on the body. Gloves on the hands. Warm dry boots and socks.  A snazzy hat and you are all set.  Check out our great range of jackets which keep wind, rain and misery out!and don’t forget that a thermal layer underneath, or a layer of thermals underneath, will keep you cosy dry and comfortable on the trail. It is easy to forget to hydrate when camping in the winter, so be sure to drink plenty of water as you would in the summer months. Don’t forget the torch, stove and lots of food to keep you going.

Enjoying the best spots without anyone else around

Winter camping means bagging all the best camping sites, with no tourists, day campers, bugs or midges to bother you.  This is definitely because people will think you crazy. Having said that, off season camping is enjoying an increase in popularity and the appeal of peeking out of a tent at snow-capped mountains and frost covered fields is on the rise.  It is still likely that the wild spaces will be all yours at this time of year.  Enjoy that rare solitude. Plan ahead, bring the right gear and leave nothing behind but good vibes. 

What You Should Know About Wild Camping in Winter

I had some extremely cold nights on the Pacific Crest Trail a few years ago during which myself and three hikers found it difficult to sleep. We had decent equipment at the time but not enough to feel comfortable in the snow-capped peaks of Washington.

But how might this cold and sleepless night have been avoided?

If I had a warm sleeping bag liner, there would have been no issue and I ended up relying on wearing several layers of clothing in my sleeping bag. And while this kept me safe, it just wasn’t quite warm enough and certainly not comfortable.

Wild Camping in Winter: From Stressed Out to Searching for Solitude

I go wild camping to have a good time and add a little excitement to my week. But I also want a stress-free time and a good night of sleep is also near the top of my list.

With this in mind, there were times early on when I really didn’t enjoy wild camping and felt stressed, worried or uncomfortable. Here’s a few reasons why:

– Taking a tent or sleeping bag that was unsuitable for wild camping in winter.

– Wearing insufficient rain gear.

– Having no weather-proof system to keep my gear safe and dry.

– Leaving my stove behind and missing out on the pleasure of a hot meal!

I will talk about some of these in a moment but for now, I wanted to make it clear that having the right gear and preparation is most important for wild camping in winter. In fact, once I figured this part out, I fell in love with wild camping at a time of year when the trails were so quiet and when the frost made me fully appreciate my morning coffee or the warmth of my sleeping bag as I sat up in the tent doorway.

You see, I should also add that I absolutely love wild camping in Winter!

Some Things to Keep in Mind for Wild Camping in Winter

Pick Somewhere that’s Easy to Reach and Return

I went wild camping in Wicklow some years ago and decided to trek up over Tonelagee and down to Glenmacnass River. It felt like a nice workout upon reaching the river but after a night of heavy rain, the way back took twice as long. In fact, it took so long that I was miserably wet and cold and near ended up hiking in the dark.

Moral of the story? Remember daylight is short through Winter and the unpredictable weather can turn what seems like an easy trek into a proper slog.

I suggest you pick a local marked trail with which you are familiar and then plan to wild camp just off that particular trail. If the trail is maintained (which is should be), you can rest assured that getting home should require the same effort as getting in there.

facebook.com/derekcullenoutdoors

Invest in a Sleeping Bag Liner

It wasn’t just the Pacific Crest Trail when I was left yearning for a sleeping bag liner. This has also happened on my wild camping trips through Africa and even here in Ireland. It’s true that my choice of sleeping bag wasn’t always right but most times in which I was cold, the weather had taken me by surprise. A sleeping bag liner is not only a lightweight item to carry but also surprisingly effective and just as useful for trips during the warmer months or when sleeping in hostels on the Camino de Santiago.

Use Separate Dry Bags for Your Spare Clothes and Belongings

If you plan to hike in especially wet weather, it’s not enough to expect a waterproof cover to protect your backpack. You will need one, of course, but a backpack cover is only useful for reducing the exposure of your bag’s contents to the elements. In reality, rainwater will always find a way into your backpack during a heavy downpour and this will certainly happen any time you need to open up the bag. You can protect these contents by using a separate dry bag for clothing, electronics etc.

Make Sure You Take Warm Gear and Proper Rain Jacket/Pants

It’s essential to have dry gear at the end of every day in the wild. This includes your jacket, clothing and sleep system. It should go without saying that you can’t keep warm and dry in wet conditions without a proper rain-jacket and I always discourage relying on a poncho of any kind to do the job.

You also can’t sleep in wet socks and I recommend taking long-johns and a having a warm fleece on hand for the evenings. Believe it or not, I will often pack my down-jacket away somewhere dry so that I have an especially warm layer to wear in the evening. Waterproof trousers are another item that some hikers forget and you absolutely need these for wild camping in Ireland or anywhere for that matter.

Either way, safety is the main priority for wild camping in winter and nothing is more important than going to bed in a safe, dry and warm environment.

Try to Develop a System for Staying Dry

Even if rain is not forecast, you should still have a strategy for keeping your gear dry. The weather is just so unpredictable in Ireland and I can’t count the number of times I got caught in an unexpected downpour. Also, there is always the risk of stumbling head-first into a creek in Donegal which is something I may have done in the past. Afterwards, I had to return to a B&B in town because my sleeping bag was so wet.

facebook.com/derekcullenoutdoors

Anyway, I recommend having a system in which bags are kept inside other bags and then also protected by a backpack cover. Never leave your backpack open or sitting in the rain and put snacks in your pocket before leaving shelter so you don’t need to open your backpack again. Finally, don’t wait for conditions to deteriorate before putting on your rain jacket or waterproof pants and get ready at the first sign of rain.

Here’s a few more tips for wild camping in winter:

– Keep your backpack inside the tent at night (not in the porch area)

– Keep your shoes inside the tent (not in the porch area)

– Keep your tent inside the backpack (Not strapped to the outside)

– Put your sleeping bag inside a plastic bag/bin liner at the very least.

– Avoid having your sleeping bag or clothes touching off the sides of the backpack.

Don’t Underestimate the Power of Warm Meals and Drinks

If the wind, rain or cold feels like too much, I might not be in the mood for taking out the stove. However, I always do because nothing compares to a warm drink or meal in these conditions. If you worry about keeping the stove lit at such times, think about buying the MSR Windburner but either way – please do take the stove with you!

I also say this because I firmly believe that cooking, eating and drinking are central to the enjoyment that comes with wild camping. I don’t particularly enjoy cooking but will humour myself for the sake of the pleasure that comes from a warm meal/drink.

And Some of these Last Minute Tips for Wild Camping in Winter

– Buy a reliable headlamp so you can put your hands in your pockets.

– Wear a beanie hat to sleep so you don’t wake up with a cold head!

– Take a flask of hot water if you don’t want to use a stove.

– Cooking in cold weather isn’t the most pleasant – Buy ready-made meals.

– Get up and moving early to keep warm and have cereal bars for breakfast.

– Put your phone in a ziploc bag in your pocket.

– Put your pride away and wear long-johns the entire time!

– Bring a book for entertainment and leave streaming for when you’re back home.

Final Thoughts

Wild camping in winter is all about preparation. While I don’t think it’s wise to feel overly stressed, I do think it’s important to be especially careful at this time of year. If I was to re-iterate one thing in this piece it would be to stay as local as possible – especially if you don’t have much wild camping experience. This might mean camping on a nearby hill instead of the mountains and sticking to well-marked trails at the very least. Otherwise, if you pay close attention to what you pack and make every effort to stay dry and warm at all times, wild camping in Winter should be a safe, comfortable and enjoyable experience.