Layering Up: How to Maximize Comfort and Warmth with Fleeces and Rain Jackets

Layering isn’t just a fashion statement. In cold, wet conditions, it’s a survival technique. Understanding the art of layering is paramount if you want to maximize comfort and warmth. Enter fleeces and rain jackets. Traditionally, they’ve shielded us from chilly breezes and unexpected downpours. Yet, there’s more beneath the surface. Delving deeper, we’ll uncover how these layers work symbiotically. We’ll also explore how to optimize their benefits. So, if you’ve ever shivered despite wearing your thickest sweater or felt clammy under a raincoat, you’re in the right place. Let’s embark on this cozy journey together. 

The Science of Layering 

Dressing for warmth isn’t about bulk; it’s about strategy. Layers trap air, and trapped air acts as an insulator. Interestingly, our body warms this captured air, providing a personalized heating system. Meanwhile, moisture-wicking is vital. Sweat, when trapped, can cool the body rapidly. Hence, the innermost layer should whisk moisture away, maintaining a dry feel. 

Furthermore, each subsequent layer amplifies this effect. But it’s not just about warmth. Layering also allows flexibility. Shedding or adding layers is a cinch as temperatures fluctuate or activity intensifies. In essence, it’s the harmony of these layers that ensures optimal comfort. 
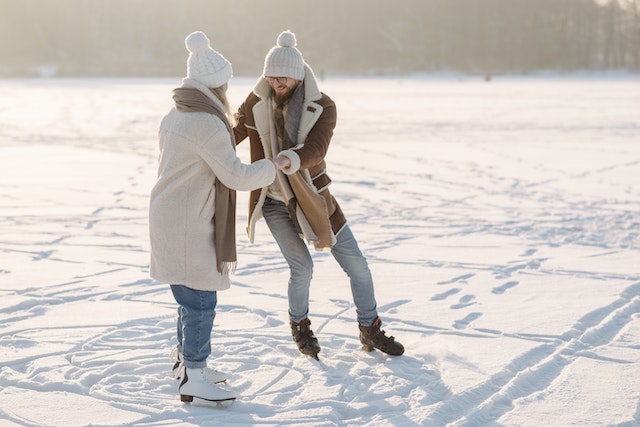
couple in fleece jackets enjoying ice skating
For warm days, microfleece is great, while heavyweight offers additional warmth on chilly evenings. 

The Basics of Fleece: More than Just a Cozy Material 

Fleece, for many, evokes images of snug evenings by the fire. Yet, there’s a rich history behind this warm fabric. Initially, fleece emerged as a game-changer in outdoor apparel, a dynamic shift from traditional materials. With time, it evolved, offering varieties such as microfleece, midweight, and heavyweight. Each variant serves a unique purpose. For instance, microfleece is ideal for mild days, while heavyweight provides added warmth on frigid nights. Notably, fleeces are more than mere insulation. Their breathability and moisture-wicking properties set them apart. 

However, it’s not all rosy. A downside? Fleece can pill over time, losing its sleek appearance. Nonetheless, considering its sheer comfort and functionality, many view these minor imperfections as a small price to pay. Ultimately, embracing fleece means appreciating its depth, versatility, and transformative role in keeping adventurers warm. 

The Role of Rain Jackets in a Layering System 

Rain jackets play more than a cameo role in layering. They shield us from wetness at their core, but there’s nuance here. First off, understanding the difference between water-resistant and waterproof jackets is pivotal. While the former offers protection against drizzles, the latter is your fortress against torrential downpours. Besides, breathability is equally crucial. Why? Because an impenetrable jacket can turn into a sauna, negating our efforts to maximize comfort and warmth. 

Consequently, features like pit zips, adjustable hoods, and cinch cords come into the limelight. They offer adaptability, ensuring you can face Mother Nature’s every whim. Moreover, a well-chosen rain jacket complements the layers beneath, allowing them to perform optimally. In sum, it’s not just about staying dry; it’s about crafting a harmonious ensemble that tackles cold and wet challenges head-on. 
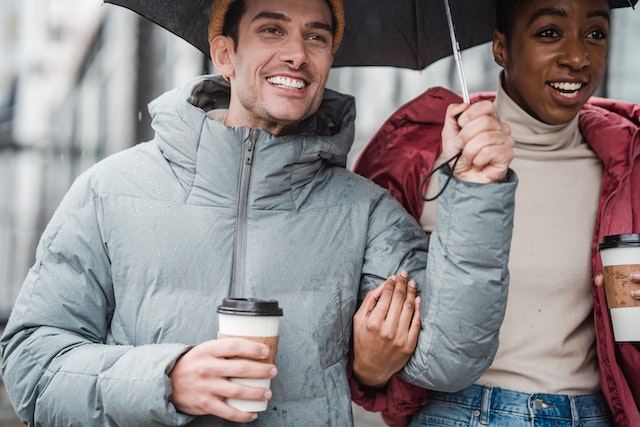
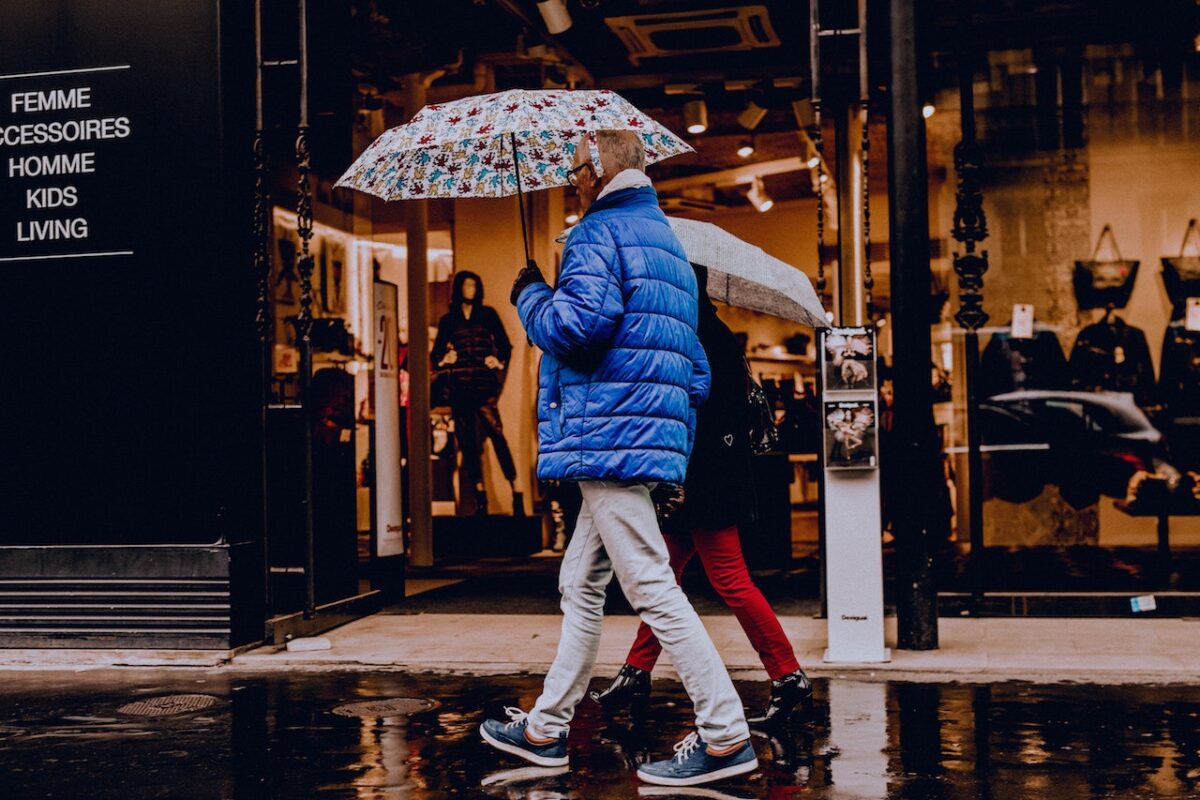
couple walking with an umbrella on a rainy day
A well-chosen rain jacket maximizes comfort and warmth. 

Step by Step: Building the Perfect Layering System for Cold and Wet Weather 

Crafting an impeccable layering system isn’t magic; it’s methodical. Firstly, commence with the base layer. Ideally made from synthetic materials or merino wool, this foundational piece wicks away sweat. Next, introduce your insulating fleece. Depending on the chill, you might opt for a lightweight version or its bulkier counterpart. Sometimes, layering two mid-weights achieves desired warmth without added bulk. Thirdly, crown your ensemble with a rain jacket. Ensure it fits comfortably over preceding layers, allowing freedom of movement. As conditions shift or as you heat up, adjust. Shed a layer, unzip a vent. In essence, the secret lies in adaptability. You can brave rain and cold through these steps, ensuring your outdoor adventures remain exhilarating, not teeth-chattering. 

Care and Maintenance 

Proper care can extend the life of your outdoor gear. When washing, always follow the label’s guidance. Generally, gentle detergents are best. Moreover, avoid fabric softeners; they can hinder performance. Post-wash, resist the urge to wring out fleeces. Instead, lay them flat to dry. As for rain jackets, periodically reproof them to retain their water repellency. When packing up your winter clothes for storage, ensure they’re completely dry. That prevents mold. Store in a cool, dry place. If minor damages arise, timely repairs can save the day. Nurturing your layers today ensures they’re ready for tomorrow’s adventures. 

Tips and Tricks for Maximizing Comfort 

Are you navigating the world of layering? Here are some nuggets of wisdom. First, prioritize fit. Overly tight layers restrict movement and trap moisture. Conversely, excessively loose ones let in the cold. Striking balance is key. Secondly, remember breathability. While insulation keeps you warm, ventilation ensures you don’t overheat. Thirdly, be ready to adapt. Temperatures swing, activities vary, and so should your layers. Don’t hesitate to adjust on the go. Also, consider zippers; they’re quick temperature regulators. Lastly, keep an eye on sweating. Wet skin cools down rapidly, diminishing warmth. 

 jackets on a clothes rack
As the weather changes and your activities change, so should your layering. 

So, the mantra? Stay dry, stay flexible. With these guidelines, you’re well on your way to mastering the art of comfortable layering. Additionally, don’t forget the importance of the material. Fabrics like merino wool or certain synthetics can offer insulation and moisture-wicking capabilities. And when transitioning between different activities or settings, always pack an extra layer; it provides options and ensures you’re prepared for unexpected weather or activity level shifts. 

Conclusion on How to Maximize Comfort and Warmth 

In wrapping up, understanding layering is transformative. It’s not just piling on clothes. Instead, it’s a curated process, a journey toward achieving the ideal balance between protection and breathability. We’ve delved into the nuances of fleeces, rain jackets, and the art of combining them. These insights, when applied, can significantly maximize comfort and warmth, especially in the unpredictable outdoors. Thus, it’s not merely about the individual pieces but the symphony they create together. So, as you venture out, armed with this knowledge, embrace the elements confidently. After all, with the right layers, the world is truly your oyster. 

The Essential Safety Tips for Outdoor Activities

Are you ready to embark on exciting outdoor adventures? Before you hit the trails or dive into new experiences, it’s essential to equip yourself with the right knowledge and precautions. In this article, we’ll explore a comprehensive guide filled with invaluable safety tips for outdoor activities. We’ve got you covered, from researching and planning to packing the right gear. Discover how to stay hydrated, navigate unfamiliar terrains, and ensure group safety. We’ll also delve into environmental awareness, recognizing natural hazards, and emergency preparedness. Get ready to make the most of your outdoor pursuits while staying safe and having a blast! 

Researching and Planning 

Before embarking on any outdoor adventure, conducting thorough research and meticulous planning is crucial. Start by selecting an activity that suits your skill level and interests. Once you’ve chosen, dive into researching the location, identifying potential risks, and understanding local regulations. Check weather forecasts and consider season-specific precautions to ensure a safe journey. Transitioning into the planning phase, make sure to pack appropriate clothing for protection against varying weather conditions and terrains. Additionally, gather all essential equipment and tools required for your chosen activity, such as hiking boots, helmets, or ropes. And don’t forget to carry a well-stocked first aid kit for any unexpected situations that may arise. 

A men in a blue leather jacket and brown backpack hiking.
Having the appropriate safety equipment is a crucial safety tip for outdoor activities. 

Essential Safety Gear 

When it comes to outdoor activities, having the right safety gear is paramount. Start by ensuring you’ve dressed appropriately for the adventure ahead. Select clothing that suits the weather and terrain, from waterproof jackets to sturdy footwear. 

Additionally, pack essential equipment like helmets, harnesses, or life jackets, depending on the activity. Don’t forget to carry a well-stocked first aid kit to handle any minor injuries that may occur. As you embark on your journey, remember to pack and move your camping gear with care to prevent any damage. And most importantly, take your gear with you – keeping it close ensures you’re prepared for any situation. 

Stay Hydrated and Nourished 

Staying hydrated and nourished is vital for your safety and enjoyment during outdoor activities. Make sure to carry ample water to keep yourself hydrated throughout the journey. Pack nutritious snacks and meals that provide sustained energy, such as granola bars, trail mix, and fruits. 

Remember to take regular breaks to refuel and replenish your energy levels. Hydration and nutrition are key to maintaining physical endurance and mental alertness. So, don’t overlook this aspect of safety tips for outdoor activities. Treat yourself to a well-balanced adventure by keeping your body fueled and hydrated throughout the experience. 

A woman looking at the map.
Become familiar with the region by using maps, GPS navigation, or guidebooks. 

Navigation and Orientation 

When it comes to navigation and orientation during outdoor activities, a few key tips can ensure a smooth journey. Start by familiarizing yourself with the area using maps, GPS devices, or guidebooks. Take note of landmarks or waypoints along the route to help you stay on track. A compass can be a handy tool for direction, so learn how to use one effectively. 

Remember to communicate and coordinate with your group to avoid getting separated. And if you encounter any challenging terrains or unfamiliar paths, don’t hesitate to seek guidance from experienced hikers or park rangers. With these navigation and orientation tips in mind, you’ll navigate the great outdoors like a pro. 

Safety in Groups 

Exploring the outdoors in a group adds an extra layer of safety and fun to your adventure. Establish clear communication and safety protocols within your group before setting off. Use walkie-talkies or mobile phones to stay connected. Keep an eye out for each other, especially in challenging terrains or unfamiliar areas. If someone falls behind, slow down or take breaks to regroup. Encourage each other and offer assistance when needed. 

Remember, the buddy system works wonders. Share responsibilities and distribute necessary equipment among the group members. You’ll create unforgettable memories with teamwork and camaraderie while ensuring everyone’s safety during outdoor activities. 

People zip lining above water.
Keep an eye out for one another, especially in challenging conditions or uncharted territory. 

Environmental Awareness 

As outdoor enthusiasts, it’s crucial to cultivate environmental awareness and minimize our impact on nature. Respect the wildlife and their habitats. If you spot something interesting, observe it from a safe distance. Under no circmustances should you feed or disturb them. Practice Leave No Trace principles by disposing of waste properly and carrying out any litter you find. Follow local rules and regulations to preserve the natural beauty of the area. Consider volunteering for conservation projects or joining clean-up initiatives to give back to the environment. By being mindful of our actions and fostering a love for nature, we can ensure that future generations can enjoy the beauty of the outdoors just as we do. 

Emergency Situations 

While we hope for smooth outdoor adventures, preparing for emergencies is crucial. Familiarize yourself with signaling techniques, such as using a whistle, mirror, or phone to attract attention. Learn basic first aid skills to address common injuries or emergencies that may occur. Create an emergency action plan with your group and discuss how to respond to unexpected situations. Stay calm and assess the situation before taking any action. Remember, safety is paramount, so don’t hesitate to call for help if needed. By being proactive and knowledgeable, you’ll be equipped to handle emergencies and ensure the well-being of yourself and your fellow adventurers. 

Conclusion 

Incorporating safety tips for outdoor activities is essential to ensure a memorable and enjoyable experience. By conducting thorough research, planning your adventure, and packing the necessary safety gear, you’re setting yourself up for success. Stay hydrated and nourished, navigate with confidence, and prioritize group safety. Let’s not forget the importance of environmental awareness and preparedness for emergencies. Safety should always be a top priority, but that doesn’t mean you can’t have fun and create amazing memories along the way. So go out, explore the great outdoors, and embrace the adventure with caution and excitement. Happy and safe trails! 

Photos used:
https://www.pexels.com/photo/woman-standing-on-green-grass-547116/
https://www.pexels.com/photo/men-s-blue-leather-jacket-and-brown-backpack-868097/
https://www.pexels.com/photo/woman-looking-at-the-map-3935702/
https://www.pexels.com/photo/people-ziplining-above-water-9223080/

The Best Outdoor Cooking Gear for Your Next Camping Trip

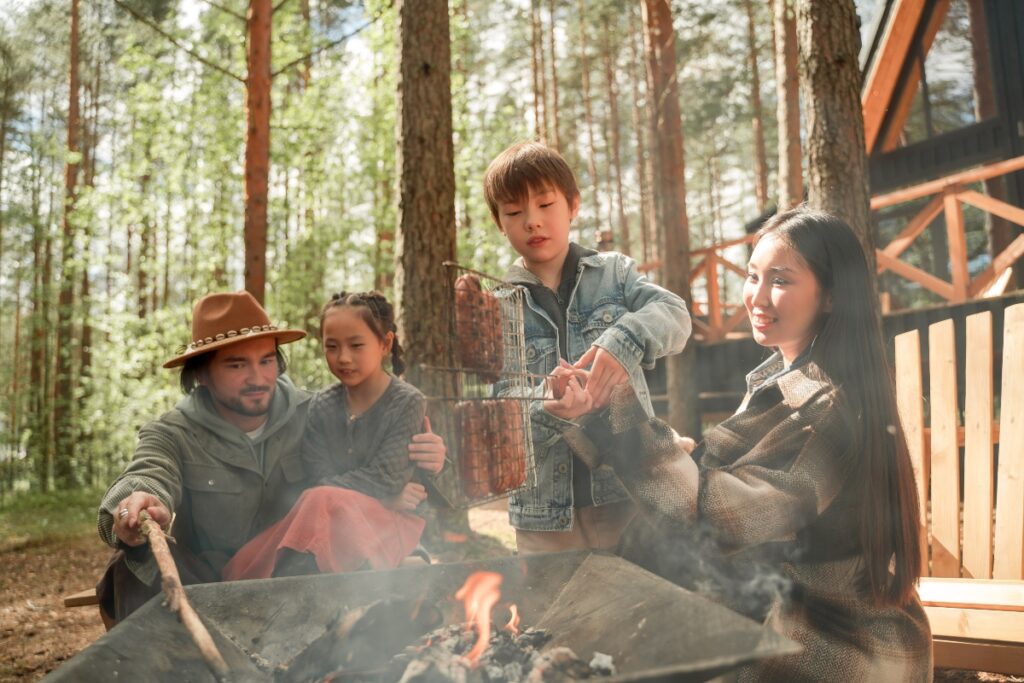
 A family preparing sausages on a bonfire.

Traditional camp meals are straightforward. Typically, people picture hot dogs and burgers that you can prepare over a small fire. But in actuality, most of what you prepare at home may be prepared at the campsite. There is only one catch: you must have the proper camping cooking equipment. Utilizing the extra-special ingredients of woodsmoke, birdsong, and fresh air, you may prepare meals as creative and delicious as those you enjoy at home with the correct outdoor cooking equipment. With a few tweaks to your camping equipment, even campsite staples like grilled hotdogs and pot noodles can improve—and there will still be plenty of room in the car for the tent, sleeping bags, and charcoal. That’s why we at Outdoor Adventure Store would like to share our advice on the best outdoor cooking gear. Hopefully, with our tips, you can become the most popular person on your camping gear.

A camp stove is a must-have for any camping trip

A camping stove is one of the best outdoor cooking gear you can get. A camp stove is a portable cooking device explicitly created for cooking outdoors while camping, trekking, or having a picnic. These stoves are designed to resist the many weather conditions found in the wild and typically run on propane, butane, or other fuels. Different styles and sizes of camp stoves are available, from compact backpacking stoves to larger family-size stoves with numerous burners. Most camping stoves have adjustable flame control, automatic ignition, and wind protection to make cooking simple and secure. They are ideal for outdoor activities because their design allows them to be portable and small. They are simple to transport and store in a backpack or suitcase; some models include collapsible legs.

Using a camp stove is relatively simple, and it may be a terrific way to warm up food, make coffee, or boil water while you’re out enjoying the great outdoors. However, adhering to the manufacturer’s recommendations and ensuring safe usage is crucial to prevent mishaps or unnecessary risks. That’s why your camping gear needs to be carried properly. Backpacks designed for camping usually have straps and compartments perfect for carrying stoves, fuel cans, and other camping gear. Using this backpack, you can safely carry your equipment. After the hike, you can put away your gear in a storage unit and keep it safe until your next adventure.

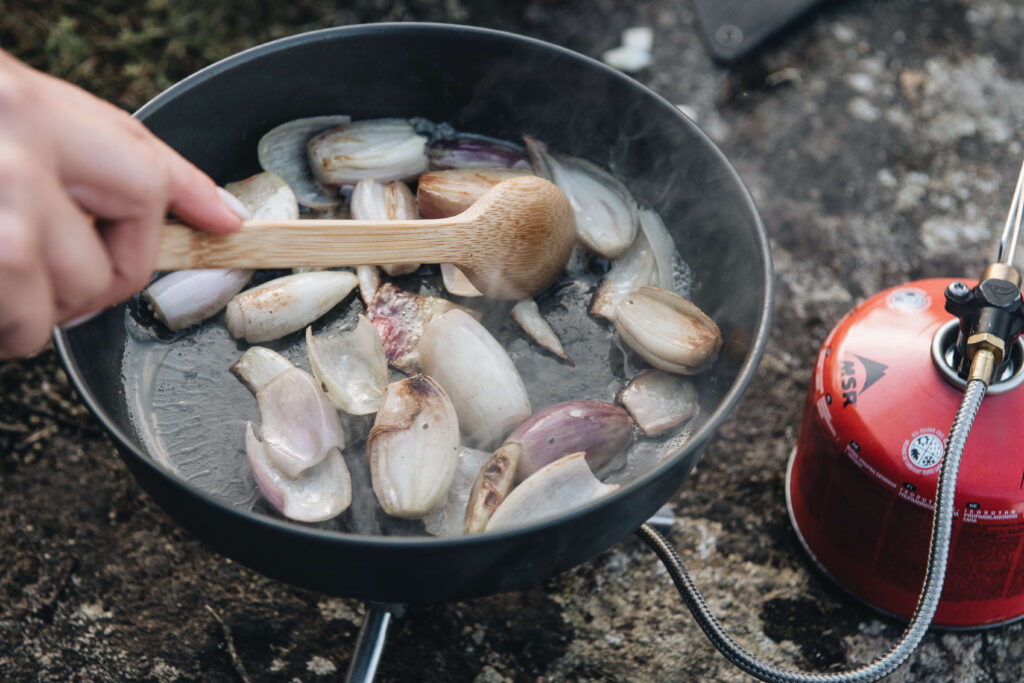
 A frying pan on an MSR portable stove.
portable stoves are one of the best outdoor cooking gear because they are waterproof and easy to ignite.

A Dutch oven is perfect for group camping

A Dutch oven is a large cooking pot of cast iron or aluminium. It is generally employed for outdoor cooking, especially when camping with a larger group. It has a snug-fitting lid that aids in keeping heat and moisture inside. Because of this property, it is ideal for slow-cooking stews, roasts, chilli, and other foods over an open flame or charcoal. Dutch ovens come in various sizes and shapes, and most have tripod legs so they can be set upright over hot coals or charcoal for even heating. They might also have a handle on the lid, making lifting it off and checking your food simpler. Dutch ovens would not be ideal for solo camping or short overnight camping as they can be quite heavy.

You can prepare the food in a Dutch oven like in a traditional kitchen before putting it inside the oven. Then, to heat the oven’s lid, add some hot coals or charcoal on top of it and arrange them in a circle around the oven. A Dutch oven’s cast-iron construction effectively and evenly distributes heat, making it ideal for slow-cooking foods that demand constant heat. Due to the uniformity of the heat distribution, it’s also excellent for baking pies, cakes, and bread. When cleaning, use hot water, light soap, and a non-abrasive scrubber to wash the Dutch oven. Avoid using abrasive cleaners, steel wool, or harsh detergents, as these can harm the oven’s seasoning.

Grilling equipment is considered the best outdoor cooking gear

Grilling equipment is essential for outdoor cooking activities such as camping, picnics, or backyard BBQs. Outdoor cooking is a breeze with a portable barbecue. From little hibachi-style grills to bigger gas or charcoal grills with many burners, these grills are available in various sizes and designs. In addition, you will require a variety of utensils to make and serve your grilled meals. Tongs, spatulas, grill brushes, kebab skewers, and grills are essential. Depending on your preferences, your grill might be charcoal or gas. While gas grills utilize propane or another fuel, charcoal grills use charcoal briquettes to heat the cooking surface.

Be aware that temperature management is essential to ensure your food cooks evenly when grilling. You can check the meal’s internal temperature with an instant-read thermometer, also available with many grills. These are some of the essential grilling tools you might want to think about. For the ultimate grilling experience, selecting equipment that depends on your needs and preferences is critical.

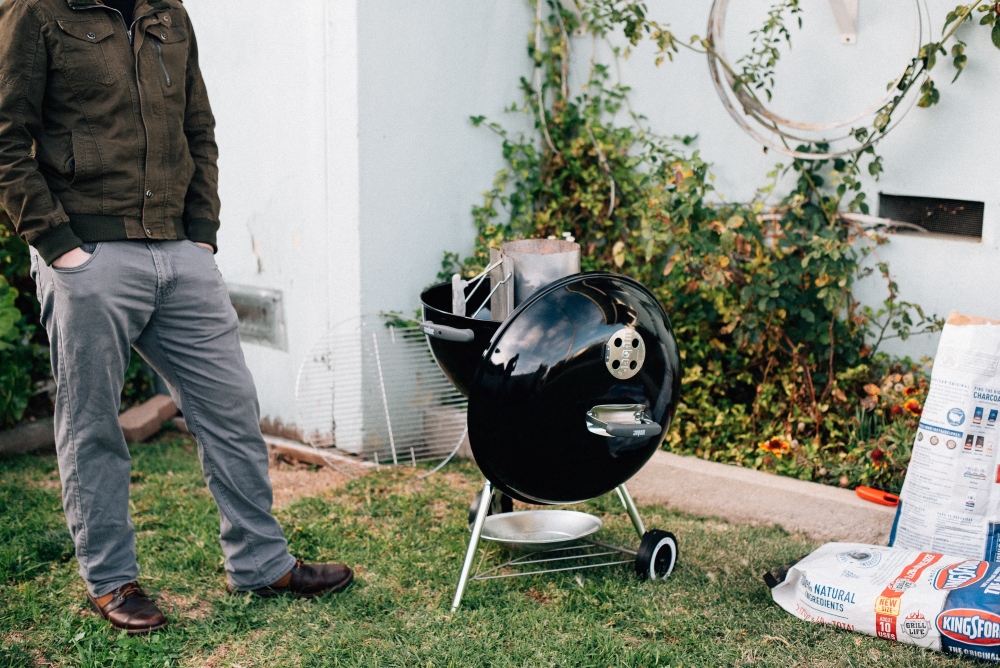
A man standing next to a black portable grill.
These grills are much easier to clean after your meal

A cast iron skillet is a must-have for any camping trip

The robust and adaptable cast iron skillet is the ideal cooking tool for outdoor cooking when camping. These cast iron skillets are great for outdoor cooking since they can endure high heat and heavy use. Cast iron skillets are excellent for frying or searing foods because they hold heat, one of their most important advantages. They can also be used on a stove or over an open flame, giving outdoor cooking more versatility. Cast iron skillets are helpful because of their non-stick surface, which gets better with use and seasoning with oil. You can use a cast iron skillet to prepare many dishes.

It would be best never to use soap on your cast iron skillet when cleaning it. Instead, wash the skillet with hot water and a stiff brush. After that, season it and prevent rust by slathering it with cooking oil and heating it briefly over high heat.

Having a camping trip doesn’t mean you can’t have the best food possible. In this article, we wanted to share our advice on the best outdoor cooking gear.

Meta: Having a camping trip doesn’t mean you can’t have the best food possible. This article shares our advice on the best outdoor cooking gear.

How to Prepare Your Kids for Their First Camping Adventure

Photo of pitched dome tents overlooking mountain ranges.

Some of us have been going on camping trips ever since we were little kids. We only had a few responsibilities while others took care of us. The first time you take your young children camping, you quickly learn how much work is involved in getting ready. This guide will help you prepare your kids for their first camping trip, including where to stay, what to eat, and what to bring along.

Camping is a different dimension than the one you remember when you were a kid

Most families use camping as a way to create fond memories for generations. Children’s camping trips are the kind of memories that can be passed down through generations.


But camping with kids is an entirely different experience than your childhood camping trip. As we age, we appreciate the effort that goes into our youth’s seemingly uncomplicated family camping trips.

Some parents are so overwhelmed with the responsibilities of camping with kids that they give up before even setting up a tent. Parents often ask themselves many “What if” questions, such as:

  • Kids can’t sleep
  • They come across a wild animal
  • Hate camping food
  • They are not having fun

Following these guidelines will ensure that your trip goes smoothly. When everything is planned and prepared, you can give all your attention to your children without worrying about whether or not you forgot something. If you want to take camping with your family to a higher level, include the children in the preparations. This way, you inspire children to appreciate the outdoors and look forward to their next trip.

A family roasting marshmallows by the campfire.
Nothing is better than family stories before bedtime by a warm campfire

How to choose the best possible campground?

Before leaving, you should choose a campground and a spot for your family camping trip. Remember to prepare your kids for their first camping by picking a campground oriented for families and a suitable campsite.


After settling on a campground, it’s time to choose a specific spot. Throughout your visit, you’ll be resting there. If you want to have a great time camping with your family, you should be as selective about your campground as you would be when choosing a new place to live. For simplicity’s sake, you should ensure that the campsite is close to the bathroom; in case of night departures. Additionally, try not to camp too close to the water for the safety of your children.

Your first night at camp

A million possible scenarios run through parents’ minds when planning a family camping trip. But for every problem, there is a solution. And, as we mentioned earlier, things will be challenging. But that’s what makes it an adventure. It’s essential to pack the camping gear and bring your gear with you, and the rest of that you can compensate in another way. The necessary equipment includes sleeping bags, as well as pads, blankets, and sheets.

Men talking by a campfire about how to prepare your kids for their first camping.
Camping does not represent constant care for children; everyone should enjoy it.

Choose a tent that fits the size of your family

Tents are generally made according to how many people they receive. If you bring a tent for two people, it will be difficult for you. As an investment, you can buy a tent for three or even four people so that they can enjoy even greater comfort. Of course, remember things like sleeping pads, mattresses, or portable cribs.

Choose a camping bag according to the weather conditions in which you are camping

It is essential to choose the right camping bag. This means you choose a bag that suits the weather conditions you are camping in. For example, you will not take a bag for winter in sub-zero temperatures if you are camping in the middle of summer. Children can be nervous because of the heat, and if their sleep is disturbed, the nightmare begins for you.

When it comes to sleep, don’t be strict with your children. Let them stay up later than usual. Nothing is better than family stories before bedtime in front of a warm campfire.

Tent with an opened side looking at waterfalls.
If you want to prepare your kids for their first camping, pick a good camping tent and a suitable bag.

Tips for preparing and enjoying meals while camping

Camp meals are often simple and back to basics. Children usually love the simplest options. Don’t worry about what the child will want to eat on the camping trip. After an exhausting day where they run and have activities in nature, they will not be very picky when tired. If you want to play it safe, you can create meals ahead of time at home, so all you do at the camp is reheat pre-prepared meals.

Some of the most common meals you can take are sandwiches, meals you have already prepared, and snacks. When camping, children are always hungry. Pack healthy, high-energy snacks. Remember to bring water. Plenty of water. Due to numerous activities throughout the day, children will always be thirsty.

You can have a barbecue to give them an authentic experience during camping. This means you can arrange pieces of meat on sticks and place them on the fire. These meals are prepared quickly, and children love to lick their fingers after them.

It’s not a nightmare if you have to prepare your kids for their first camping

If you and the kids need a break, go camping and have fun. Since you made a plan, packed all your things, and showed up on time, you can enjoy it. Take in the crisp air, breathtaking views, and smokey smell of a bonfire as it drifts through the woods. It’s time for youngsters to use nature as their playground, school, and soccer field.

Join them in discovering the wonders of nature and spending time together outdoors. Simply said, camping is for everyone, not just the young. Everyone in the family can enjoy camping. No, it won’t be as carefree as when you were a child. Overall, if you follow up on how to prepare your kids for their first camping and put in the necessary preparations, you shouldn’t have any major concerns. To put it simply, the greatest is yet to come.

Beginner’s Equipment for the Best Trail Running Experience

A person who is trail running

Trail running is a fantastic way to kick your running and fitness up a notch. It combines a great healthy activity and the ability to experience the outdoors. Understandably, it can be a bit daunting when you’re just starting, especially when surrounded by experienced trail runners with expensive high-grade gear. However, there is no need to stall. Much beginner-level equipment is available to ensure you’ll have the best trail running experience possible. The minimum gear requirement is shallow, and it’s possible to have a great start with only a tiny investment. Let’s go through a list of some of the most crucial equipment that every beginner needs to have a confident start to their trail running career.

Running Clothing

The first thing any beginner needs to understand is the importance of proper trail running apparel. It doesn’t stop at what kind of clothes you will wear. You should also have a deeper understanding of which fabrics and materials are best for this experience.

One of the first items on your list when shopping for your first trail run should be a set of clothing made from moisture-wicking fabrics. This type of fabric achieves two goals. Firstly, it pushes any moisture or sweat to the outer layers of the fabric. And secondly, it dries quickly. Generally, it would be best if each part of your outfit was made from this material. That would include socks, running shorts, underwear, T-shirts, etc.

Next, you should consider what weather you should expect on your track. If you’re expecting wind and possibly light rain, the best option would be to bring a windbreaker or lightweight jacket. However, if you’re going on a winter outdoor adventure, packing on a few extra layers and a more heavyweight jacket will help you ensure your safety and avoid getting frostbite during the run. In addition to all of this, you should also consider investing in some grippier shoes.

Pro Tips

  1. Remember to wear layers- This way, if your day starts chilly, you can protect yourself from the cold. But, once the sun starts shining and your heart rate rises, you can take off any clothing items you don’t need.
  2. Check your closet – See if you already have any of these things in your home to stay on budget.

The right food and supplements

As fun as it is, trail running can be pretty intense and taxing on the body. That is why proper nutrition is imperative for everyone, beginner and expert alike. Your best bet is to create a healthy mix of specialized supplements (prep and post-running recovery) and nutritional snacks/lunches.

Generally, it’s best to stick to things that are easy to carry, like energy bars, drinks, and gels. You can also make yourself a protein shake if you’re running longer. When it comes to food, you should bring calorically dense foods, a.k.a. “trail running superfoods.” Some examples include nut butter sandwiches, trail mix, granola bars, dried fruits, etc.

A bowl of trail mix
Trail mix is the perfect snack to ensure the best trail running experience.

Eating schedule

An eating schedule is a homemade piece of “equipment” that every beginner can benefit from. That is especially important for long runs that may take a full day or weekend (ex., organized trail running camping trips). Since it’s common for beginners to struggle with timing food intake, writing down your snack break timetable in a small notebook is a great idea. Eventually, you’ll learn the ins and outs of eating during a trail run, and this item will become obsolete. But it’s great to have the first few times.

Your general plan should be to avoid food breaks for the run’s first part (unless necessary). In the best-case scenario, your first break should be in the middle of the trail, and you can snack intermittently toward the end. You can calculate how much you should eat and how often relative to the length of the second half of the trail. Additionally, if part of your trail is uphill, you should avoid eating before you’re done with that part to avoid any gastric problems.

Hydration equipment

No matter what physical activity you’re doing, staying hydrated is essential. But this becomes even more important when it comes to trail running (or any sort of long-distance running, for that matter). To best explain what kind of hydration gear you need to achieve the best trail running experience possible, we’ll separate it into three levels:

  1. Short runs – A large water bottle or waist pack should be enough for short runs;
  2. Long trails – If a longer trail is in your plans, you’ll need something more substantial than a water bottle. Consider a trail running hydration pack or vest;
  3. Long excursions – If you plan on running a full day, your best bet is to bring a hydration backpack. It’ll offer double service since it’ll also give you additional clothing, food, and other storage equipment.

Account for every part of the run

Trail running starts even before you step on the trail of your choice. To avoid any unpleasant surprises, it’s also essential to prepare your body by doing dynamic warm-ups for running. You’ll only be able to withstand the whole run if you get properly warmed up before it. All of this is to say that you should consider this pre-run workout session when deciding how much water you’ll need to bring.

Sun protection

That is something that beginners commonly overlook. Since a trail run guarantees prolonged sun exposure, equipment that offers protection from harsh rays is necessary. Even a short amount of sun exposure can cause skin damage. That’s why taking a few preventative measures is always a good idea. Here is a short list of some of the best sun protection gear you can use:

  1. Sunscreen (SPF 30 or higher),
  2. Bucket hat/Baseball cap/Vizor, Chapstick,
  3. Sunglasses,
  4. Lightweight clothing to cover as much of your skin as possible without overheating.
A few of the best sun protection products for trail running lined up
SPF and other sun protection are essential during a trail run.

Headlamps

These are great for added safety during your run. If night falls before plan, or you end up in a darker area, these nifty gadgets can save your life. While this is a niche-use item, it’s very cheap, so even a beginner can get one without thinking of it as a colossal waste. Plus, chances are you already have one in your garage or shed. Remember to browse a few options to get the most bang for your buck. Ensuring safety is the first part of ensuring the best trail running experience.

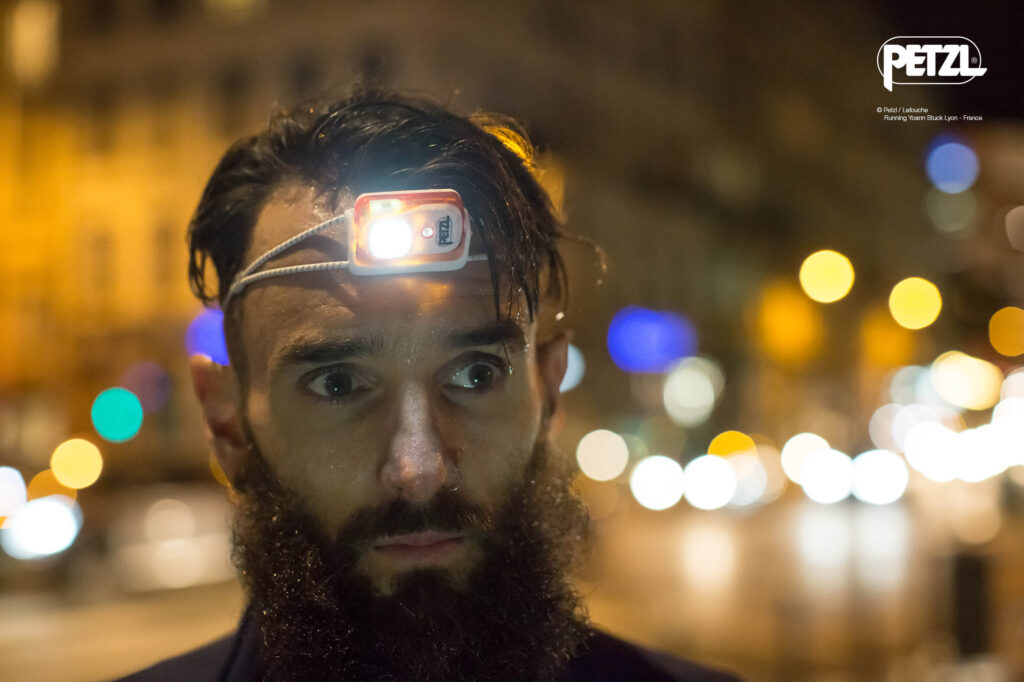
A man using a headlamp
Headlamps are an essential part of trail running safety.

To conclude

Trail running is a gratifying and delightful experience. But if you want the best trail running experience possible, it will take some preparation. And if you’re a beginner, you must invest in some new equipment. It’s good to be frugal, but don’t be cheap! As fun as it is, this activity can sometimes be pretty dangerous, and improper gear can put you at risk. But, as long as you gear yourself up with affordable entry-level equipment, you will have a great time on your first trail run.

A Backpacker’s Guide to Australia

If you are thinking of heading to Australia you can be sure you’re not alone in your thoughts. Why wouldn’t you go? You get great weather, affordable accommodation, great paying jobs, and much more. It can be daunting to commit to leaving home and flying a day away. Keep reading to check out how to get yourself started on your Australian adventure.

Applying for your Visa

If you are planning on staying in Australia for longer than a year you’ll have to apply for a Working Holiday Visa (417). You can apply for your visa here. You will first have to create an immi account and once you’ve created that you can sign in and begin your application for your visa.

With the 417 visa, you can work short-term to help pay for your travels, study for up to 4 months, travel to and from Australia as many times as you like within the year, and do 3 months (88 days) of specified work in order to qualify for your second-year visa (462). The cost of the WHV 417 is
€330 (510AUD).

You can check your eligibility here. A few key things to note if you are Irish; you must be aged 18-35 years and you must have €3,000 (5,000AUD) and the cost of a flight out of Australia in your account when applying for your visa and upon entering. Usually, you get a response to your application within 24 hours. From the date your visa is granted, you have one year to enter Australia. i.e if you are granted April 1st, 2023 you have until April 1st 2024 to enter. Your 12-month visa begins on the date you enter.

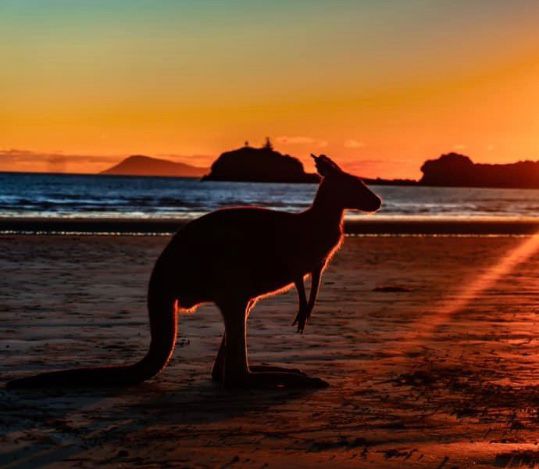
Kangaroo on the beach in Gatton, Australia

I’ve Arrived, What Now?

There are a few things that you have to get sorted out when you arrive. Some of these things can take up to a week to process so best to do them as soon as you can.

Get an Australian sim card

Telstra was recommended to me by fellow backpackers and I have no complaints so far. Great coverage and plenty of different data plans to suit your needs. Make sure you bring a phone with you that is unlocked so you can use sim cards from other countries.

Open an Australian bank account

The four biggest banks in Australia are Commonwealth Bank of Australia (CBA), Australian and New Zealand Banking Group (ANZ), Westpac Banking Corporation (WBC), and National Australia Bank (NAB).

The most common bank amongst backpackers is CBA. You can apply online here or head to your nearest branch to set up an account. Make sure to bring your passport with you as you will need identification. The bank will help you set up your mobile app and then they will post your card to you. This can take up to 5 business days to receive.

Apply for a Tax File Number (TFN)

You can apply here. You need a TFN to work. It is sent via post and can take up to a week to arrive. If you want to start working immediately be sure to sort this out sooner rather than later.

Open a Super Account

Super is basically a retirement fund. It is money put aside by your employer over your working life. If you are a temporary resident, you can claim the balance when you leave Australia. You must claim the balance within 6 months of leaving. A popular super account for backpackers is HostPlus. You can become a member here.

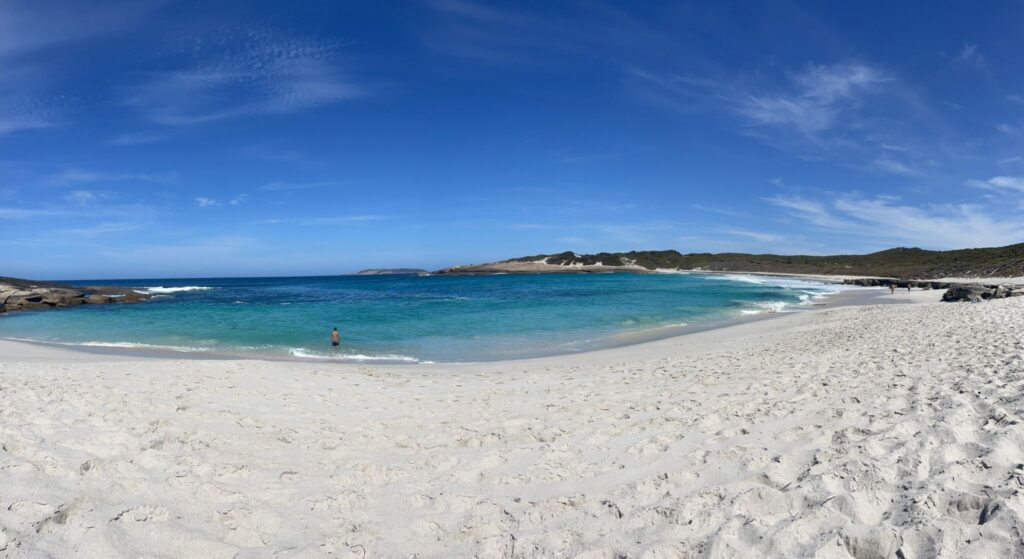
White sandy beach in Australia

Completing my 88 Days

As I mentioned before, you must complete 88 days of specified work in order to qualify for your second-year working holiday visa. This means that different forms of work can count towards your 88 days depending on what part of Australia you are in. You can check out the approved areas and industries for specified work here.

Completing your 88 days can be stressful. Some weeks you will work 60 hours over 6 days and other weeks you will only work 2 days. Although this won’t be great for the wallet it is normal and you shouldn’t worry too much about your 88 days. The Australian government said that so long as you attach 13 payslips where you worked whatever you could you should be approved for your second-year visa.

How do I find work?

There are multiple ways to try and find specified work. If you are looking to work on a farm with plants or animals you can call up the Harvest Trail on 1800 062 332. I would recommend completing your 88 days at the beginning of your visa. If you leave your specified work until the end of your visa you may not complete your days due to unforeseen circumstances such as weather, illness, or lack of work.

The Harvest Trail will help to guide you on what areas can supply the most jobs and accommodation but will not source a job for you. I recommend talking to fellow backpackers when you arrive and getting phone numbers for employers and for accommodation. COVID-19 has had an effect on regional farms so finding a farm to work on now is not as easy as it was before the pandemic. The time of year will also play a factor in what part of Australia there will be work and how much of it.

You can also look for jobs on Indeed, Jora, Workforce Australia, and backpacker job board. If you see a contact number on a website don’t hesitate to pick up the phone. Being eager to work in Australia is better and you’ll get a job before someone waiting on an email.

How do I know what is in season and where?

You can check out what is in season at this website for the time of year that you will be working.

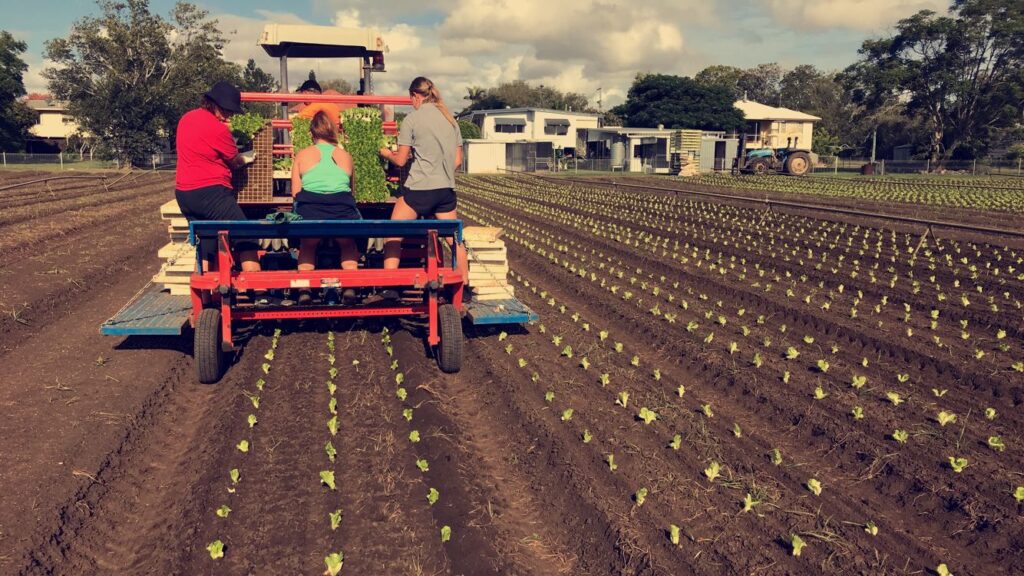
A day on the farm in Australia

Apps to download

There are a few apps that you should download for your time in Australia. These apps range from accommodation to transport to casual working jobs.

  • Airbnb
  • Hostelworld
  • Booking.com
  • Domain
  • Flatmates
  • Homely
  • Realestate
  • Tenant App
  • Hostplus
  • Jora Jobs
  • Airtasker (Casual jobs)
  • Sidekicker (Casual jobs)
  • Mad Paws (Pet Sitting)
  • Uber

A Backpacker’s Guide to Cambodia

Zoe Kinsella

Cambodia was the one country on my travels that I was hesitant to visit. Whenever I met other backpackers it was always 50/50 whether they loved or hated it. They had regaled me with tales of how they had been robbed and I was petrified to go. My boyfriend and I decided it was better to wait until our friend had arrived so the 3 of us would go together. Strength in numbers and all that.

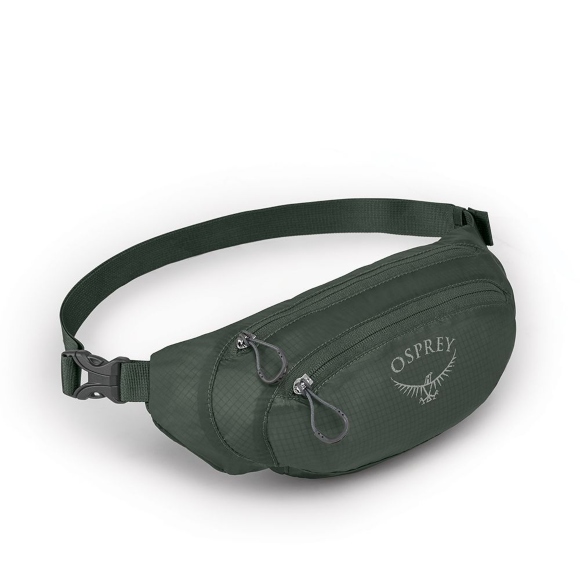
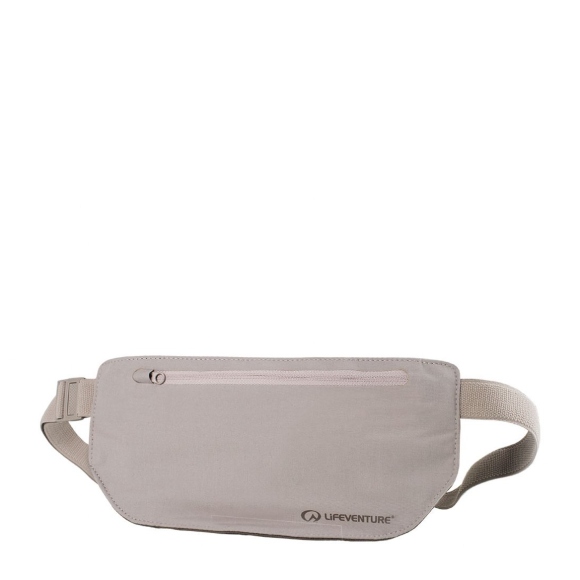
To say the state of the 3 of us when we landed in the airport in Phnom Penh would be putting it mildly. I had a decoy bum bag on the outside of my t-shirt and a secret money belt underneath.

I got a Tuk-Tuk outside the airport and drove 10 minutes to our hostel. I’m sure I looked like a lunatic clutching my backpack to my chest inside the Tuk-Tuk so nobody on a motorbike could swipe my belongings from me while driving. We had planned on a short visit to Cambodia. ‘Let’s go just to say we’ve been’ sort of thing. I look back and laugh now as I write this because Cambodia is one of my top two favourite countries in South East Asia.

Entry Requirements and Visas

Something for you to note. Before you can board any vehicle headed for Cambodia you need to have proof of onward travel i.e a ticket to show when and how you are leaving Cambodia. As a backpacker, with plans that are ever changing, it can be hard to decide how long you will spend in a country. To allow me the flexibility while travelling I used a site called onwardticket.com for proof of my onward travel. This site lets you reserve a flight for roughly €15 and holds your ticket for 24 hours. You simply show this at the desk and the reservation expires after 24 hours. This will give you the freedom to travel without a deadline date. You will never be asked for proof on onward travel after entering Cambodia.

The visa process is super quick and easy. You will fill out a visa form on the flight and present it when you land. The visa fee is $35, you have to have this in cash as they do not accept card. USD is used widely in Cambodia along with their own currency Riel. They will not accept any USD that have a slight tear or look worn so be careful when handling your money so as to avoid being out of pocket. I have found while traveling that USD come in handy a lot of the time so if they won’t accept it in Cambodia you will be sure to be able to use it elsewhere.

The Route

When backpacking around Cambodia you will either travel from North to South or vice versa. There is an airport in Phnom Penh (N) and Siem Reap (S) which makes it easy to travel to and from other countries from Cambodia. I began in Phnom Penh as I flew from Thailand. You can also opt for a land crossing which is much more budget friendly. Once you are in Cambodia you will travel quite cheaply via bus, train or boat to the other destinations.

Phnom Penh (2 Nights)

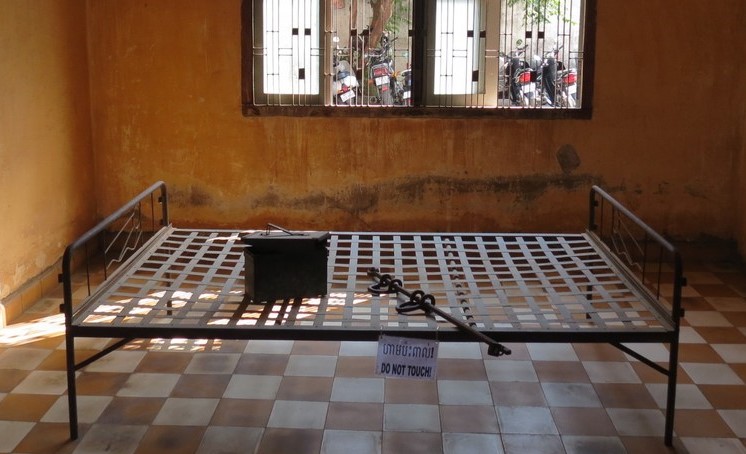
A cell in the S21 prison in Phnom Penh

I spent two nights in total in the capital and this was plenty of time. I stayed in Mad Monkey Hostel which is a chain hostel found in South East Asia. You can be guaranteed to meet plenty of other backpackers in these hostels as they are sociable and always have plenty of events on. It cost roughly $8 a night for a shared dorm.

I booked through the hostel to visit the S21 prison and the Killing Fields. These tours give you an inside look into Cambodia’s dark history – the genocide killings committed between 1975 – 1979 by Pol Pot, the Khmer Rouge leader. This tour is not for the faint hearted but I would highly recommend going.

I booked my 3 hour transfer bus from Phnom Penh to our next destination through the hostel. Plenty of mini buses depart a day so you’ll have no issues booking one. The bus cost us roughly $10 and will leave you in the centre where taxis will be waiting for you with a fare as low as $3 to your accommodation.

Kampot (3 Nights)

Pepper plantation in Kampot

I spent 3 nights in Kampot in Karma Traders backpacker hostel. The accommodation cost roughly $5 a night for a shared dorm room. They had events on every night like Taco Tuesdays, Burger nights and table quizzes. If you do stay in Karma Traders be sure to lock away your valuables especially if you are staying in one of their outdoor dorms that can be accessed by the general public.

Another accommodation option popular amongst backpackers is Arcadia. A sociable hostel located on the river that has a selection of water activities for you to try out.

There’s plenty to do in Kampot if you’re looking for an adventure. You can rent a motorbike from your hostel or you can hire a driver for a few hours to bring you around if you are not a confident driver. Check out a list of things to do in Kampot here.

From Kampot I planned on getting the 5 hour train to Koh Rong however, when I arrived at the train station the train was sold out. Be sure to go over a day in advance of your trip or book a train ticket online to avoid disappointment. The views from the train are breathtaking and it makes for a smooth, comfortable journey.

Alternatively, you can get a mini bus from your hostel that will drop you to the ferry point in Koh Rong. If you suffer from motion sickness I would avoid the minibus option as the roads are full of potholes. There is one stretch of road that should take 10 minutes to drive that takes an hour due to the potholes. Make sure to wear your seatbelt as you’ll be bouncing off the roof (I’m not even joking). The minibus seats 12 and it cost roughly $20 each.

When you arrive at the ferry port you will purchase an open return ticket for roughly $30. This boat will make two stops. First stop is to Koh Rong and the second is to Koh Rong Samloem. You can choose to do these islands in whatever order you please. I went to Koh Rong Samloem first but I would recommend going to Koh Rong first.

Koh Rong (3 nights)

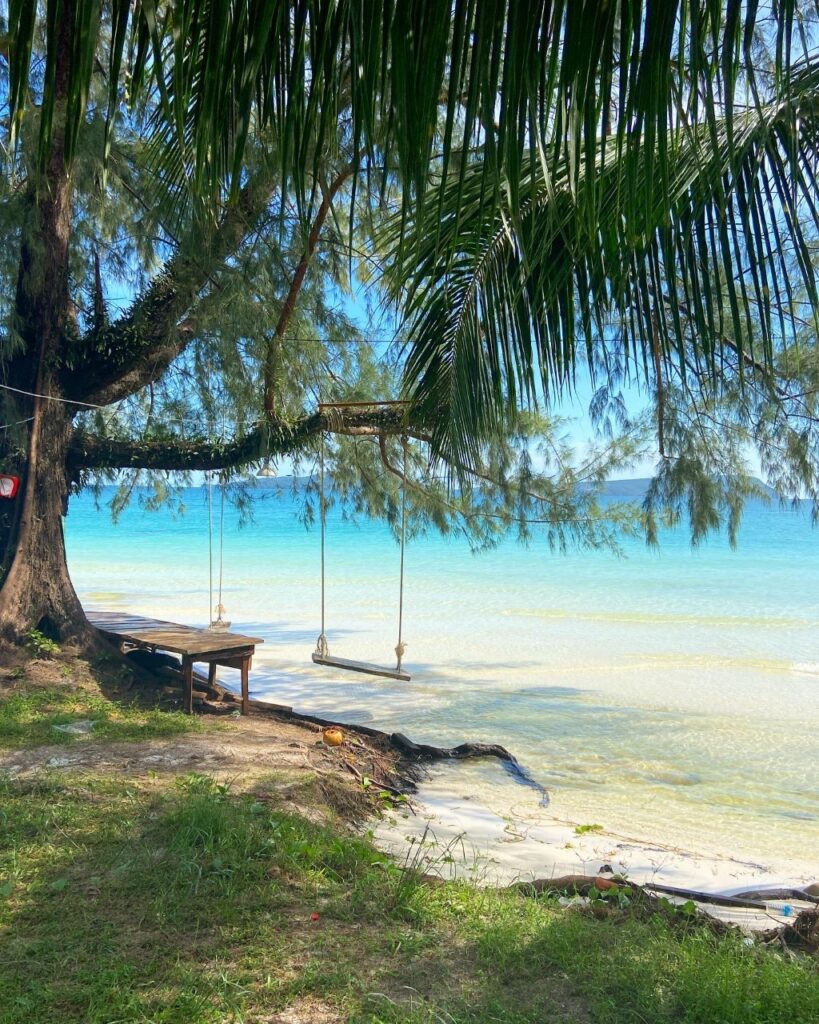
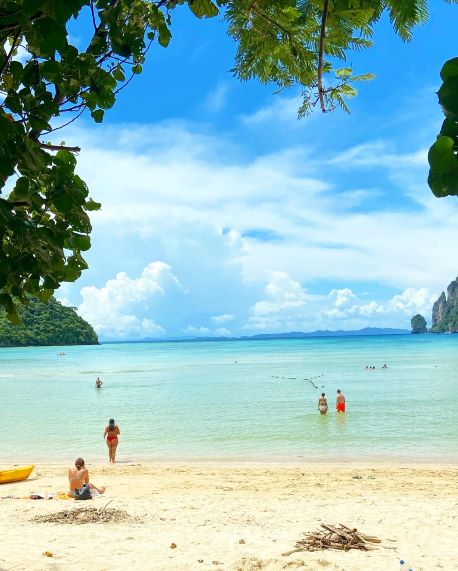
Stunning beaches found in Koh Rong

There’s not a huge amount to do in Koh Rong and you can walk the entire island in about an hour. This was a great place to simply chill and recharge. There are plenty of lovely restaurants along the beach front that are super cheap, tasty and give generous portion sizes. A backpackers trifecta.

I needed a break from the hostel lifestyle so I booked a bungalow for our stay in Koh Rong. I would recommend your stay in Koh Rong overlap with a Saturday because there is a hostel called The Nest that runs a day festival called ‘Nestival’. They hold plenty of games similar to a school sports day with the inclusion of alcohol. It is a great day that helps you meet people and spend your day doing something different. You can opt to stay in The Nest hostel or stay in local bungalows.

I stayed in Happy Elephant Bungalows. My room slept 3 people, had a private bathroom, a porch with a hammock, fans and towels were supplied and it only cost $46 between three people. Absolute bargain!

Make sure to bring enough cash with you for your time on the Koh Rong islands as there are no ATMs on these islands. There is one restaurant on the entire island that will double as an ATM but charge you a surcharge of 10% to withdraw money. You also have to pay for your accommodation by cash as the entire island is run off of a generator.

Koh Rong Samloem (3 Nights)

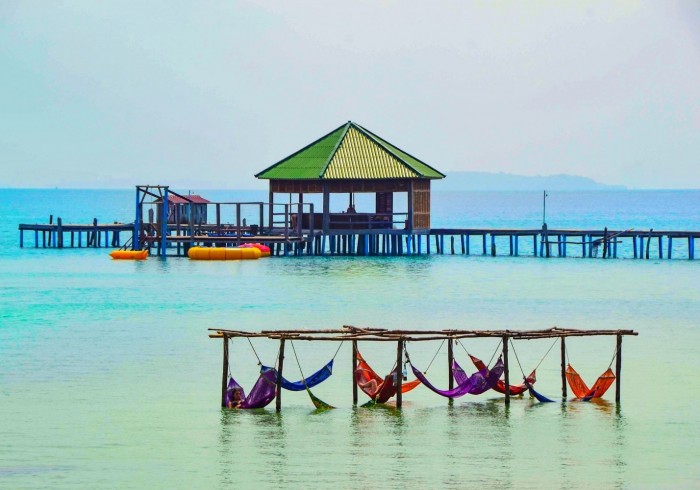
One of the many lounging areas in Koh Rong Samloem

You can get a quick 20/30 minute boat from Koh Rong island to Koh Rong Samloem. I recommend going to Koh Rong Samloem first as there are plenty more boat times going in this direction. You can get an early boat to arrive in Koh Rong Samloem early and have two full days on this island as I felt 3 nights was too long.

I stayed in Mad Monkey hostel for roughly $6 a night for a shared dorm. You will definitely experience the remote island life here. I stayed in a 6 bed dorm that is in a hut, there are a couple of fans in the dorm room and a hammock outside on each porch. Be sure to bring mosquito repellent with you for your sanity.

The hostel runs daily excursions and you can also get a daily boat over to the mainland as Mad Monkey is more remote than the other hostels. This does add to its charm. Mad Monkey have a bracelet payment system so you top up your bracelet by X amount using your card (again, you’ll incur a surcharge) or by cash. What you don’t spend on your bracelet will be refunded to you on your departure.

Another hostel option, located on the mainland of Koh Rong Samloem, that is popular amongst backpackers is Onederz. A dorm in Onederz is roughly $9 a night.

Siem Reap (5 Nights)

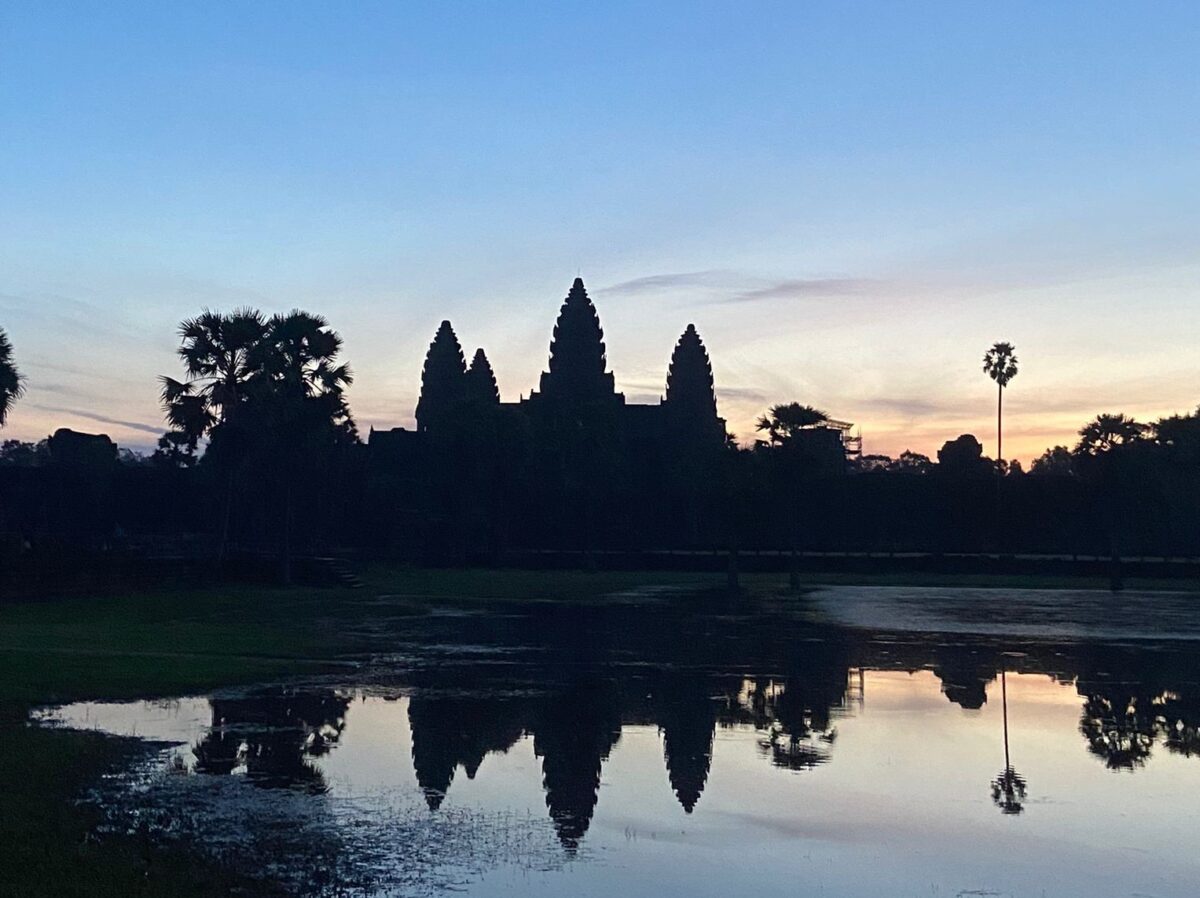
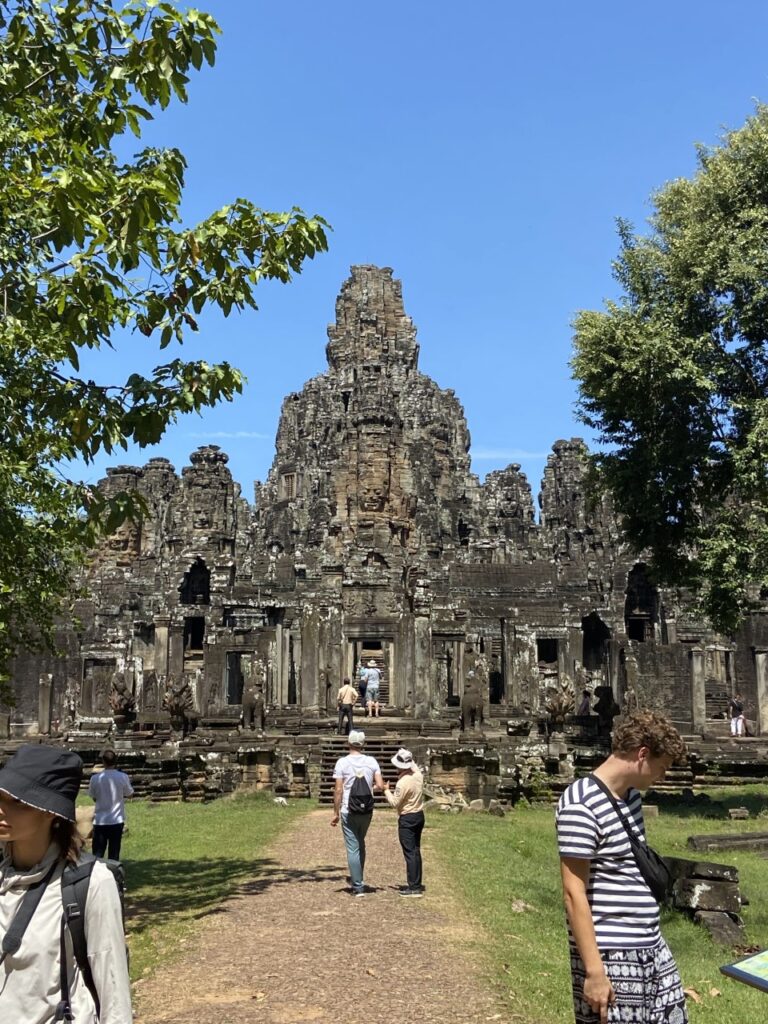
One of the temples found in Angkor Wat

The journey from Koh Rong to Siem Reap is not one to be taken lightly. I began by getting a boat from Koh Rong island back to the ferry port. I had to reserve a time slot for my return trip. Once I arrived back at the port I hailed a taxi to drop me to the bus terminal for a sleeper bus to Siem Reap. This bus is advertised as a 10 hour sleeper bus it actually takes 15 hours. There are no single beds only doubles so if you are travelling alone prepare to have a bunk buddy. The beds are not your typical sized double, more like a large single so it will be a tight squeeze. The bus also picks locals up along the way so the pathways on the bus will be full of people and luggage.

I arrived in Siem Reap centre in the early hours of the morning and there were plenty of taxi drivers waiting. Don’t be afraid to barter with them as they tend to ask for double the going rate. Be sure to check how far of a drive your hotel/hostel is from the bus terminal so you’ll have an idea of what you’re happy to pay.

I stayed in Lub d hostel for roughly $6 a night in a dorm with a shared bathroom. The bathrooms in Lub d are sex segregated. I love staying in Lub d hostels as they are super clean, kitted out with everything you’d need, and the food on site is always delicious. Usually Lub d is a treat as they can be expensive to stay in, especially in Thailand, however, this was not the case in Cambodia.

Siem Riep was definitely my favourite place in Cambodia. You could easily spend 3 days in Siem Reap and see all you need to see but I wouldn’t spend less than that. I was located in the centre which gave me the freedom to walk most places. There is a bustling nightlife, amazing restaurants and plenty to do in Siem Reap.

The main tourist attraction is Angkor Wat – a temple complex and the largest religious monument in the world. You will also recognise it from the Tomb Raider movies. I booked my tour through the hostel so that transportation and a tour guide was included. You can purchase a day ticket or a multi-day ticket depending on your interests. This tour is a full day tour as you are up at 4.30am to make it to the temples in time for sunrise. Other tours you can embark on are to the landmine museum, national parks, dance and dinner shows and much more.

If you are thinking of heading to Cambodia as part of a backpacking trip across South East Asia or as a stand alone trip I would highly recommend it. You can experience Cambodia as a budget backpacker or a luxury traveller. The Khmer people are so friendly and helpful, the food is delicious, and the views are stunning. What more could you want?

5 Coastal Hikes in Ireland That Will Take Your Breath Away

Ireland is home to some of Europe’s most awe-inspiring coasts. However, the weather isn’t for the usual sunbathing beachfront experience. So, the best way to enjoy the landscape is to embark on one of the coastal hikes in Ireland. These hikes are usually so breathtaking that you’ll completely forget about the lack of beachfront sunshine that most of us relate to the coast. Of course, to fully experience them, you have to do a bit of preparation. This is why we have prepared this short list of some of the best hikes for you to choose from, covering the breadth of the country


#1 The Gobbins Cliff Walk

The Gobbins Cliff Walk is one of the most impressive coastal hikes in Ireland. However, what makes it such is the fact that it’s not just a typical nature walk experience.

The path you’ll be walking on follows the Gobbin cliff faces, but not in the way you would expect. The path isn’t natural, nor is it simply carved into the faces of the cliff. It follows an array of man-made tunnels, bridges, stairs, and gallery structures.

It was first created in 1902 by a railway engineer. After a while, it was reopened in 2014 with an updated series of new bridges and gallery structures. During the walk, you will see caves, cliffs, sea stacks, natural aquariums, and islands.

Keep in mind that this isn’t a beginner-friendly hike. It can be pretty challenging at certain points, and you’ll need a guide to help you navigate the “trail” safely.

#2 Malin Head

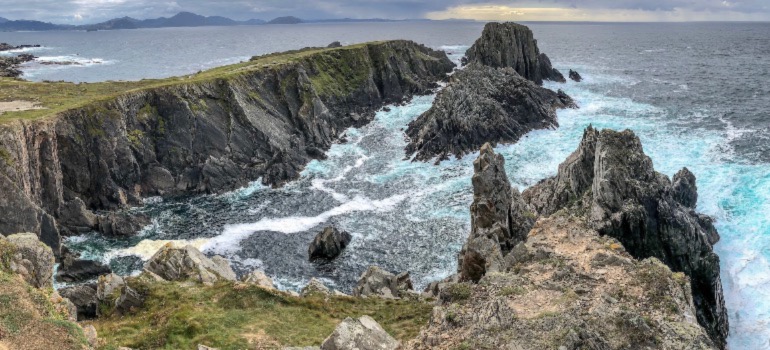
This hike is located at the top of County Donegal, Ireland’s northernmost tip. The terrain looks impressive and features unparalleled ruggedness. During the walk, you can also expect to see some interesting historical sites, such as a Napoleonic watchtower and an EIRE sign from the World War II era. Aside from that, you can also expect some incredible nature and dramatic rock pinnacles.

Malin Head in Ireland.
Though the terrain in Malin Head is pretty rugged, the hike is relatively easy, making it one of the better coastal hikes in Ireland for beginners.

While this walk can be busy during the summer, it’s still definitely worth it. The beauty of its nature won’t leave you wanting, even if you have to share it with others. The hike is about 7 km long, and although the terrain is rugged, it is not too difficult. And most beginners will also be able to enjoy it.

#3 Inis Nee Island Roundstone Loop

Connemara is a place full of amazing hikes. And although most of these are inland hikes that follow the mountains and the national park, it also features one of the best low-level and beginner-friendly coastal hikes in Ireland. The Inis Nee loop is an excellent option for any hiker who wants to get to know the region in a relaxing way. Later on, you’ll be able to start going on hikes that follow all of the things you’ll be seeing during this one.

This 6-kilometre looped hike is located around 3 km from the small village of Roundstone. After crossing a short causeway, the loop follows the small islands of Roundstone Bay. It mainly comprises tiny roads, rough tracks, and narrow laneways. Even though it is a low-level hike, the views will take your breath away.

On one side, you’ll be able to view Roundstone village and the beautiful Errisbeg Hill. While on the other side, you’ll be able to see the Twelve Bens of Connemara. As we’ve previously stated, this is a great introduction hike, whereas later on, you’ll be able to hike both the Errisbeg Hill and a few of the Twelve Bens you saw. After a long day of hiking, you can rest and freshen up at Roundstone.

#4 The Dingle Way

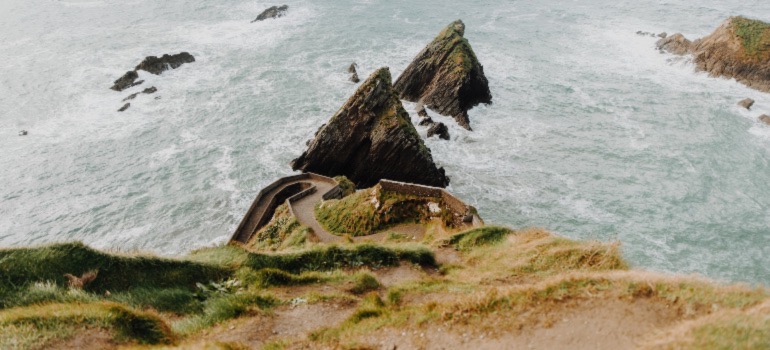
The Dingle Way is a 162 km multi-day hike looping the Dingle peninsula. This is one of the most famous long-distance ways in Ireland. Keep in mind that it does not only feature coastal hikes. It also features a healthy mix of rural trails, which go through a few towns and villages, and inland mountain paths. Even as an experienced hiker, it would be best to research the hike before attempting it. As experts from verifiedmovers.com like to point out, any long-distance voyage, be it moving or walking, should not be taken lightly.

The Dingle Way coastal landscape.

Additionally, there are some lovely beach walks on other days. These include:

  • Inch Beach,
  • Ventry Beach,
  • Wine Strand.

The part of the hike that covers Slea Head will also introduce some archaeology (you’ll mainly be seeing some ancient beehives).

Make sure to plan properly for this multi-day hike since it most commonly takes about a week to hike the entire Dingle Way. Although, this depends on how much you’ll be walking each day. And, of course, you can always choose only to hike the smaller coastal sections.

#5 The Bray to Greystones Coastal Walk

Ireland’s east coast has fewer coastal hikes than the west coast. However, if you are looking for a hike here, The Bray to Greystones Coastal Walk is one of the best options.

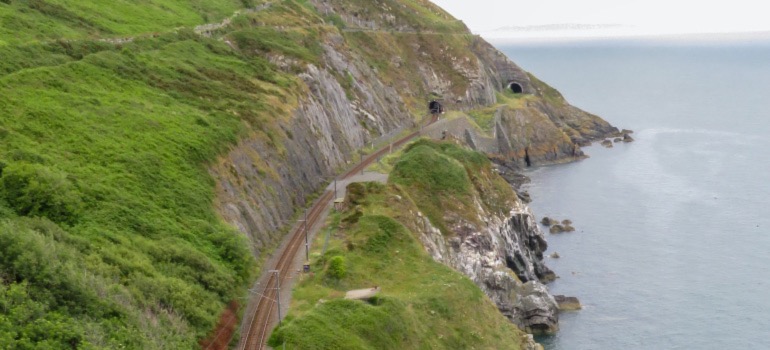
It starts at the Bray Train Station and then follows the gorgeous Bray seafront. The ocean views here are unparalleled. You’ll also be able to gaze at some ancient ruins during the hike. However, you’ll have to do it from afar since most are on private land.

Greystones cliff walk in Ireland.
This linear hike ends in the town of Greystones, where you can rest and reward yourself with some great food.

This is a 5 km long linear hike, and it finishes at the coastal town of Greystones. Here you can find plenty of beautiful cafes, restaurants, and shops and rest up for a while. Afterwards, you can head back to Dublin using public transport.

To conclude

We hope we have helped narrow the choice between the many incredible coastal hikes in Ireland that are sure to take your breath away. Most of these are available throughout the year. Nevertheless, you shouldn’t forget to take into account weather patterns. If you decide to hike during winter to avoid crowds, ensure you do everything possible to make the hike as safe as possible. Ireland is full of incredible hikes; you shouldn’t stop at these five. However, if you’re new to Ireland, these five will surely entice you to keep going.

Busting Most Common Camping Myths

Camping is truly a full immersion activity. Nothing really brings you back in touch with nature and lets you escape the hustle and bustle of life as much as camping does. We are real believers that if more people got outdoors and slept under the stars for a night the world would be a better place. But there are many myths that stop people from getting out on a camping adventure. So we are going to bust some of these myths today!

Camping is uncomfortable

Vacation campers know that the experience is never bad if everything goes according to plan. Going to camp is to push yourself beyond your usual boundaries, so be prepared for some uncomfortable situations. Camping could be perfect if you’re looking for a way to break out of your routine. That’s why it’s never unpleasant if you plan ahead. Learning as much as possible about your camping destination is vital before setting out for the first time. So break those common camping myths and enjoy your bonding with nature.

Eating is a hassle while camping

Camping can make it feel like you’re out of luck when it comes to food, but this is far from the truth. There are tons of great recipes out there that can have you eating like kings under the stars while also not causing you to bring your whole kitchen with you. Prepping your meals before your camping trip is a great way to do this. Instant meals are also a great way to cure that hunger outdoors while also keeping luggage weight down.

It will be cold no matter where you camp

One of the most common camping myths is that you will freeze at night when camping. Frigophobia is the fear of cold experienced by those who camp in tents. But it doesn’t mean it has to be a real fight. If you’re going camping in the winter, you should take extra precautions to ensure you have the right gear for winter camping. Tents and sleeping bags designed for temperatures as low as -5 degrees Celcius are great ways to beat the cold nights. Wearing garments with a water-repellent covering is essential if you want to be warm in the rain or snow. And what about the old wives’ tale that it’s impossible to keep a fire going when it’s raining? That is also incorrect.

people sitting around a fire
If you prepare well enough, you won’t be cold no matter where you camp

You won’t get a good night’s sleep

Clinical sleep educator Martin Reed claims that camping improves sleep quality. According to the creator of Insomnia Coach, “research shows that avoiding artificial light and exposing our bodies to the natural rise and decrease of light associated with dawn and dusk may help reset our internal body clocks and boost sleep quality.” Even if you’re just going to be sleeping in a tent or a cabin, you might as well bring a mattress. The convenience and ease of use of air mattresses have come a long way since the first models were created (in 1889).

Bringing only a GPS is enough is one of the most dangerous common camping myths

There’s no way to pack up and leave the house for a camping trip or overnight stay somewhere else unless you have a map and are familiar with the area. Exploring uncharted territory is thrilling, but not if being lost is a cost you have to pay. Even if your phone has a GPS, you could still get lost in a foreign area for many reasons. This means you need a good compass, map or guide to help you find your way. And while camping is fun, incidents can happen. You need to know how to treat basic injuries and be prepared.

Moss only grows on the north side

Moss prefers cool, damp, and gloomy places to grow. While the north side of trees receives less sunlight in the northern hemisphere, the east, west, and even south sides of trunks can support moss growth due to other trees, giant boulders, and sloping soil. In order to find your way, a compass is a much safer bet. So be sure to pack all the necessities for camping. But be sure not to pack too much. As our friends at Big Man’s Moving Company say, “Less is more.” You don’t want to be over-encumbered by things you will never use.

picture of trees covered in moss
Moss grows everywhere in the right conditions. Moss grows everywhere in the right conditions. Everything else can fall under the category of common camping myths.

Camping is bad for your health

Many are concerned that the health risks associated with relocating to a camp in an uncharted location or experiencing significant environmental shifts may outweigh the benefits. However, there are no potential health risks if you adhere to all of the camp’s safety protocols. Camping can even improve your mental health. Of course, you should take the necessary precautions to maintain your health. However, the idea that going to camp can harm your health is entirely unfounded. There is in fact a ton of health benefits in spending time outdoors!

Camping is boring

Those who have never camped are likely to believe this frequent misconception. One only needs to ask a camper to hear how much fun camping can be. You might think there is nothing to do at a camping area, but once you get there, you’ll find that there’s actually quite a bit. Camping with your pals is a novel way to spend a vacation. When you have the right people around you, camping can be the most relaxing and rejuvenating of all the fun things to do.

In conclusion

The vast majority of people actually believe these common camping myths. However, they are totally off-base and wrong. Therefore, get out there and go camping! And if you never tried camping. Just take the first step. After your first adventure, we’re sure you will enjoy regular camping trips with your friends and family.

7 Backpacking Essentials for Travelling

Zoe Kinsella

So, you’ve finally booked that flight and you’re heading off backpacking. Whether you’re going for 6 weeks or 6 months you need to figure out what backpacking essentials you need to pack. This should be an exciting time and not a stressful one so I’ve compiled a list of the must-haves for you. Sit back, click away and with OAS’s super quick delivery you’ll be ready to jet off in no time.

Here’s a list of 7 backpacking essentials for you:

1. Universal Adapter

This USB world travel adapter is a backpacking must have. You can charge up to 3 devices at once with the 2 USB ports and the plug socket. Not all plug sockets are the same in each country you visit so this all in one adapter will save you buying an adapter in each country you visit.

USB World Travel Adapter

2. Document Holder

Keep all of your travel documents at arms reach and together in a safe holder. This document holder is RFiD protected which means your cards cannot be scanned reducing the risk of identity theft. You can wear it as a waist pack or stow it away when it is not in use. 

RFiD Travel Belt Pouch

3. Bum Bag / Money Belt

A bum bag will be your new best friend while travelling. Think about it, you’ll be spending most of your days in your swimsuit so where do you keep all of your valuables? I would recommend a money belt for underneath your clothes if you’re travelling to any countries that have high theft rates. There have been cases where people’s bum bags have been torn from their shoulders as they are walking down the street so a more discreet bag will put you at ease.

4. Travel Towel

You’ll find that while travelling and staying in hostels some hostels will supply a towel but that is not always the case. Microfibre and softfibre towels are a Godsend while you’re travelling. Anti-bacterial, quick drying, lightweight and compact, what more could you want? 

5. Powerbank

Think about how much time we spend on our electronic devices. We read our books, book our flights, answer our emails, update our social media accounts and watch our favourite movies and shows on them. The battery on our devices can’t keep up with the amount of time we spend on them so a powerbank is essential. Travel days while backpacking can be excruciatingly long, I mean like 20 hours long. You could be left at a bus station waiting 3 hours for a bus with 50 others all crowded around 4 sockets. Do yourself a favour and get a powerbank – you’ll thank me later.

6. Padlock

This resettable 3 digit lock is perfect for keeping your valuables safe while you’re travelling. All hostels will have a locker for you to store your valuables in but they won’t have a lock for it. This lock means you use a code and don’t have to worry about losing a key. I’d get two locks if you’re backpacking for a few months as things tend to get left behind as you jump from place to place.

TSA Combi Lock

7. Packing Cubes

Imagine storing all of your clothes in your wardrobe in a heap on the floor. That’s what backpacking with a rucksack is like without packing cubes. Pack all of your clothes into 4 cubes to keep them clean and organised. Unfortunately, packing cubes are not available at OAS yet but they are coming soon and of course for the best value in Ireland.

There you have it. 7 backpacking essentials to pack for your next trip that won’t break the bank. Only at OAS, Ireland’s best value outdoor store.