What to Expect and How to Prepare for Hiking the Kerry Way

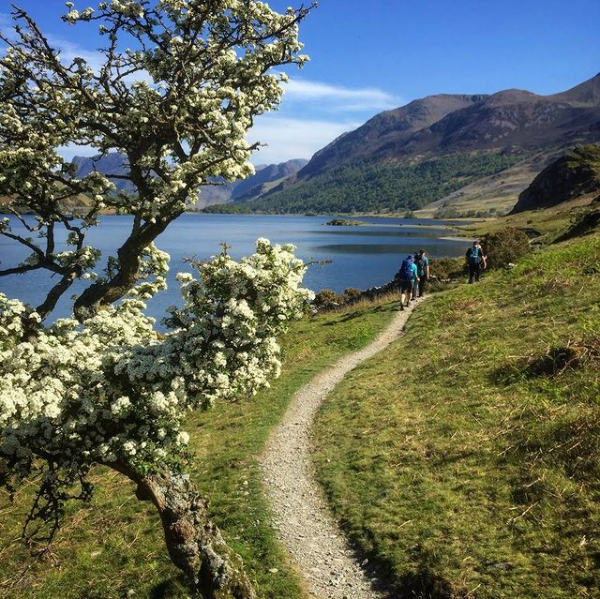
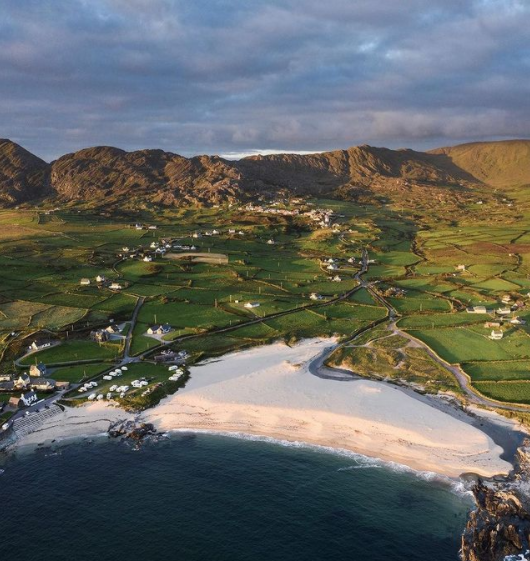
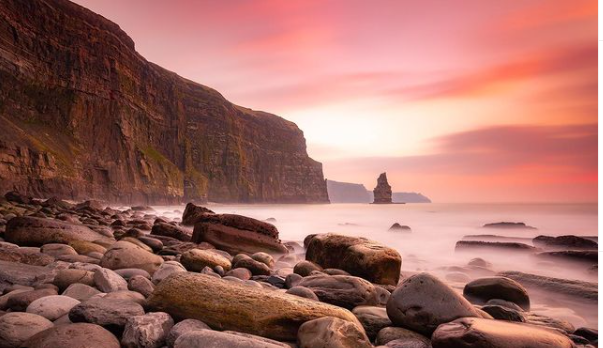
The Kerry Way is one of the most popular hiking trails in Ireland that starts and ends in the busy town of Killarney. It traces a loop around the Iveragh Peninsula and features a nice mix of quiet country lanes and rugged trails through the mountains. In fact, the Kerry Way is best known for being home to some of the tallest mountains in Ireland. Its awe-inspiring peaks really do validate its nickname – “The Kingdom”.

For tourists, Kerry itself is a chance to visit idyllic towns in Ireland. But the surrounding countryside is the real jewel in the crown. The Kerry Way is well-marked with a lot of food and water re-supply points along the trail. You will also find great infrastructure for hikers and great campsites and towns to enjoy the occasional rest day.

But that’s just part of the story…

What to Expect in General on the Kerry Way?

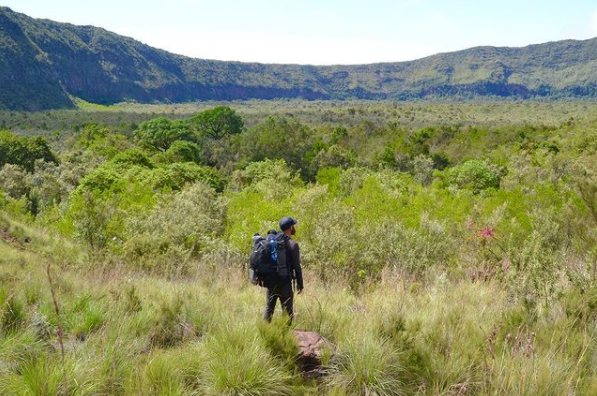
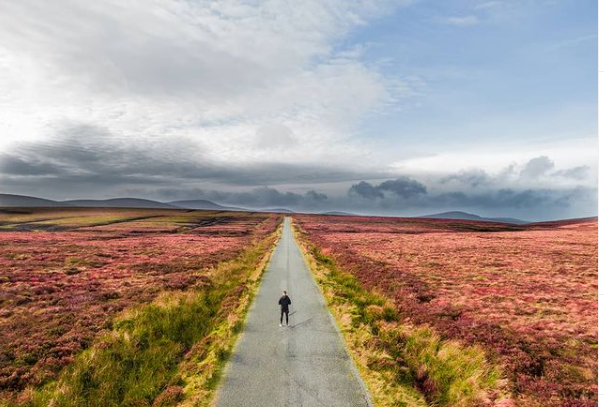
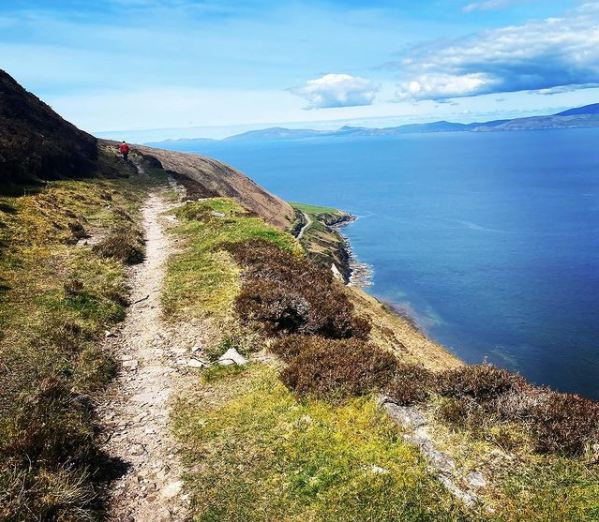
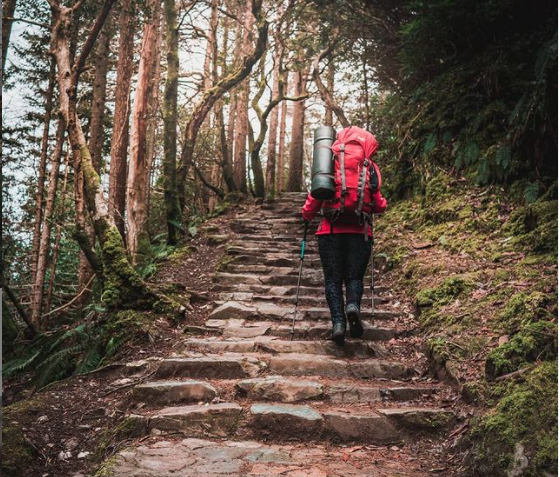
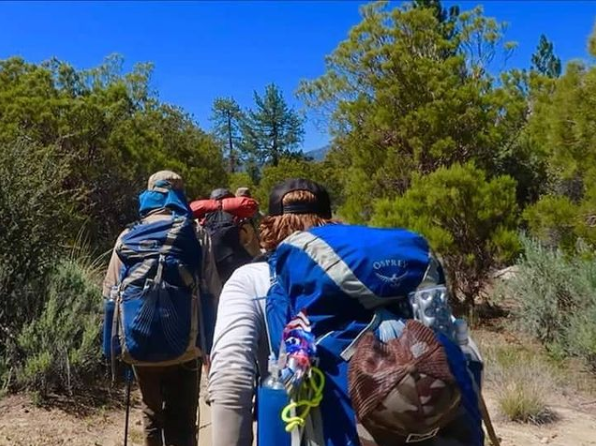
Hiking the Kerry Way is by no means easy. This mountainous terrain is a proper physical endurance test for most hikers. It can feel rather remote in places. This is certainly true if the wind and rain shows up as you navigate the higher section of the trail. Some sections of the trail pass through open farmland, while others follow quiet roads. But, there’s little to no traffic in comparison with the main roads around Kerry.

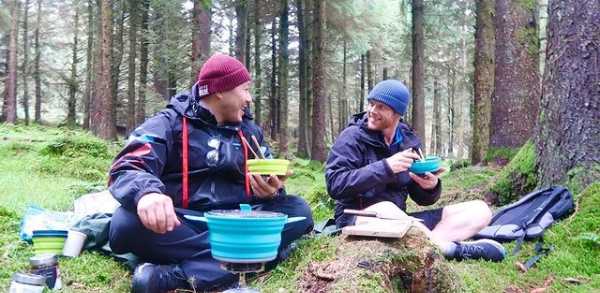
As for water, you can source and filter water quite easily. The towns are fairly reliable for picking up food supplies. Most stages/sections involve 20km+ hiking per day. But the Kerry Way is easy to follow with regular signposts from start to finish.

What’s the Best Time of Year to Hike the Kerry Way

The summer months are always best for hiking the Kerry Way. Expect campsites and accommodation to be busier during the peak months. I don’t like to fear monger but sections of the Kerry Way would be rather dangerous during the winter months and campsites etc will be closed.

At the same time, the weather in Ireland is always unpredictable. You should always pack sufficient warm gear and rain-gear for the Kerry Way such as Helly Hansen Jackets or Trespass Clothing. I personally like to hike these trails in late May or June. There are less people on the Kerry Way and a reasonable chance of some sun!

📷 @climbersinnglencar

Where to Start and Finish the Kerry Way

The Kerry Way starts and finishes in the same town – Killarney. However, it’s recommended to hike this trail anti-clockwise as it’s easier to follow the signs in this direction. I also think it’s best to start with the section between Glencar and Killarney as it’s good for camping. Either way, it’s really easy to reach Killarney from just about anywhere in Ireland. You literally start walking from the town on day one. If driving, I recommend staying at Flesk Caravan and Campsite as it’s located near the beginning of the trail. They have great facilities and staff that give you advice of where to leave the car while you are hiking.

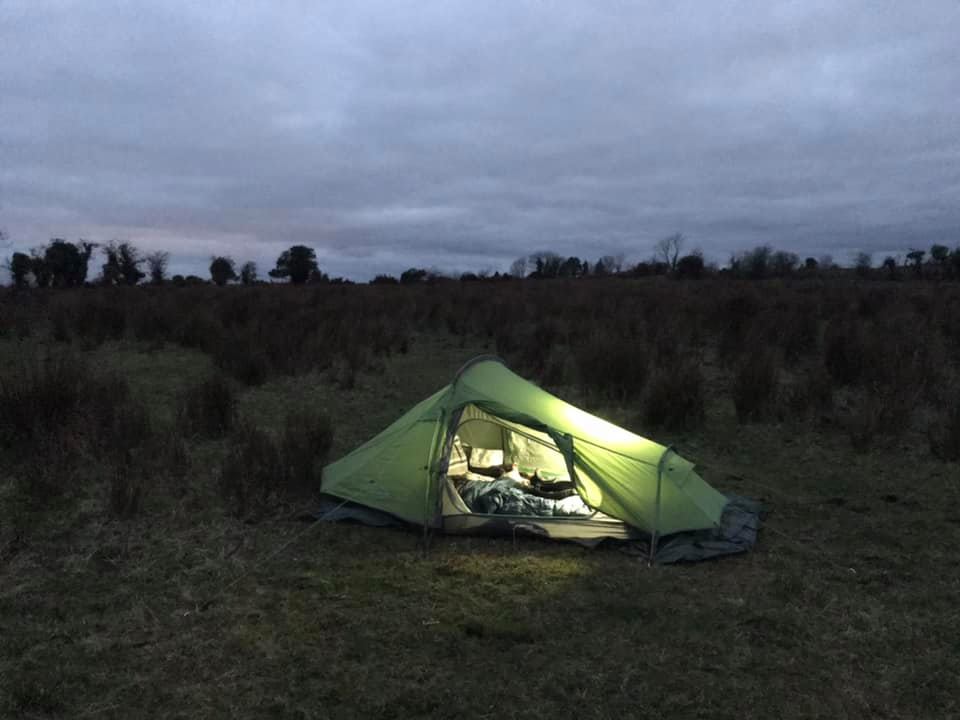
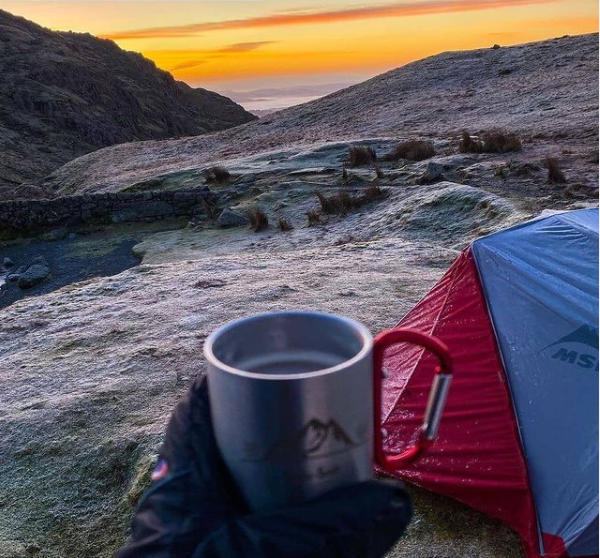
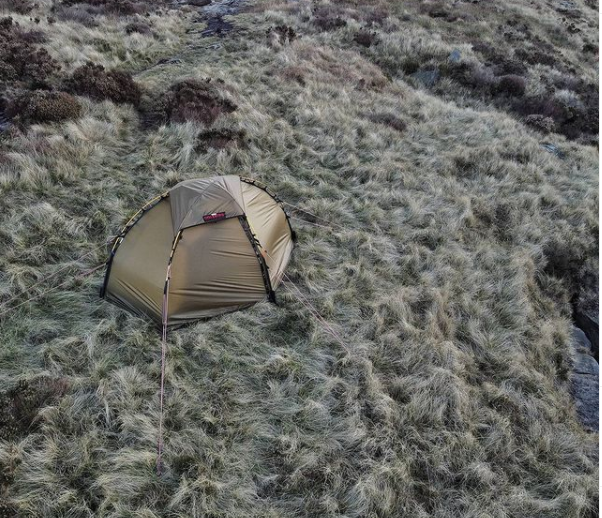
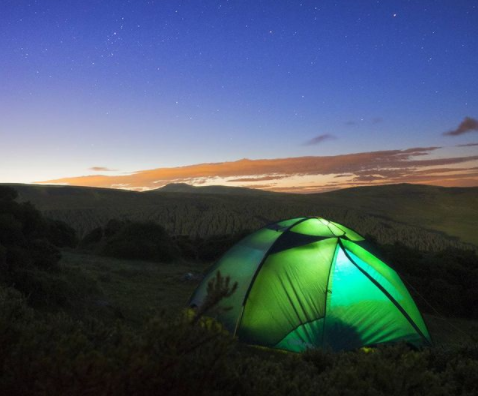
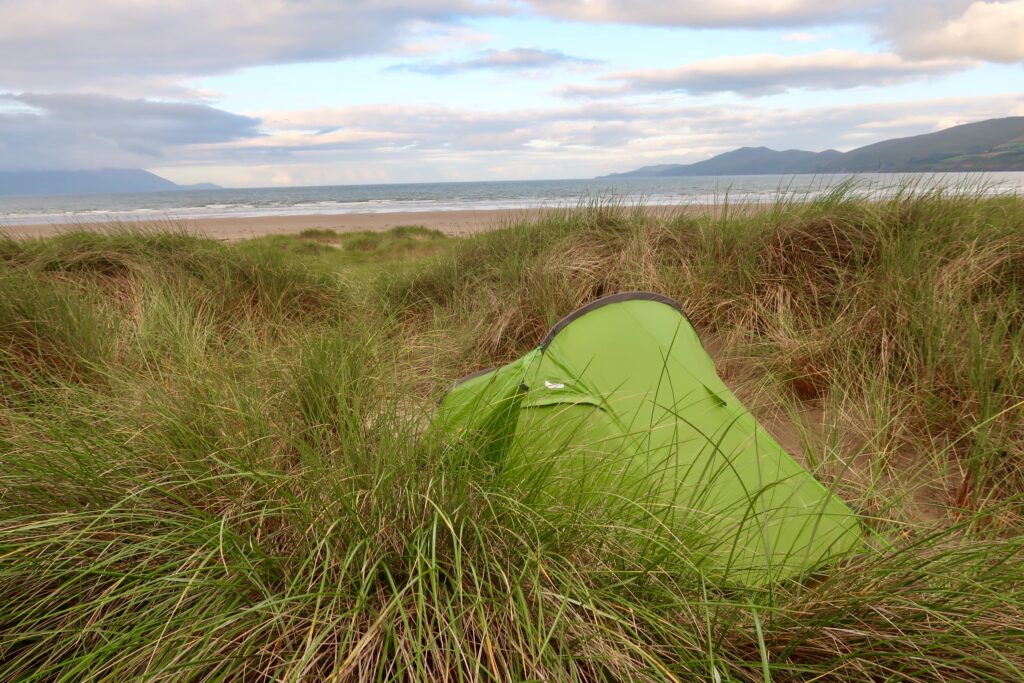
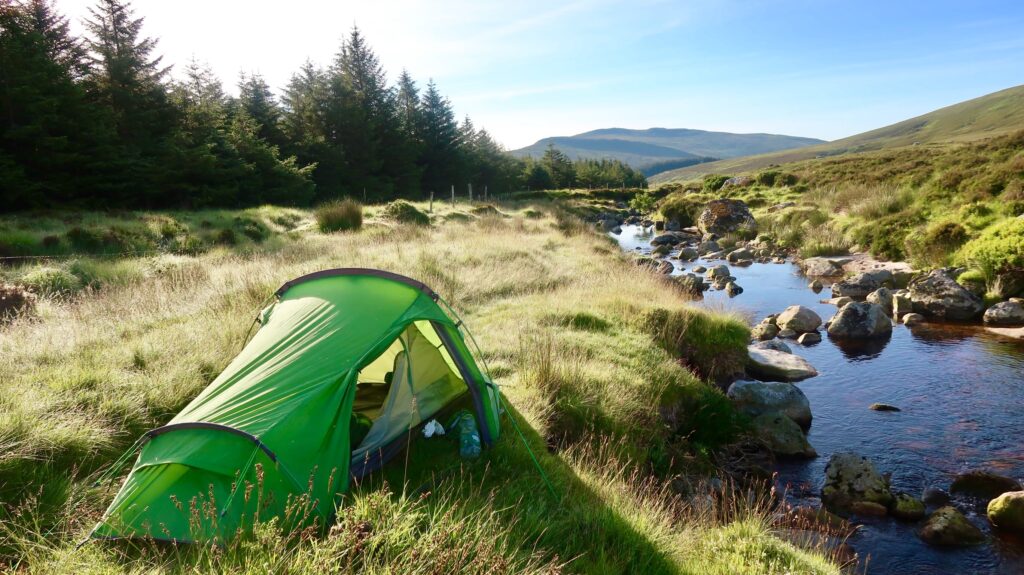
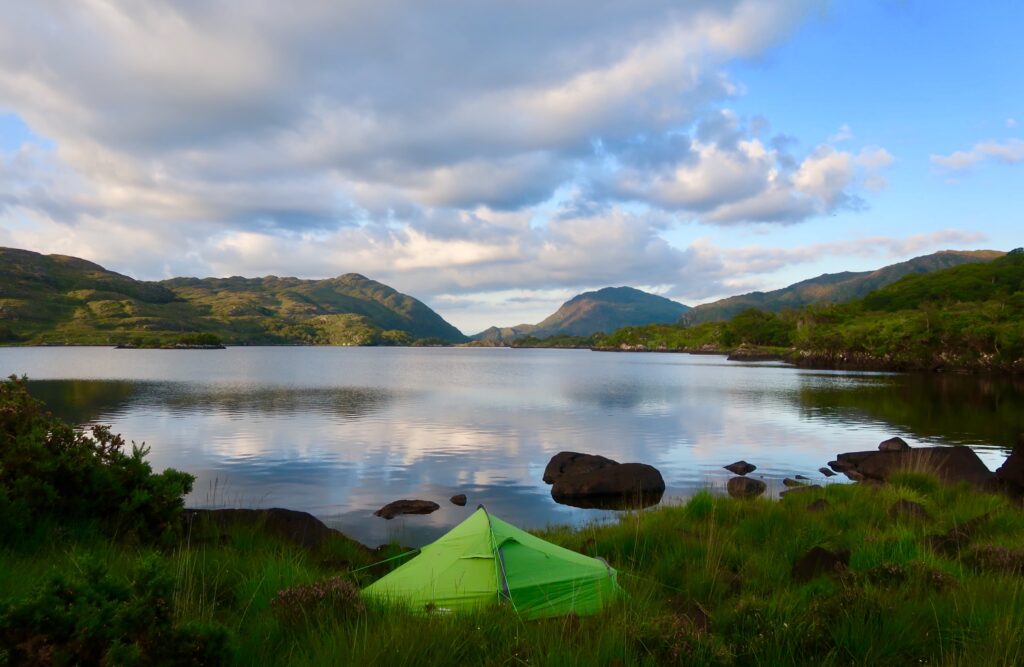
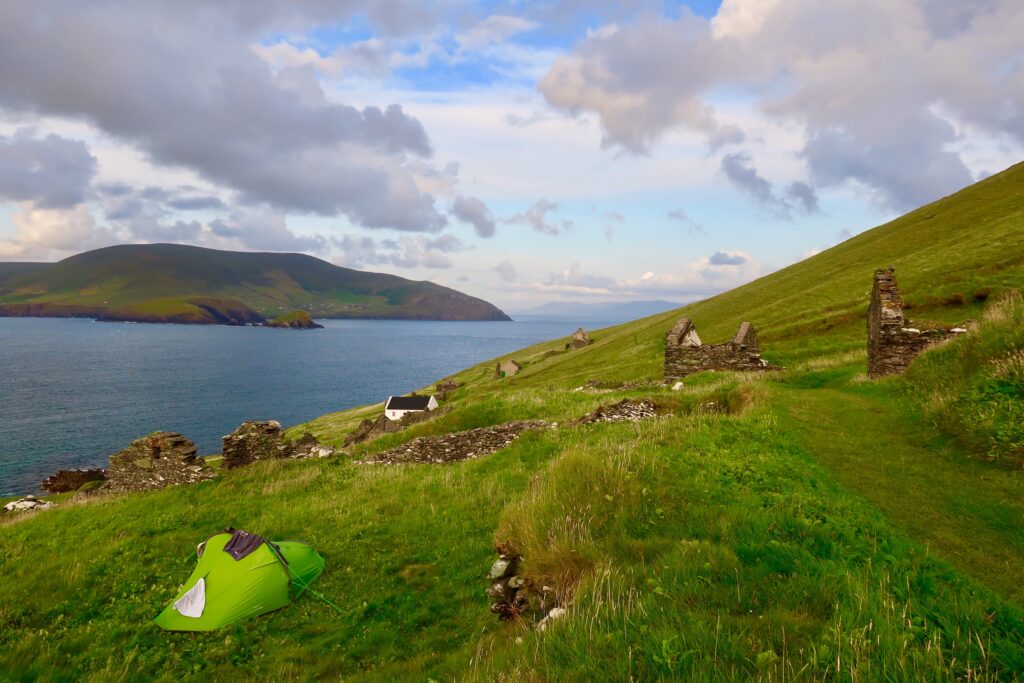
Wild Camping Versus Guesthouses on the Kerry Way

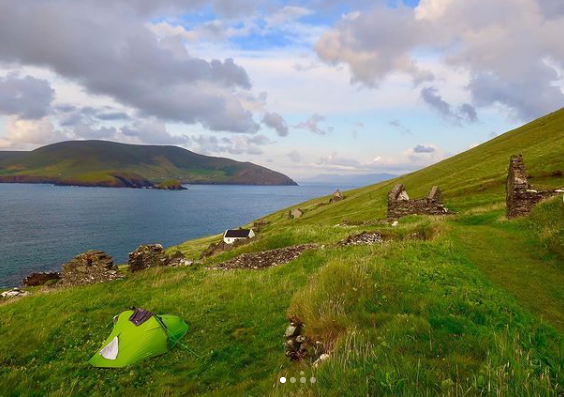
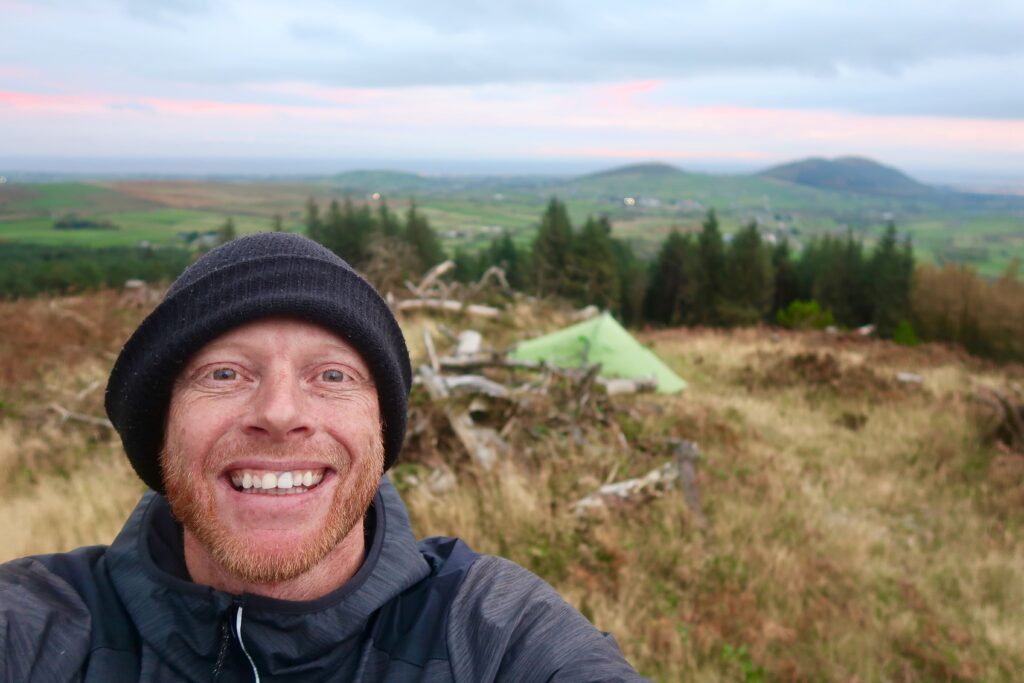
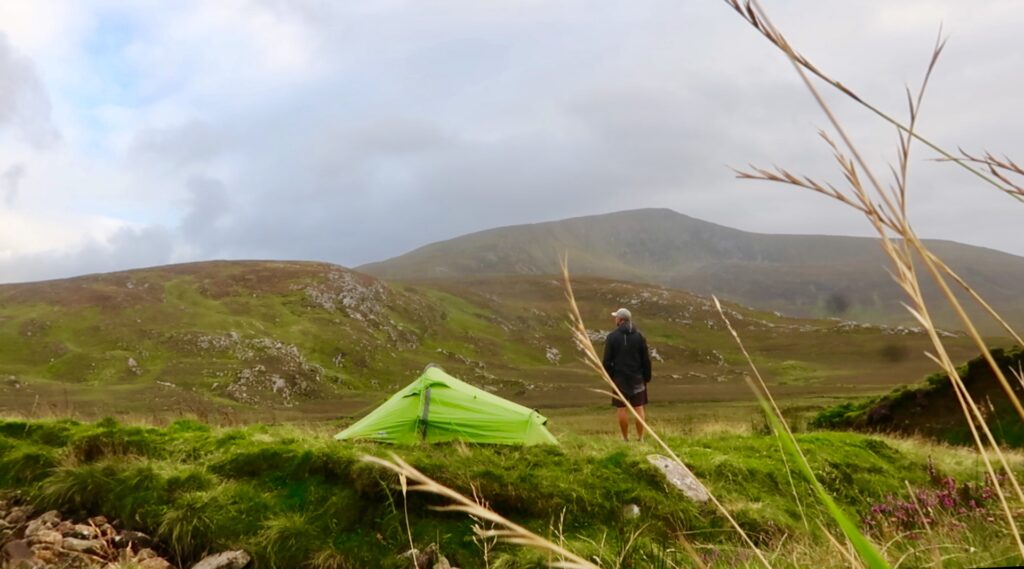
The Kerry Way is lined with a host of guesthouses and the occasional hotel or hostel. There are also campsites and I was really impressed by the standard on my last outing on the Kerry Way. As for wild camping, it’s quite easy to find secluded spots on many sections. The tricky part is finding a spot that’s not overly exposed. It may be necessary to hike a bit further some days in order to get down from a a mountainside and closer to a lake or sheltered area. The Climbers Inn is a handy spot to camp in the middle of nowhere. It has a small shop and lovely rooms if you’d like a shower and bed for the night.

Food and Water on the Kerry Way

I carry between two and three days food at all times on the Kerry Way. This allows for the option to wild camp each night. Otherwise, it might be necessary to hike on to the next town in order to find more supplies. Either way, you should find the towns are well stocked. It’s only really the valleys (eg. the mountainous section between Glenbeigh and Killarney) in which you might not see a proper shop for more than one day. But make sure to have a water filter in your backpack at the very least!

📷 @Climbersinn

Day-to-Day Itinerary for Hiking the Kerry Way

Killarney to Black Valley – 22km

Black Valley to Glencar – 23km

Glencar to Glenbeigh – 18km

Glenbeigh to Caherciveen – 28km

Caherciveen to Waterville – 29km

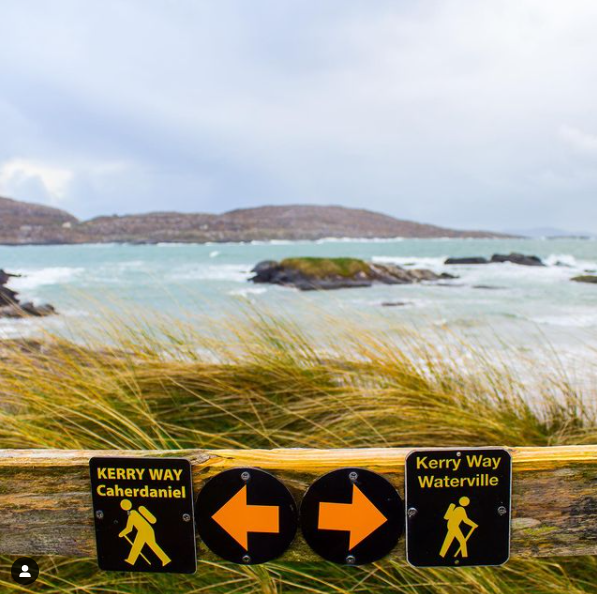
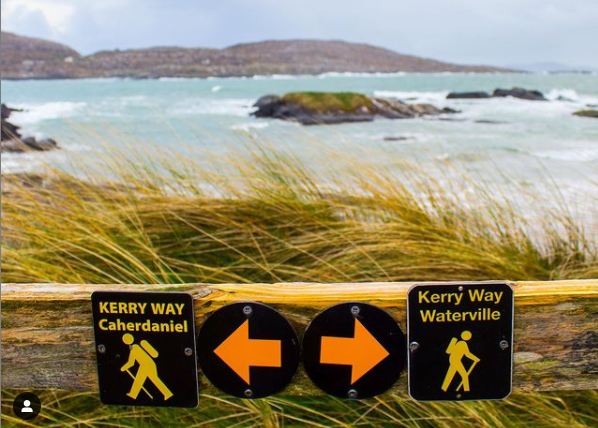
Waterville to Caherdaniel – 13km (Coastal Route)

Caherdaniel to Sneem – 18km

Sneem to Kenmare – 30km

Kenmare to Killarney – 24km

About Hiking Sections of the Kerry Way

Maybe you don’t have time to hike the Kerry Way in full? In that case, it’s still worth hiking a section or two of this amazing trail. I’ve mentioned the section between Killarney and Glenbeigh a few times already. This is because it’s my favourite part of the Kerry Way. After climbing up over Torc Waterfall, the scenery is some of the most spectacular in the country. The same can be said for Black Valley shortly afterward. Either way, it’s always possible to pick out a section or two of the Kerry Way and then take a local bus back to your starting point in Killarney.

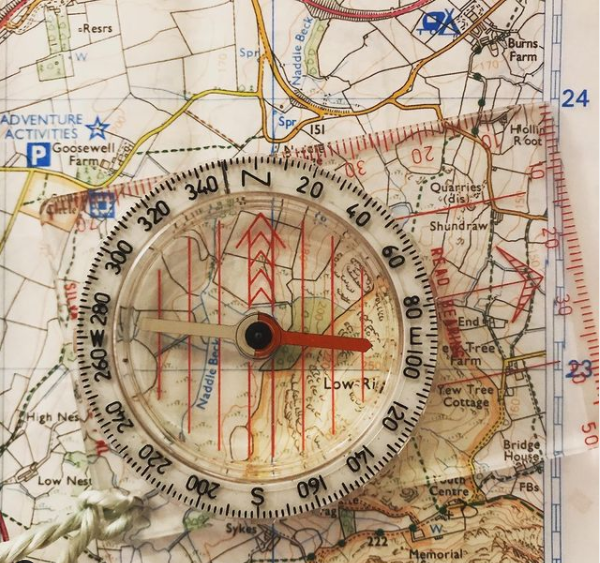
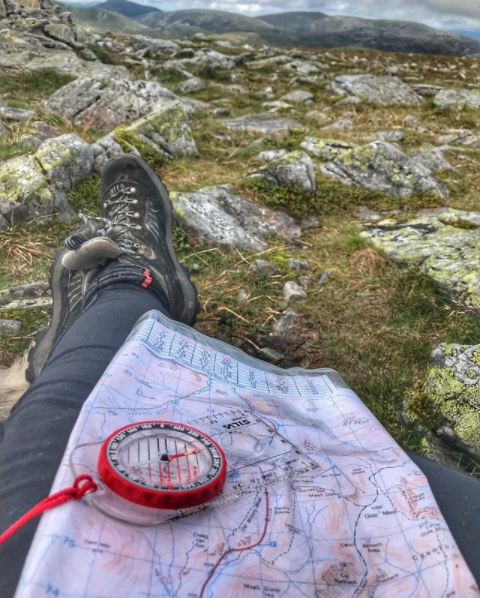
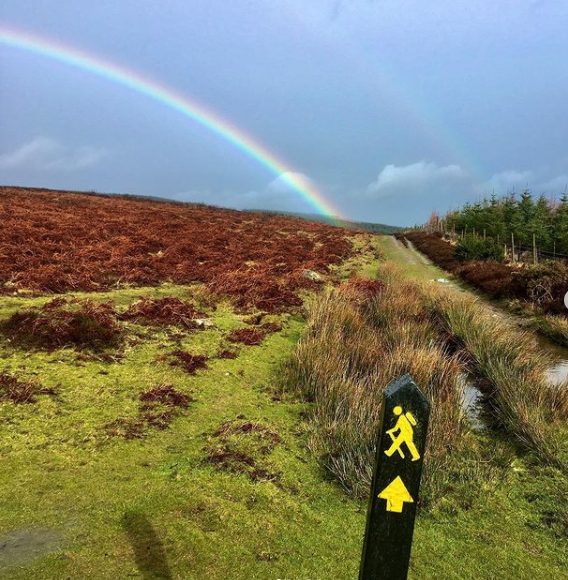
Navigation on the Kerry Way

The Kerry Way is remote in places and climbs up around the mountains next to Carrauntoohil. This means you are hiking in the middle of the MacGillycuddy’s Reeks which is the highest mountain range in Ireland. Now, I don’t say that to dissuade anyone from hiking the Kerry Way but rather to highlight the importance of navigation and staying safe on the trail. More specifically, I’m trying to say that it’s crucial to carry the right maps on trail and use a form of GPS as backup. It’s true, the Kerry Way is well-marked but these maps and GPS will not only provide peace-of-mind but also ensure you will not end up in trouble when it comes to navigation. As always, you should do your own due-diligence on the Kerry Way. Make sure to study the maps and day-to-day itinerary before setting off on the hike.

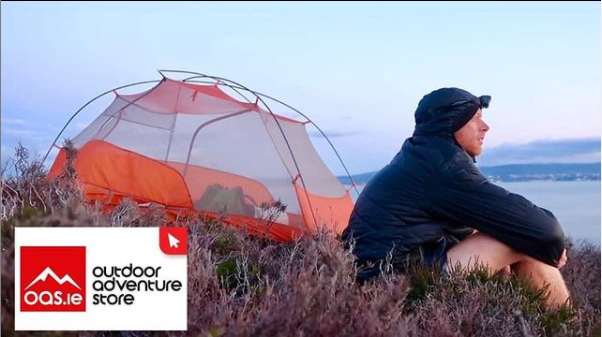
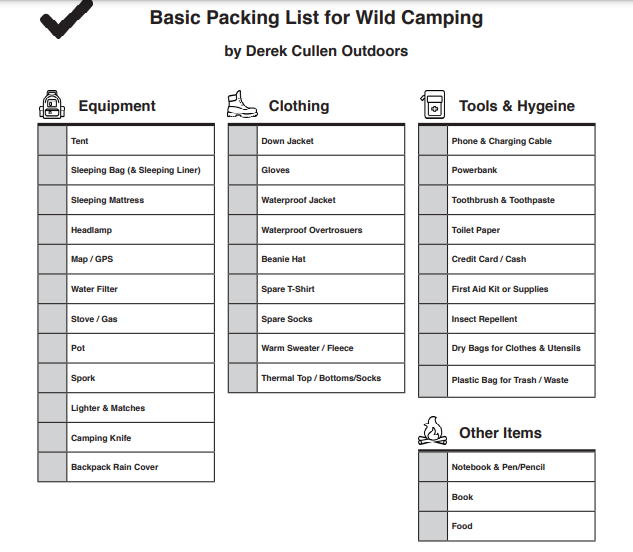
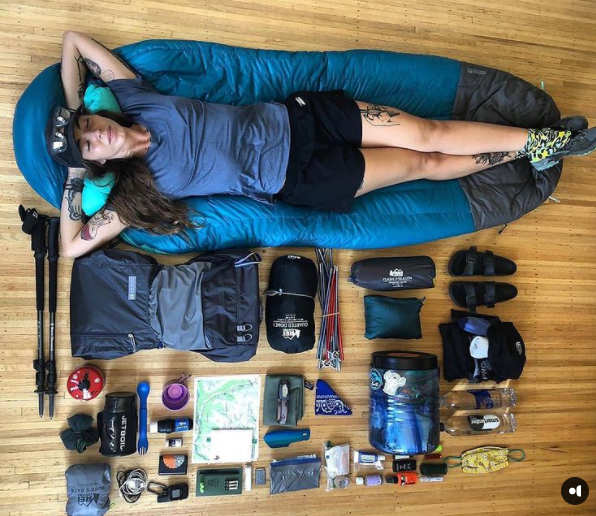
What Gear to Pack for the Kerry Way

It’s important to pack sufficient hiking boots, warm and wet-weather gear and to know the mountains can experience all kinds of weather – even during the summer months. You will need to carry everything on your back, from your tent and sleep system to clothing, food and water. So, make sure to pack your gear with all of this in mind. I highly recommend hiking poles and believe that every hiker should carry and use them on the various climbs. But for more information on what to carry on this trek, check out this packing list for a multi-day hike in Ireland.

📷@zuzka_world_wanderer

Pros and Cons to Hiking the Kerry Way

Pros

Incredible scenery from start to finish.

Well-marked trail at all times.

Great towns and infrastructure for rest days.

Big wide open spaces on the trail and never feels overcrowded.

Some sections are really suitable for wild camping.

Possible Cons

Busy campsites on occasion and may need to book ahead of time.

May not suit beginners due to remote and mountainous nature of terrain.

Very exposed terrain for some sections and weather can change really quickly.

Final Thoughts

I believe the Kerry Way is one of the top three hiking trails in Ireland. It offers a nice stretch for those who might have ten or more days at hand. However, while most hikers will find a comfortable hiking experience on the Kerry Way, it’s much more than a walk in the hills. You will need to prepare for all weather conditions and be ready to hike up the side of some very remote and exposed mountains. If you don’t have any wild camping experience, I suggest making a day-to-day itinerary with set distances and places to stay. That is, it might be best to reserve beds, rooms or campsites instead of having the added pressure of wild camping for the first time. I also recommend carrying more food, snacks and water than you might need.

6 Steps to Help Plan Your First Multi-Day Hike in Ireland

I took my first steps as a backpacker on the Wicklow Way. It was quite the learning curve and rather painful but interesting enough that I wanted to take another hike.

But why was it painful and what did I learn?

I had all the wrong gear and did very little research before my first couple of trips. That’s why my shoulders were ruined and my backpack was the size of a small car!

It’s true, I didn’t really enjoy my first few trips. I spent most of these hikes lamenting the weight of my backpack. Also, I was dealing with far too much uncertainty. This was the result of failing to research and plan my trip properly. As for “what did I learn”? I’d like to share some tips with you in terms of planning a multi-day hike in Ireland.

Here’s a quick overview of the points I will discuss:

– Narrowing Down Your Choice of Trail

– What to Consider About Your Intended Route

– Planning for Your Safety and Emergency

– What to Consider about Food and Water on the Trail

– What Gear to Pack for a Multi-Day Hike

– A Final Word about Wild Camping on the Trail

How to Plan Your First Multi-Day Hike in Ireland

1. Narrowing Down Your Choice of Trail

It’s important to know and think about the key parameters of your trip. The following questions should help give you an idea of what I’m talking about:

How many days can you afford?

Do you want to stay off the beaten path and camp all the way?

Are you wanting to hike between towns and stay at a bed & breakfast each night?

What’s your comfort level when it comes to wilderness or hiking in remote areas?

As you can imagine, no two trails are the same in Ireland. Some are rather remote, while others consist of some rather big climbs. Take the Bangor Trail in Mayo, for example, this trail passes through a large wilderness area.

If you live in Dublin, the Wicklow Way is an obvious choice and a great one too. For those in Cork, I’d take a look at Sheeps Head Way for a camping-only trip. The Kerry Way is another beautiful trail with lots of accommodation in between.

📷 @hiiker_

2. What to Consider About Your Intended Route

The Distance

You should know the precise distance between the starting point and endpoints of your hike. Ideally, you will also know the distance with which you are comfortable hiking every day and the amount of time/days you can afford to spend on the trail.

For instance, the Wicklow Way is 127km and many hikers take between five and seven days to complete this trail. This means you might need to hike 19km on average over seven days or 25km over five days, so good hiking boots are important. The length of each section is slightly different so you should never assume or only use averages as a guideline.

One of my great mistakes was to underestimate how much longer it takes to cover distances with a heavy backpack. Similarly, if you hike in the mountain or through boggy areas, you can expect to cover a lot less distance than a path-like trail. My general advice is to take as much time for your hike as possible. Otherwise, you might end up needing to rush in order to reach certain destinations or finish on time.

The Route

It’s worth taking a look at your maps every evening and knowing how many kilometres until the next camp/stop. But also take note of any water sources along the way and any significant climbs that lie ahead of you. While I try not to plan every last detail of my trips, it’s better to know this kind of information before setting out every morning. It saves you hours of guesswork and wasted time thinking about where you might stop or what time you’ll arrive.

3. Planning for Your Safety and Emergency

Tell Someone About Your Trip

Unfortunately, in the case of many fatal accidents and serious injuries, the hikers have failed to notify a friend or family member about their trip. It only takes a few seconds so make sure to drop someone a message. Ask them to check that you’ve “checked in” or returned safely from your hike.

First Aid Kit & Emergency Blanket

If you don’t want to buy a first aid kit, it’s easy to make one of your own. I also recommend packing an emergency/space blanket. Knowing that I have one of these in my backpack is something that brings me great peace of mind. You can use these blankets for extra insulation in very cold weather but also in times of emergency. I was grateful for my own emergency blanket one day when my sleeping bag slipped into a river. Without that blanket, I’m not sure what I would have done to keep warm that evening.

Paper Maps and Downloads for the Trail

There’s a number of apps that you can download to help with navigation on the trail. I recommend picking one but it’s also crucial to carry a paper map and compass. Just so you know, I recently wrote this post about how to use a map and compass.

Mark Down Exit Points on Your Map

Many of the waymarked trails in Ireland will take you to remote places in which you need to be careful. This means paying close attention to navigation, taking care with your footing, and keeping an eye on the weather. There’s always a possibility that you will need to get off the trail. This can happen due to injury, extreme weather or maybe even running out of food or water. Either way, it’s important to know at all times exactly where and when you can exit the trail.

Charging and Re-Charging Your Gear

I always make sure to charge my camera and phone in each town. However, you might not reach a town every day. Regardless, I believe the powerbank to be a necessity for hikers in case of emergency. My personal favourites are the 20,000amp powerbanks by either TP Link or Anker.

LifeVenture Thermal Blanket

4. What to Consider about Food and Water on the Trail

Planning for Water on the Trail

Dehydration is a common cause of illness and exhaustion on the trail. I always urge others not to use their water “sparingly” – unless necessary. In other words, you should try to carry sufficient water so that you can drink whenever you want. It’s also a risk to assume that you will find a water source on any given day or rely upon rivers, lakes, etc which might not be suitable for drinking. With this in mind, try to fill up your water bottles in towns Then make sure that you carry a water filter for stocking up on the trail. I’ve had giardiasis twice over the years – once on the Pacific Crest Trail and once on my walk around Ireland. It’s a sure way to end your trip but easily avoided if you invest in a decent water filter.

About Food Preparations on the Trail

I used to take far too much food on my backpacking trips. Although, it’s better to have too much as opposed to not enough. Needless to say, you’ll need breakfast, lunch, and dinner for each day and snacks for in between. If you are new to multi-day hiking, you’ll discover that snacks are not a luxury but rather a necessity. After all, these snacks account for the fuel your body will need to keep hiking every day!

While many hikers focus on the easiest meals to cook such as instant noodles, my own school of thought is that you should bring whatever food you enjoy the most. Now, that’s not to say you should bring frozen chips and onion rings. I’m just saying there’s no reason to suck the enjoyment out of your trip by sticking to instant noodles only. Instead, I recommend you get creative. Think about things like porridge with fresh fruit, bagels with cheese or tortillas with chili in the evening.

Here are some foods which I find work really good for long-distance hiking:

Bagels

Porridge

Biscuits

M&M’s

Fruit slice/cake or similar

Peanut butter

Denny veggie sausages

Cliff bars

Knorr pasta sides

It’s also worth remembering that you might want to eat in town or grab a takeaway some evenings. I love nothing more than grabbing a takeaway and heading for the hills to set up camp with my bag of chips, battered onion rings and curry sauce!

5. What Gear to Pack for a Multi-Day Hike

You need to think carefully about what gear to carry on a multi-day hike in Ireland. Weather conditions change very quickly and you should always have both warm gear and rain gear at the ready and a good pair of hiking boots. I wrote this article recently in which I outline my own packing list. 

Here’s a quick word on some of the most important items:

Backpack – Only consider a hiking-specific backpack. These backpacks are specially designed to carry heavy loads and offer a lot more comfort in terms of fit.

Tent – Strike a balance between size and weight. For a multi-day trip, I usually take my Vango Banshee Pro 200 because it’s reasonably light but also highly durable.

Jacket – Make sure to have a jacket with sufficient warmth and one that can withstand the harsh environment here in Ireland. A good rain jacket such as a Helly Hansen Jacket is ideal for wet conditions.

For more information on what to pack – click here.

Vango Banshee Pro 200

6. About Wild Camping on the Trail

You won’t have to think about this one if you plan on staying at hotels or B&B’s every night. I wrote a post recently about wild camping in Ireland which should help if you are new to camping. I don’t wish to create any fear here (I love wild camping). However, if you lack camping experience or you’re not yet comfortable with the prospect of wild camping, you might not enjoy your first multi-day hike. For this reason, I just wanted to encourage you to learn more about camping before you get out there. Maybe experiment by taking a quick overnight camping trip somewhere familiar before you start a multi-day trail.

And here’s a few encouraging things to keep in mind about wild camping:

– Wild camping is generally safe if you do research and take the right precautions.

– There are no real dangerous animals in Ireland.

– Axe murderers do not live in the mountains or forested areas.

– The absence of other campers creates solitude and this is a wonderful thing!

– Wild camping is free and will help you save money.

  • There’s nothing like falling asleep in the wild and waking up with nature.

Anyway, that’s all for now – See you on the trail!

10 Pieces of Budget Hiking Gear that You Will Actually Use

I spend a lot of time thinking about the most useful hiking gear that doesn’t weigh a tonne. It helps when this gear is affordable. But more importantly, I try to focus on buying gear that I will actually use. What’s worse than carrying a heavy backpack, knowing that you don’t even use half of the items in it?

I’d like to share some budget hiking gear ideas that I’ve picked up from other hikers and first-hand experience.

10 Pieces of Budget Hiking Gear that You Will Actually Use

1. Affordable Pair of Hiking Poles for Better Balance

I’d never tried using walking poles until my hike on the Pacific Crest Trail a few years ago. In short, I stopped incurring injuries when I began using poles and found them incredibly helpful going up and down. I believe most of my fellow hikers felt this same way. Once you use hiking poles, it’s likely that you’ll take them on future hikes. Now, I’m not referring to a short 5km day hike but rather a longer multi-day hike. It’s true, they provide balance and stability on uneven terrain but hiking poles also take so much weight off your body – especially the knees.

Many sets of hiking poles can fold up and pack away easily and the weight is reasonable. I know that a lot of hikers like to splash out on expensive poles, usually made of carbon. I’ve stuck with the more affordable options and they’ve always served me well.

Which ones? Rock + River has this nice folding walking pole.

Rock N River Folding Walking Pole

2. Lightweight Sit Mat for Comfortable Breaks

If you hike often, you’ll be familiar with this small but persistent dilemma that happens regularly – where to sit. It’s often wet or muddy in Ireland but mostly, outdoor terrain doesn’t really provide the kind of comfort you might hope for your rear end. I’ve tried sitting on my bag, folding my jacket and laying down a tarp – but it was always a hassle. I began using my foam sleeping mattress as a seat and this worked really well – until I stopped carrying one. A lightweight foam sit mat is a nice luxury without taking up space or getting in the way.

Rock N River Sit Mat

3. Soap Leaves for Hygiene on the Trail

Soap leaves are disposable and perfectly safe to use. This packaging is watertight and consists of fifty individual leaves. Each leaf has a fragrance and soap leaves are useful for international travel as they meet airport requirements. The ingredients are also more environmentally friendly than shower gels or shampoo, and the item is much lighter to carry. Either way, this is a nice small item that you can carry on a day hike. You can use it to wash your hands, feet or face in a freshwater river.

LifeVenture Soap Leaves

4. Mosquito Head-Net to Warn Off the Midges

My first wild camping adventure in Wicklow was almost my last due to the obscene number of midges. At that time, the only way to avoid these pests was to out-walk them or hide behind the mesh of my tent in the evening. It’s an awful thing to try cooking around midges or even just sitting down for a break. Some hikers swear by insect repellent but my mosquito head-net is the only item I find useful in this regard. You simply pull this netting down over your head/hat and midges are unable to land on every inch of your face which is the most frustrating thing about it. As for why else you should carry one? They weigh nothing and you won’t even notice this item in your backpack. In other words, there’s no reason not to carry one!

LifeSystems Mosquito Head Net

5. Backpack Cover to Rainproof Your Gear

I’m always amazed when I see people hiking in the rain without a backpack cover. Once again, this item packs down really small and doesn’t weigh very much. I keep mentioning weight in this article but as you know, weight is everything on the trail! More importantly, even if your backpack is water-resistant, a rain cover will provide a lot more protection during periods of heavy rain. An example of great backpacks are Trespass backpacks. You can also place this cover over your bag at camp or when stopped for a break. But make sure to choose the right size cover for your backpack. Sizing is very specific to ensure a decent fit for the bag.

Trespass Rucksack Raincover

6. Bum Bag instead of a Backpack

I carry a lot less gear on my trips nowadays which is why I recently downsized to a smaller backpack (Osprey Farpoint). However, even this backpack is a bit much for a day hike. A nice in-between option is to wear a bum bag. This can offer as much as 5 litres in terms of space which is quite a lot. Believe it or not, bum bags are all the rage in America. In recent years, hikers find these tiny bags a lot more practical than carrying a small backpack. After all, you can quickly access items without having to stop and take off a backpack. These bags are ultralight and Trespass’ Vasp 5 Bum bag is just 0.18kg and comes with a bottle, too!

Trespass Vasp 5 Bum Bag

7. Affordable Hydration Bladder for Hot Days and Convenience

I use my hydration bladder on every hike but it’s always in my backpack. Carrying these bladders also beats using disposable water bottles on every trip. A hydration bladder is made from very durable material and the wide opening makes it easy to fill. They roll up really small when they’re not being used and you can attach a tube for easy access while hiking. This last bit can be so useful when hiking on a hot day. It saves you from having to take out your water bottle every few minutes in order to stay hydrated. Finally, if you intend on filtering your water outdoors, a hydration bladder is a lot more practical to use.

Which one? Check out the Flexible Water Bottle by Platypus or this affordable 2L hydration bladder.

Platypus Flexible Water Bottle

8. Mac in a Sack Overtrousers for Rainy Days

I first bought Mac in a Sac when I lost my usual pair of waterproof trousers. I was sure the originals would show up and didn’t want to spend much on a temporary replacement. However, I’ve actually continued to carry these lightweight rainpants by choice. I like how they strike a balance between size and utility.

These trousers are compact and have an elasticated waistband that makes them easy to put on quickly. The seams are taped which maintains the waterproofing and my favourite thing about them? They feel light and breathable at all times. While the Mac in a Sac Overtrousers is not ideal for extreme weather, they are handy for a rainy day!

Target Dry Mac in a Sac Overtrousers

9. Safety and Emergency Items That are Too Light not to Carry

Thankfully, many emergency-type items are rather small. A first aid kit is a necessity that you should always carry on a multi-day hike. There is a different size for each occasion including this compact first aid kit. While a poncho might not be considered an emergency item, this ultralight piece of gear is a backup for a rain jacket. Also, I sometimes use a poncho to cover my backpack in extreme weather. It’s really just another case of the item being too small, lightweight and useful not to carry.

One more item that always finds a place in my backpack is an emergency blanket. This “space blanket” actually saved me one night when all of my gear got wet in a storm. I used one of these blankets to heat myself up and stay warm.

Rock N River Emergency Blanket

10. 1000 Mile Socks for Socks that Will Actually Last

I used up four pairs of 1000 Mile socks on my 3,000km walk around Ireland a couple of years ago. They would have lasted a bit longer, I’m sure. I was happy to replace them at the halfway point in order to have a “fresh pair of socks”. The point is, 1000 Mile socks are both durable and comfortable. They lived up to their lofty claims on the above-mentioned trip. With this in mind, these hiking socks offer amazing value to anyone that goes for regular hikes/walks – whether that be on a trail or not. You can also get two pairs as part of this Trail Sock Twin Pack by 1000 Mile.

1000 Mile Trail Sock Twin Pack

How Do I Plan My First Wild Camping Adventure?

I know what it’s like to worry about what might happen on your first wild camping trip. My mid-twenties were dominated by acute anxieties. This didn’t bode very well for someone who wanted to experiment with wild camping. It was also these fears that helped bring about the confidence I have today. It’s also why I spend so much time encouraging others to get out and enjoy what the wild has to offer.

In this article, I talk about how to plan your first wild camping adventure. Also, why you should be mindful of any fears or reasons that might be stopping you.

Afraid to Take Your First Wild Camping Adventure?

We all have the same fears when it comes to wild camping. These are primal fears that can cause chaos for the limbic side of the brain. As you may know, this is the “chimp” part of the brain that likes to make decisions quick and fast. It’s also the side of the brain that causes all sorts of stress and anxiety. However, there are some points I would like to share about fear and the anxiety that can come before and during any wild camping trip.

– Fear is a good thing and will keep you safe on a wild camping trip.

– Most fears are irrational and highly unlikely to happen.

– Fear is something you can manage.

– Fear creates excitement and adds to the sense of adventure.

I know it might not feel this way for first-timers but fear or danger is often responsible for the sense of excitement we feel on an adventure. The truth is, I was very scared on my first few wild camping trips in Ireland. I was not only afraid of getting lost or stranded but also quite terrified of ax-murderers, angry farmers, and the banshee. This was the reason I camped right beside the infamous Hellfire Club in the Dublin mountains one night – to face my fear of the supernatural.

Anyway, you get my point, we all have certain thoughts that cause anxiety. This is certainly true when wild camping for the first time. You might want less of this fear but this will come naturally through experience. In my own opinion, these fears dissipate over time and you should be left with a comfortable sense of excitement.

📷 @derekcullenoutdoors

How to Actually Plan Your First Wild Camping Adventure

1. Pick Out Some Potential Wild Camping Spots

It’s important to have a decent idea in terms of where you are going on your first wild camping adventure. This not only refers to the actual hiking trail but also the general area you’ll pitch your tent. But how can you know this area or spot?

I used to go out for day hikes and use these short trips to scout for potential wild camping spots. This was a great load off my mind when it came time to go out with the intention of camping. This didn’t mean I had to camp in that particular spot. But rather I now had a backup camp spot that I could use in the event of not finding another.

That being said, most of my wild camping spots are chosen without any “recon”. In these instances, I look at a GPS map and mark a few forested areas as my provisional camp spots. I don’t particularly enjoy camping in the forest but it’s often a dry hospitable place to wild camp. I might also mention that I always make sure to choose spots away from towns or civilization in general.

2. Make a Packing List and Prepare for the Unexpected

It should go without saying that making a wild camping packing list is super important. This list is responsible for keeping you safe and a fool-proof way to prepare for the unexpected. As a rule, it’s helpful not to carry too much but wise to carry more than you think you’ll need. For example, it’s okay to be “too warm” in the outdoors but never good to feel cold. So carrying sufficient warm gear for cold weather is most important such as Trespass Gear. Similarly, you should always carry rain gear and spare clothes in a dry bag.

On one of my very first wild camping trips, I ended up in a bad storm and all of my gear got wet due to my own stupidity. It was my tiny emergency blanket (space blanket) that saved the day and allowed me to sleep or stay safe that night. I will never take a trip without one and the same goes for my small first aid emergency kit. While I’ve only ever used the panadol in my first aid kit, I carry one in order to prepare for the unexpected.

Feel free to check out my wild camping packing list here.

📷 @derekcullenoutdoors

3. Make Sure Electronics are Fully Charged and Carry a Powerbank

I like to use my outdoor adventures as a means of escaping the noise and busy nature of modern life. This includes technology which means my smartphone is only really used for navigation or taking photos. That’s why the smartphone is incredibly important, for your safety relies on it.

I always make sure everything is fully charged and my electronics are stored inside a reliable dry bag. This is also where I keep my charging cables and a decent power bank. I like the TP Link 15600amh or the Anker Powerbank. I cannot tell you how many times my smartphone has died unexpectedly and this power bank has saved the day. Yes, I can revert to paper maps but let’s be honest, having a fully charged phone is not only useful but also great peace of mind.

4. Have a Plan for Cooking, Food, and Water

Cooking is one of my favourite things about wild camping. It’s not that I love cooking but the fact that nothing beats a warm meal in the wild. You also want to keep things simple. This is why I usually stick with simple ideas like these quick and easy meals by Wayfarer. For lunch, I sometimes carry bagels with cheese or a pot noodle. For snacks throughout the day, I bring a mix between biscuits, cereal bars, and pastries.

Try to take note of rivers and potential water sources on your route. Don’t depend on these sources but use them whenever available. Remember that staying hydrated will keep you healthy and fit. You can do this by drinking water as much as possible – especially upon waking up and anytime “you don’t really feel like it”.

Of course, you will also need a camping stove to boil water or cook meals and the MSR pocket rocket is a small and lightweight option that I like to carry on overnight trips.

– Dioralyte is great for staying hydrated and Berocca is good for a boost of energy.

– Cereal bars are healthier than chocolate bars.

– Always carry a lot of water and try to camp near a water source.

– Carry a lighter AND a box of matches.

– Oats/porridge is a nice hot meal that packs a lot of energy.

– Coffee is filled with energy and a great boost for the mood in the mornings.

Note – I carry at least one backup meal and a spare box of cereal bars for emergencies.

📷 @derekcullenoutdoors

5. Tell Someone Where You Are Going

I used to feel like it was almost a bit childish to contact my brother before going out for a night in the wilderness. In fact, I often pretended there was another reason for these texts and left my destination plans at the end.

However, after spending so long in the hiking community, I’ve come to appreciate the very real reasons why you should always tell someone where you are going. There are lots of rescue stories and you only need to follow Mountaineering Ireland to see some of these. There are also many instances that don’t have a happy ending. I think the story of David O’Sullivan on the Pacific Crest Trail was the one that affected me the most. David, from Cork, is thought to have gotten lost on this trail in America. I’ve been sending out these text messages with destinations/maps ever since.

This brings me to the next point…

6. Use Paper Maps and GPS (and Maybe a SPOT Device)

I don’t really use paper maps anymore but you will usually find one in my backpack. It’s not that GPS is unreliable but rather that electronics are prone to error and failure. Whether it loses power or gets wet, a phone is always at risk in this sense. And yes, it might be unlikely but you should carry a paper map in case of the unexpected.

I carry these Ordinance Survey paper maps in my backpack.

As for GPS, there are several apps out there. Hiiker and AllTrails provide various features for trails in Ireland. Maps.Me is a simple alternative which I use a lot.

Quick Note – SPOT is a tracking device that uses a satellite network to facilitate GPS tracking and texts in hard-to-reach places. This means you can text a friend from almost anywhere in the world. You can even provide a map that uses this device to show your location. I normally recommend hikers invest in one of these for long-distance trips in the wild. It’s a good idea to have one regardless of where you go.

📷 @derekcullenoutdoors

7. By All Means Plan Ahead but Most Importantly – START!

I announce the start date of my long-distance trips on social media for one reason – accountability. I know that by announcing this date, the trip is far more likely to happen. I’m not suggesting you announce your wild camping trip online but highlighting the fact that getting started is never easy. There’s just always a reason to wait or put off an adventure. It’s worth embracing whatever helps you take that first step. My advice is to set a day or date and commit to making a start.

A Final Word about Your First Wild Camping Adventure

I’d like to finish up this article by saying that you never regret the adventure. I’ve had some serious fails and miserable times on the trail but there was always something to learn. As a tip of the hat to Henry David Thoreau, let me say that I go wild camping because I wish to live deliberately and see what I might learn and not, “when I came to die, discover that I had not lived.”

Enjoy and remember that fear will always disappear in the face of confidence. This is why wild camping is an experience, not a competition.

How to Choose the Right Tent for Camping in Ireland

The tent is possibly the most important item when it comes to camping. While other options exist such as the bivvy bag and hammock, tents are more suited to the conditions in Ireland. Not every tent is suited to every type of adventure and certain things need to be considered to find a tent that’s right for your adventure:

What size should it be? Which features should it have? Is the weight or colour of a tent important? Is this tent something that you can afford?

In this post, I’d like to take you through some things to consider before investing in a tent. This will help you decide what type of tent is right for your upcoming adventure.

The Season, Size and Weight of a Tent

It firstly depends on what type of adventure you have in mind. For instance, if you plan to go car camping, the weight of a tent won’t matter. As for hiking the Wicklow Way, you will want to strike a balance that allows for a reasonably lightweight tent. Then there’s the season, conditions and number of people you need to squeeze inside!

The Season

Ireland has very unpredictable weather patterns. I recommend choosing a 3-season tent. This is considered an “all-rounder”. Aside from extreme weather, this will suffice in most types of conditions in Ireland. Most tents should be up to this task. For more extreme weather, you’ll need a formidable 3-season tent to withstand strong winds and heavy rain or snow. All considered, a decent 3-season tent should be enough to protect you from the wind and wet-weather conditions.

The Size

How many people will sleep in the tent? Each tent will display a specific size that states one-man tent, two-man tent etc. However, this size will also change with each brand. That is to say, there’s no “industry standard” and some are more spacious than others.

For Car Camping – Size won’t be an issue when you stay on a designated campsite with a car. There’s plenty of space and you don’t need to carry the tent. This means you can pick a tent with whatever special features catch your eye. If you go wild camping and take the car, you won’t want a tent so big that it attracts attention.

For Backpacking – I recommend that you pay close attention as the size will determine the weight that you end up carrying. As a rule, I always go one size bigger. I choose a two-person tent for solo camping and a three-person tent for two people. This is because most “two-person” tents feel rather cramped and small for two people. I also prefer to have lots of space for moving around and keeping my backpack inside. I’m happy to carry that extra bit of weight on my back in order to have this extra space.

Tip – Choose 20 square feet per person for a bit more room and 15 square feet per person for something more compact.

The Weight

You definitely need to think about weight if you intend to carry this tent in your backpack. It will be the heaviest item in your bag and a weight that you can’t lighten until you replace it. At the same time, remember that safety is your number one priority. You should never choose a lightweight tent that may not withstand the conditions and changing environment in Ireland.

A Quick Note About Lightweight and Ultralight Tents

The material on ultralight tents is rather thin and the poles are much lighter than a standard tent. It’s important to know that durability is not sacrificed. These poles etc are often stronger than you might find with a heavy tent. This superior material and design are why lighter tents are more expensive. Most long distance hikers in particular are happy to pay more in order to carry less.

What Else Should You Keep in Mind?

The “Peak Height” of Your Tent

The height of a tent will dictate how spacious it feels inside. The “peak height” is the distance between the ground and the top of the tent. This will determine whether or not you can sit up comfortably in the tent. For car camping, this will also illustrate if you can stand up and walk comfortably around the inside. Also, tents with vertical walls can feel more spacious as they offer more shoulder room.

The Tent Door

I never really cared about the entrance of a tent until I went on my first multi-day hike. In short, having more than one door is very useful. It means you don’t have to climb over another person to get in/out when sharing the tent. I also prefer the side door as it feels easier to pass through – but this is my opinion.

The Vents and Vestibules

Mesh and tents are not to be overlooked. Vents allow a tent to feel less stuffy and reduce the amount of condensation inside. This means vents are even more important on a single-walled tent. As for vestibules, these small porch-like areas are great for storing your bag or keeping your shoes and any wet gear.

The Color

The colour of a tent is important for wild camping in particular. A bright orange tent is more likely to stand out or attract unwanted attention. More specifically, I prefer to go with green or brown tents (natural colours) for wild camping. Preference is also important and light colour tents allow more sunlight to pass through the walls which is very important to me in the mornings!

The Footprint

Footprints are often ignored by hikers but they create the perfect barrier between your tent and the ground. I suggest investing in a lightweight footprint. This will keep the tent dry but also protect the fabric from any loose stones, branches or sharp objects on the ground.

Maybe you want a little more help with choosing the right tent? Here are a few of my suggestions to get you started.

My Tent Recommendations for Camping in Ireland

Hiking Tent for Wild Camping in the Mountains

The Vango Banshee Pro 200 is my favourite tent for wild camping in Ireland. It has a low centre of gravity which enables the tent to withstand heavy winds and rain. There’s just enough space inside for one person and a backpack. The green colour is useful for blending in with the environment. I have many very expensive tents but the Vango Banshee Pro 200 has outperformed most on many occasions. For a two-person tent, you can also upgrade to the Vango Banshee Pro 300. By the way, I carried this tent for the entirety of my 3,000km walk around Ireland a few years ago.

Check out more hiking tents here

Banshee Pro 200 – Vango

For Car Camping with the Family on a Campsite

The Avondale 5-person Airbeam by Outwell is a spacious tent that will suit a family or friends that wish to camp together on a campsite. It has a lot of headroom (height) and a specially designed ventilation system that makes it feel airy inside. The many ropes and pegging points allow for the tent to be secured properly. For something smaller or more affordable, the Huntsville Twin 600 by Easy Camp is a very practical option that features twin facing doors and a large living area inside.

Check out more family tents here

Avondale 5 Person Airbeam – Outwell

For a Multi-Day Hike on the Wicklow Way, Kerry Way etc

The MSR Hubba Hubba NX 2-Person tent has been on my wishlist since hiking the Pacific Crest Trail. I used a similar tent back then but many of my fellow hikers were using this tent and I’ve wanted it ever since. The tent is super light (3lb 2oz) which is something every long distance hiker will appreciate! The green colour also makes it ideal for blending in with the environment. Aside from the spacious interior, you’ll find this durable 3-season tent the perfect companion for a multi-day hike.

Check out more Hiking tents for multi-day hikes here

Hubba Hubba NX 2-Person tent – MSR

For a Budget Alternative for Wild Camping or Multi-day Hikes

The Inis 200 by Rock n River is incredible value and a green dome tent that blends in nicely with natural scenery. With plenty of room inside, the tent is ideal for one or two persons and the tent is rigid and fully waterproofed. There’s also a nicely sized vestibule in front with a mud flap and gear pockets for smaller items inside.

Check here for more great value adventure tents

Inis 200 – Rock N River

For a Different Night of Wild Camping in Fair Weather

I tell my friends that a bivvy bag is like a waterproof sleeping bag and this is partially true. A bivvy bag is more useful than it sounds. It is a great way to sleep outside, while feeling more “connected” to your surroundings. The Stratosphere Tent by Snugpack is a lightweight one-person bivvy. It’s a great alternative that promises a more personal or immersive encounter with the outdoors. That being said, I only recommend a bivvy bag to experienced campers and during decent weather.

Check out more hiking tents here

Stratosphere – Snugpak

Final Thoughts

You might notice my favourite tents for camping in Ireland are neither the most extravagant nor the most expensive options. There’s a lot to be said for experience and these tents have always performed well for me. That said, everyone will have their own preference. The above guidelines should at least help you find the right tent for whatever adventure you have in mind.

Beginners Guide to Navigation with a Map and Compass

Most people like to stick to familiar trails and areas. However, some basic navigational knowledge is necessary for longer hikes or trips off the beaten path. This navigation refers to both skills and tools but these are nothing overly complex or expensive.

Whether you want to prepare for a multi-day hike or gather some potentially life-saving knowledge for the outdoors. I’d like to take you through some basic skills and tools that should get you started with navigation in the great outdoors.

What is Orienteering Exactly?

Navigation is all about being able to read specially designed maps that illustrate the trails, vegetation and features of a landscape. This might include rivers, bogs, forests and even fences or buildings. Most OS maps (Ordinance Survey) can feel somewhat intimidating at first. A basic understanding of how to read a map will fix this issue right away. It’s also a surprisingly fun skill to learn in the right circumstances!

Just so you know, OS maps are also drawn with difference scales and these scales are illustrated to give you a sense of size on the map. In other words, everything on the map is obviously smaller than what it represents in real life and so these scales help quantify the size and distance between features. But more on that in a moment.

📷 @trcklinefieldstudies

Who Learns to Navigate?

It should go without saying that all kinds of people learn these skills. Navigation is something that can bring an added sense of confidence for hikers. While I have yet to feel lost on my hikes around Ireland, that’s not to say it cannot happen. Having a basic knowledge of navigation enables me to feel more confident.

Aside from knowing the basics in this article, courses for navigation are available for all levels of experience. Beginner courses will usually take place on marked trails and where you find notable features. Intermediate or advanced courses can take place in remote areas. Hikers need to be more precise with their skills and tools in these areas.

But Why Else Might You Want to Learn to Navigate?

Learning to navigate is fun and something that you can practice in a safe environment. There is generally no danger or pressure during this learning process. You can learn to navigate on a day hike or brief trip into the mountains. Navigation is also quite an interesting skill to learn. It involves a map and compass…and getting outdoors!!

As you may know, many people treat navigation as a sport. It’s true, orienteering is another reason why some people take their navigational skills and tools more seriously. This is an activity that combines navigational skills with the excitement of a race and forbids the use of GPS devices. But you just want to know the basics, right?

📷 @thebeardedburton

The Basics of Reading and Understanding a Map

OS maps are topographic maps that include the natural features mentioned above. They also include various landmarks such as fences, power lines etc. These maps will outline vegetation boundaries in yellow and other man-made objects in black. As for counter lines, these lines illustrate whether a section of land is either flat or steep.

Relatively flat – Counter lines are far apart

Steeper Terrain – Counter lines are close together.

There are also many symbols and hieroglyphics on OS maps. You should always take a few minutes to understand what they represent. This might sound obvious but many hikers never take time to learn these symbols and hence, cannot read a map.

So take time to familiarize yourself with the map before going out into the wild. Here’s two quick examples to help you understand the scale on OS maps:

1:10,000 – 1cm is 100m on ground

1:7,500 – 1cm on map is 75m on the ground

A Basic understanding of the Compass

Your compass should be used to determine the direction of a particular object. This bearing can help determine either your intended direction or specific location. This is important because you need to know what direction to go at all times.

On a way-marked trail, it’s easy to turn left or right at signposts. Without these way-markers, there is often indecision. This is especially the case in a forest, bog and after dark or during conditions with low visibility. Either way, a compass should be inside your backpack at all times.

Most compasses have a magnetic needle. You should notice the red tip of this needle is pointing “magnetic north” which is also shown on the lines of a map.

Here’s the definition of “magnetic north” according to Wikipedia:

“Magnetic north is the direction in which the north end of a compass needle or other freely suspended magnet will point in response to the earth’s magnetic field. It deviates from true north over time and from place to place because the earth’s magnetic poles are not fixed in relation to its axis.” – Wikipedia

But you should also remember the sun can be useful for navigation and knowing which direction you might be facing. In fact, navigation is really about using a combination of your skills and tools to read and understand the environment.

📷 @kirstyhamilton_explores

Using the Map and Compass Together

For most beginners, the tricky aspect of using a map and compass comes when trying to hold the map in such a way that it matches the view. This means you need to keep rotating the map so that whatever lies in front of you is also how it appears on the map. It’s a form of “mirroring” that ensures what you see on the map can be seen on the landscape. Now, you might not get that fully so let’s consider the following:

A compass will always point north and you should do the very same with your map. For instance, if standing in the forest facing north, hold the map so that it also faces north. If you turn to face south, rotate your map so that north on your map continues to point north. Make sense? It’s much easier when you put this into action.

One way that I keep track of my location on a map is to hold my thumb on this location. As I hike further in a particular direction, I move my thumb on the map in that same direction. Although this technique is widely used, it takes practice.

With the above in mind, proper navigation requires that you learn how to use a map and compass together. After-all, a map and compass is far more reliable and helps ”triangulate” this location. This means you can consult three different systems during the process.

Here’s a reminder of the main objectives of navigation:

1. To determine your precise location on the map.

2. To identify your next target/destination on the map.

3. To calculate the time and distance to reach this target/destination.

The first of these steps can be assisted through “mental mapping” and this is a simple process that involves observing your surroundings in order to know your location. You then use a compass to take a bearing from that location to your intended waypoint and then get moving in that direction.

And before moving onto the next section, are you familiar with “Attack points”?

Attack points are features/locations to which you can hike quickly without the use of a compass. This can be a distinctive rock, maybe a bend in a river or something that stands out on a particular landscape. Instead of walking with hope, it’s worth using these attack points as a reference point and then measuring the distance between them.

📷 @teamwalking_hillskills

Judging Time and Distance in the Outdoors

Judging the distance between two points is extremely useful in the outdoors. Most people hike at an even pace. If you know how long it takes to hike 100 metres, it’s easy to calculate how long it may take to hike multiple kilometres. However, it can take much longer to hike through marsh or unmarked areas so keep this in mind.

It takes practice to develop this skill and get better at calculating time and distance. As mentioned, you can learn these skills in a safe environment without having to worry about not getting out alive!

But what does this look like in the field?

I use my “pace count” when hiking in the mountains.

About Using Your “Pace Count” in the Field

One natural step is equal to a pace. You just need to know how many paces it might take you to walk 100 metres. You can do this by walking a measured 100-metre and count the number of steps you take and then turn around and walk back to your starting point while recounting this number of steps. The “pace count” is the average of these numbers but you should try to recreate the scenario (carry a backpack etc) and conditions (the terrain) in order to be accurate with this calculation.

You can then use this pace count to gauge time and distance in the wild. That being said, time and distance is often deceiving on the trail. It can feel as though you are hiking long distances due to challenging terrain or a heavy backpack. In reality, you might have hiked half that amount of time or distance. I think you get my point…

Have an Exit Strategy Before You Hit the Trail

There’s a lot to be said about common sense on the trail. Honestly, this is often your best way to ensure you don’t get lost. Likewise, preparation and precaution are key to staying safe. This is why you should always have a backup plan.

To be more specific, before hiking the trail, you should know exit points in the case that you might need to get off the trail. This can be a road, carpark or a trailhead that leads to a settlement of some kind. It’s quite easy to identify these exit points in Ireland because most trails or National Parks are reasonably close to towns.

📷 @thehigherhiker

3 Last Minute Tips for Navigation-Related Safety

1. Tell Someone About Your Plans

I’ve come across a lot of sad stories in my time hiking trails around the world. Many of these relate to missing hiker but there are just as many rescue stories. Many of these rescues happen because the hiker made sure to tell someone about their plans. This can mean a quick text or call can potentially save your life.

2. Slow Everything Down in a “Situation”

If you do get lost, remember that panic can cause common sense to jump out the window. Try to avoid this at all costs. Slow everything down so that you can take accurate readings with your map and compass. It’s important to check this more than once so you can make the right choices in getting back to safety.

3. Wear the Right Outdoor Gear

You really shouldn’t be hiking in the mountains without proper hiking shoes and adequate outdoor clothing. This also means you should always have your map and compass on hand along with a first aid kit and water at the very least.

I genuinely believe that common sense is the best way to stay safe outdoors. However, proper navigational skills are necessary for longer hikes or trips off-the-beaten path. A map and compass should be the first two items placed in every backpack. A basic understanding of how to use them is something fun to explore and not to ignore!

Everything You Should Know About Hiking the Wicklow Way

The Wicklow Way is my favourite long distance trail in Ireland. It was first written about in the mid-1960s by J.B Malone who set out to develop a long distance walk in Ireland. It took many years for this idea to gain much interest. The Wicklow Way is now the best known hiking trail in the country and easily accessible from Dublin.

Stretching from Marley Park in Dublin to Clonegal in Carlow, the Wicklow Way is approx 125km and split into seven “stages”. Each stage is intersected by a small town. Most hikers take up to one week to complete the trail without having to rush. In between these towns, the trail can feel surprisingly remote. It snakes its way through a series of foothills and mountains that climb more than 3,500 metres in total.

Hiking the Wicklow Way: What Should You Expect?

Most of the trail travels through Wicklow which mostly consists of mountains and hills. You will also hike stretches of paved road from time to time. These are usually quiet country roads and lanes with little-to-no traffic. It’s relatively easy to find a water source on most days (but not guaranteed). The accommodation at the end of each stage is reasonably affordable and cheerful. If you wish to wild camp, this is also possible – but more on this in a moment.

Overall, I’m always surprised with how remote it can feel on the Wicklow Way because you are always within walking distance of civilization. While the hill climbs come and go by the hour, they are rarely too steep and are accompanied by stunning views. The Wicklow Way is also well-marked and with a paper map and GPS, I believe most hikers will feel comfortable in terms of navigation. With these stunning views and favourable logistics, I think it’s an ideal long distance trail for a first-timer.

But maybe you don’t want to (or cannot) hike the full Wicklow Way?

📷 @sher_yogi

Hiking the Wicklow Way in Stages

It’s also possible to hike the Wicklow Way in stages. This makes the trail suitable for every fitness level. Some stages are much shorter than others so hikers can also pick out a specific stage, with which they feel comfortable. I’ve done this myself when short on time and if you live in Dublin, County Wicklow never feels like “a long way to go” for a hike.

What’s the Best Time of Year to Hike the Wicklow Way?

May to September is the most reliable time to hike the Wicklow Way. I would advise the less experienced not to attempt this trail close to the Winter months. Most of the accommodation (and many restaurants) are also not open outside of the Summer months. The weather is very unpredictable which is the main reason to avoid these months. In fact, I prefer to hike this trail in the shoulder months of May or September. There are less people on the trail and various attractions in between are less busy.

In case you might be asking yourself, I refer to places like Powerscourt Waterfall and Glendalough which are both highlights of hiking the Wicklow Way.

Where to Start and Finish the Wicklow Way

I should also say that you can choose to hike north to south or south to north. The main difference between each starting point is the ease of transport. That is to say, it’s easy to get to/from Marlay Park in Dublin but slightly more tricky to reach Clonegal.

There’s also the fact that starting in Clonegal will help ease you into the hike. Less climbs near the beginning when you hike south to north. While the last day presents stunning views of Dublin and the coastline.

Note: The number 16 bus travels from Dublin city centre to Marlay Park. Meanwhile, Bus Eireann stops in Kildavin which is less than 3km from Clonegal.

📷 @sallyham55

Wild Camping Vs. B&B – Where to Stay in the Wicklow Way

As for where to stay, there are B&B’s at the end of each stage on the Wicklow Way and a handful more in between. There is a nice little hostel in Knockree and another at Glendalough and three Adirondack Shelters on the trail. These shelters are small huts that were built so that hikers could take shelter from the elements. I’ve come across people wild camping beside these shelters and sleeping inside with a bivvy bag. With one or two exceptions I’ve found multiple spots to wild camp on the Wicklow Way.

You should know that wild camping is not permitted in Glendalough Valley. Hikers should always expect to either camp earlier than planned or to hike further when searching for a suitable spot. I say this because sometimes you happen across a suitable spot for a wild camp but it might be earlier than you expected to stop hiking. Likewise, it’s often necessary to keep hiking until you find a nice place to wild camp.

📷 @andreasrothphotography

Food and Water on the Wicklow Way

It’s important to carry enough food for each stage of the Wicklow Way because towns are few and far apart. There is no alternative to these towns in terms of buying food. As for water, there are many sources along the trail. There are also times when you might not come across one when needed. You should have at least two or three litres of water at all times. Remember that due to wildlife, farming and forestry, the water en-route is not always potable. With this in mind, it’s really important to pick up a water filter like the Trailshot Microilter by MSR.

For my own hikes, I always had at least one backup meal in dried food for each time of day – breakfast, lunch and dinner. I also pack many cereal bars and snacks in the case of an emergency (running out of food).

Following the Trail Signs and Navigation on the Wicklow Way

The Wicklow Way is sign-posted really well with a variety of markers that feature a “yellow man”. You will most often find them at junctions and then every half-kilometre for the long straight sections on the trail. There are also information boards from time to time but it’s best to have your own GPS, maps and apps to consult for navigation.

As a rule, if you don’t see a trail marker for more than one kilometre, it’s possible that you will need to turn around and at least check your map. I’ve mostly used offline maps (an app downloaded before hitting the trail) but in the case of my battery running out, I also have a powerbank and OS paper map of the Wicklow Way area.

📷 @courtneyshawactor

What Gear to Pack for the Wicklow Way

I’ve put together this packing list for a long distance hike which you might want to check out. It’s crucial that you also do your own due-diligence. The gear you pack will always impact how comfortable and safe you feel on the Wicklow Way. Footwear with good outsoles and support is recommended. I always use trekking poles – the importance of which many hikers seem to ignore. I won’t go into the specifics in this post but I would like to mention a few things to remember about clothing:

Layering Up – The weather on the Wicklow Way can change in a second and you need to be prepared for cold or wet weather on a hike. While it may seem like a sensible idea to take the warmest, waterproof jacket with you – the better option is to layer up. If you have both lightweight gear and several layers for underneath, this will enable you to regulate your temperature and provide you with the best of both worlds.

Avoid Cotton – When the weather is hot, cotton can cause chaffing. When the weather is wet, cotton is difficult to dry. When you are cold, wet, and wearing cotton, you are a walking recipe for hypothermia. Choose a material like merino wool, polyester or nylon which dries quickly and keeps the moisture off your skin.

Keeping Clothing Dry – It always brings me confidence to know that there is something warm and dry to wear later that night. Also, if you wake up to the sound of rain in the morning and your hiking gear is wet, resist the temptation to hike in your dry clothes. Instead, pack them up, put on the wet gear and suck it up. You’ll likely need this warm and dry gear to sleep in again that same night.

📷 @muno.explore

Day by Day Itinerary for Hiking the Wicklow Way

Let’s take a quick look at the seven stages from north to south on the Wicklow Way:

Marley Park to Knockree – 21km – Approx 8 hours walking.

Knockree to Roundwood – 18km – Approx 7 hours walking.

Roundwood to Glendalough – 12km – Approx 4 hours walking.

Glendalough to Aughavannagh – 14km – Approx 5 hours walking.

Glendalough to Glenmalure – 14km – Approx 5 hours walking.

Glenmalure to Moyne – 21km – Approx 7 hours walking.

Moyne to Shillelagh – 21km – Approx 7 hours walking.

Shillelagh to Clonegal – 19km – Approx 6 hours walking.

Some Final Points for Hiking the Wicklow Way

Carrying Your Own Backpack – Believe it or not, you don’t even need to carry all your belongings in the summer months. It’s possible to ask most B&B’s or even a local transport company to take your backpack to the next town – for a fee of course.

Consult the Weather Forecast – The Wicklow mountains are very exposed in places and rather scary in extreme weather. The weather can also change very quickly so it’s important to have an idea of what to expect and plan and pack accordingly.

Bring a Powerbank – Try to make sure that both your phone and powerbank is full charged by the time you depart each morning. Charging these items is the first thing I try to do as soon as I stop hiking for the day.

Be Careful on the Roads – Although there is little traffic on the road sections, cars can drive fast on these sections for this same reason which poses an obvious danger.

Remember to Leave no Trace – Know the principles of “Leave No Trace” and always pack out everything that you take with you on the trail. It’s also really important to respect the wildlife and local landowners and avoid starting any campfires.

📷 @philyob

Final Thoughts

You don’t need to have a high level of fitness to hike the Wicklow Way but decent preparation will always keep you safe. Early starts will also help take the pressure off in terms of covering any distances in between. I also encourage friends or family to hike the Wicklow Way alone. Yes, you can share the cost of accommodation with friends but hiking alone is a very different experience and the Wicklow Way is the perfect opportunity to experience a stunning wilderness in the “Garden of Ireland”.

My 7 Favourite Wild Camping Spots from Walking Around Ireland

I went wild camping for more than one hundred nights in the year that I walked around Ireland. It was my first time to sleep in all of these spots with no directions or information. I was often camped in a random forest next to the road or on a hilltop above a farm. These spots were not always spectacular but always provided the sense of adventure and excitement I was hoping to find. Some wild camping spots really stand out in my memory. In this blog, I will share with you for the first time – my favourite wild camping spots in Ireland.

My 7 Favourite Wild Camping Spots from Walking Around Ireland

1. Dunree Beach on the Inishowen Peninsula in Donegal

This area is best known for Dunree fort which sits on a rocky promontory on the Inishowen Peninsula in Donegal. It was built during the Napoleonic Wars and really adds to the sense of mystique in the area. I was far more interested in the beautiful view that opens up as you approach the sandy and rather isolated stretch down below.

Dunree Beach feels like a sort of amphitheatre due to the shape of the bay. On more than a few occasions I’ve had this beach all to myself . The dunes provide enough shelter from the elements and privacy which is needed for a comfortable night of wild camping. I’ve also parked up the road and walked down to the beach with my gear in-hand.

Dunree beach 📷 Derek Cullen

2. Glenmacnass River Near Lough Tay in Wicklow

Glenmacnass Waterfall was used as a filming location in the movie “Braveheart”. The river preceding this spectacle leads up further into the Wicklow mountains and past a popular attraction known as the heart-shaped lake – Lough Ouler. I often camp right next to this river after visiting the lake or climbing nearby peak – Tonelagee.

While there is often a swarm of midges awaiting at dusk, I love the sense of wildness in this area. It’s common to see deer at sunrise or sunset. The silhouettes of the mountains offer some of the most spectacular scenes in Wicklow. When you first arrive at this river en route to Lough Ouler, it’s best to walk at least a few hundred metres up river. That way you are out of sight and not bothering any hikers that come that way.

I used to walk all the way to this spot from Glendalough via St Kevin’s Way and Tonelagee Mountain. I then return to Glendalough by either climbing over Scarr Mountain or walking the nearby road that runs down the valley and past Glenmacnass River. It’s a hike but a real adventure to take on for a weekend of wild camping!


Glenmacnass River 📷 Derek Cullen

3. Mountains or Lakes Between Killarney and Black Valley in Kerry

Want to see some of the most stunning mountain scenery in Ireland? Climb up above Torc Waterfall on the Kerry Way hiking trail. The trail is well-marked and there are many potential wild camping spots between here and “Black Valley”. I eventually settled for a majestic spot next to a lake. I happened across many more spots earlier that same day but it was too early to stop. There’s not much else around except silence and natural beauty so be sure to bring supplies. I have yet to hike this trail in full but this section put the Kerry Way at the top of my “to hike” list.


Killarney, Kerry 📷 Derek Cullen

4. Lough Salt in the Hills of Donegal

I know that lots of people will be quick to recommend a visit to Glenveagh National Park. While I totally agree, I much prefer the lesser known spots for wild camping. Located approx halfway between Dunfanaghy and Letterkenny, Lough Salt is the perfect example of what I hope to find on a night out in the wild. The lake is used as a reservoir and especially interesting as it sits more than 450 metres above sea level. There’s very little traffic on this road (zero after dark). I camped close to the lake but on the other side of a hill that faced down into the mountains. Cue the most incredible night of reading under my headlamp and watching a dark mist descend on the mountains below.


Lough Salt 📷 Derek Cullen

5. Great Blasket Island Just Off the Coast of Kerry

I think this just might be my favourite place to visit in Ireland. Not to mention my favourite place to go wild camping. There’s a lot of history behind the ruined village and life on the Great Blasket Island. I recommend reading “Twenty Years a Growing” or “The Islandman” to know more about this history. I’m just as fascinated by the wildness and wildlife on the island. You can spend an entire morning or afternoon walking from end to end and the views are beyond special.

I camped next to the “Kings House” on the Great Blasket Island. It’s important to take great care in terms of the principles of Leave No Trace. There’s a tiny coffee shop on the island that allowed me to use the toilet by day. There is also a spring for water but you need to bring all of your own food.

Note – I get the feeling that wild camping might not always be welcomed/encouraged on the Great Blasket Island. I plan to return as soon as possible for this reason/suspicion!

Great Blasket Island 📷 Derek Cullen

6. The Mourne Mountains in County Down

I walked through a small portion of the Mourne Mountains on my walk around Ireland last year. This was one of the most beautiful sections of the entire walk and one that made me feel especially small! There were so many spots I wanted to camp for the couple of days I spent walking this area. Some of these spots were graced with spectacular views of the land below. Others were sandwiched in a valley between two towering peaks. Due to an injury, I was eager to reach the next town and kept walking past many of these potential wild camping spots.

I still managed to pitch up in a lovely spot, such is the beauty and remote nature of the mountains. I could see the lights of a town in the valley below and only silence surrounded my tent that night. I hope to seek out many wild camping spots in the Mourne Mountains in the future.

Mourne Mountains 📷 Derek Cullen

7. Nephin Beg on the Bangor Trail in Mayo

There is a part of Nephin Beg which is said to be the most remote point in the country and 8km to the nearest road. I’m not sure of the exact coordinates but the entirety of “the Bangor Trail” felt like the most remote place in the country. It felt quite strange to be hiking and camping in such a dark landscape. The sights were reminiscent of the bleak times of history like the famine years. In spite of this rather dark atmosphere, it felt like a privilege to camp here.

It was absolute silence and stillness. However, there were a bazillion midges objecting to my wanting to camp or cook in the area. It’s also quite a tough hike (much harder in wet conditions). The trail is not well-marked but for experienced hikers/wild campers, a night in Nephin Beg is an exciting and unusual experience to say the very least!

Nephin Beg 📷 Derek Cullen

Final Thoughts

In all my years of wild camping, I’ve often found the best camping spots in the most unlikely of places. Lough Salt and Dunree Beach are examples of this. While some spots stand out from others, I believe the same sense of excitement can be found just down the road as on an adventure on the other side of the country – or even the world, for that matter!

Top 7 Must-Visit Outdoor Destinations in Ireland

I’m increasingly interested in outdoor destinations and parts of the country that I might explore on foot. I’ve taken a few road trips around Ireland and really enjoyed visiting the usual landmarks and attractions. My favourite experiences in Ireland have taken place outdoors and without any kind of entry fee – something that seems quite rare nowadays!.

In this blog post, I’d like to share with you some of my favourite outdoor destinations in Ireland that you might want to consider for your next adventure.

Top 7 Must-Visit Outdoor Destinations in Ireland

1. Killarney or the Dingle Peninsula in Kerry

📷 @endless_wander

For many tourists, Kerry represents their idea of quintessential Ireland. While I think that tourists are often misguided toward very busy places that feel overcrowded, I have to agree. Kerry is not only home to bustling villages with traditional music and food but also endless opportunities for getting outdoors. You don’t need to climb Carrauntoohil (Ireland’s highest peak) to appreciate the majesty of the mountains. Most of this scenery is easily accessed from marked trails such as the Kerry Way or the Dingle Way. There are lots of places to enjoy wild swimming, and Inch is fantastic for surfing with B&B’s everywhere in between. I was especially pleased to find so many campsites in this part of the country and a host of unusual experiences to encounter. My favourite islands include Skellig Michael, Valentia Island, and the Great Blasket Island.

Tip – Take an overnight trip to the Great Blasket Island. It’s permitted to wild camp on the island (You carry your own supplies) and there is also a small hostel.

2. Anywhere in Connemara, Galway (I love Leenaun)

📷 @real_adventures_connemara

I was first drawn to Connemara with hopes of walking alongside the old stone walls and fields that I saw in movies like “The Field” and “Far and Away”. I’m not sure how much of these movies were actually shot in the area. I was led to believe that Connemara was unspoiled in comparison to much of rural Ireland. The region certainly feels quite remote and primitive at times. There are interesting landmarks including the stunning Kylemore Abbey. If you would rather be more active you can go kayaking, horse-riding, and hiking.

When I walked around Ireland a couple of years ago, Connemara was one of my top three destinations. It really did feel rather unspoiled compared to many of the other popular areas.

Tip – I recommend taking a road trip through Connemara and prearranging some outdoor activities such as kayaking or a guided hike. You will find fantastic outdoor activity companies in the area through a quick search on Google. Leenaun is one of my favourite places to stay and located next to the beautiful Killary Fjord.

3. Inishmore just off the Coast of Galway

📷 @aranglamping

I’ve been to the Aran Islands quite a few times over the years. There are three different islands with Inishmore being the most visited. While I do think the other islands are more off the beaten path and even more authentic, there is just so much to do/see on Inishmore. For instance, there are many ancient forts to explore and some of these landmarks are without the busyness of Dún Aonghasa. The beaches feature pristine white powdered sands and the water is reminiscent of what you might find in the Mediterranean.

I spent a lot of time cycling from trail to trail on my first visit but decided to walk everywhere on my last visit. Either way, aside from the local pub, all of the attractions on Inishmore are outdoors. It’s true that some of these attractions require a small entry fee but not enough to take away from the experience.

Tip – Make sure to visit the Black Fort for a less crowded experience and use the hop-on/off minibus if you want to spend more time at each of the attractions on the island.

4. The Cooley Peninsula in Louth

📷 @carlingfordire

The Cooley Peninsula is best known for oysters and Carlingford Lough. It’s a place where groups (often school tours) show up for watersport activities – and for good reason! There’s a great adventure centre where you can rent kayaks or join regular guided excursions. For me, the Cooley Mountains are the place to be! There is a long-distance path called the Tan Trail (40km), whereas Slieve Foy offers spectacular hiking and panoramic views. The Cooley Peninsula, which is en route to Northern Ireland, would make an ideal stopover on the way to the Antrim Coastline/Giants Causeway.

Tip – Try the Molly Loop Walk (5km) which leads up into the mountains to an abandoned village from the time of the famine.

5. Malin Head on the Inishowen Peninsula in Donegal

📷 @paesaggidirlanda

It’s not because I’m biased (I currently live in Malin Head) but because Malin Head is one of my favourite outdoor destinations in the country. As with the Aran Islands, all the “attractions” are to do with nature and within easy reach of each other. On a visit to Banba’s Crown at the very north tip, you can hike a rugged coastline, while taking in majestic views of the ocean. On Five Finger Strand, you can catch the sun going down from a beautiful stretch of beach. The “Little House of Malin” is another interesting stretch of coastline that also offers a nice little encounter with some local history. I should also mention the road to Malin Head is just as interesting as the Inishowen Peninsula. It is home to a lot more history and beautiful scenery than people seem to know about!

Tip – Rent a little cottage and spend a couple of days exploring on foot and walking around the very north tip in Malin Head. It’s rugged, unspoiled, and reasonably remote.

6. The Beara Peninsula in West Cork

📷 @cork_daily

I really love the countryside in Cork and the Beara Peninsula offers some of the most remote and stunning scenery in Ireland. If you fancy a road trip with lots of places to get outdoors, the “Ring of Beara” is perfect. It’s a rather short drive (4 hours) that passes many idyllic villages such as Eyeries and Allihies. As always, my personal interests lie within the natural attractions. Mare’s Tail Waterfall is thought to be the highest in the country and Healy Pass is also a special place. There are so many lesser-known looped trails on the peninsula and a trip to Dursey Island adds a little something different.

Tip – Hike a section of “the Beara Way” to really get off the beaten path. It’s a challenging hike and fairly remote but absolutely stunning!

7. Doolin in Co. Clare (Near the Cliffs of Moher)

📷 @dodphotography

Doolin is one of the most touristy towns in the country. Most of these tourists arrive for lunch and then disappear. It’s an ideal pit-stop on the way to the Cliffs of Moher. For whatever reason, most visitors don’t think to stay here overnight. I’m happy this happens because it leaves Doolin much quieter in the later afternoon and evening time. There is a hotel, B&B’s, hostels, and a great campsite just down the road from Gus O’Connor’s pub. I especially like to stay in Doolin. You can take a free shuttle to the Cliffs of Moher visitor centre and then walk these cliffs all the way back to the town.

Tip – Be very careful on the cliff walk. It’s not ideal for small children and rather scary in windy conditions.

I’m looking forward to visiting a lot more of Ireland but these are some of my favourite outdoor destinations in which the trails, mountains, and nature are always within reach.