10 Pieces of Budget Hiking Gear that You Will Actually Use

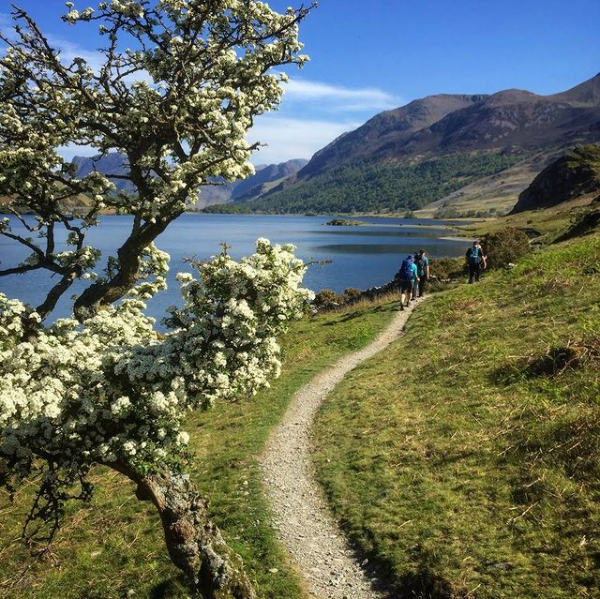
I spend a lot of time thinking about the most useful hiking gear that doesn’t weigh a tonne. It helps when this gear is affordable. But more importantly, I try to focus on buying gear that I will actually use. What’s worse than carrying a heavy backpack, knowing that you don’t even use half of the items in it?

I’d like to share some budget hiking gear ideas that I’ve picked up from other hikers and first-hand experience.

10 Pieces of Budget Hiking Gear that You Will Actually Use

1. Affordable Pair of Hiking Poles for Better Balance

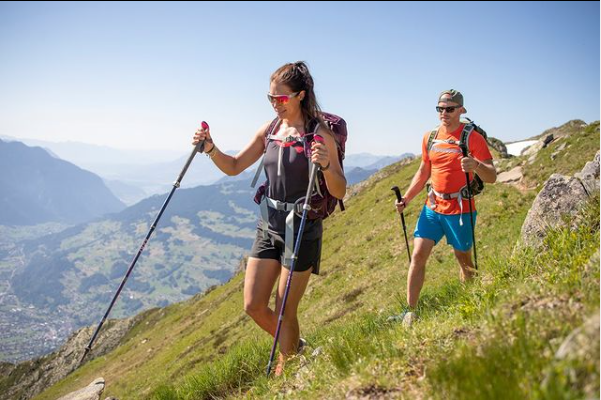
I’d never tried using walking poles until my hike on the Pacific Crest Trail a few years ago. In short, I stopped incurring injuries when I began using poles and found them incredibly helpful going up and down. I believe most of my fellow hikers felt this same way. Once you use hiking poles, it’s likely that you’ll take them on future hikes. Now, I’m not referring to a short 5km day hike but rather a longer multi-day hike. It’s true, they provide balance and stability on uneven terrain but hiking poles also take so much weight off your body – especially the knees.

Many sets of hiking poles can fold up and pack away easily and the weight is reasonable. I know that a lot of hikers like to splash out on expensive poles, usually made of carbon. I’ve stuck with the more affordable options and they’ve always served me well.

Which ones? Rock + River has this nice folding walking pole.

Rock N River Folding Walking Pole

2. Lightweight Sit Mat for Comfortable Breaks

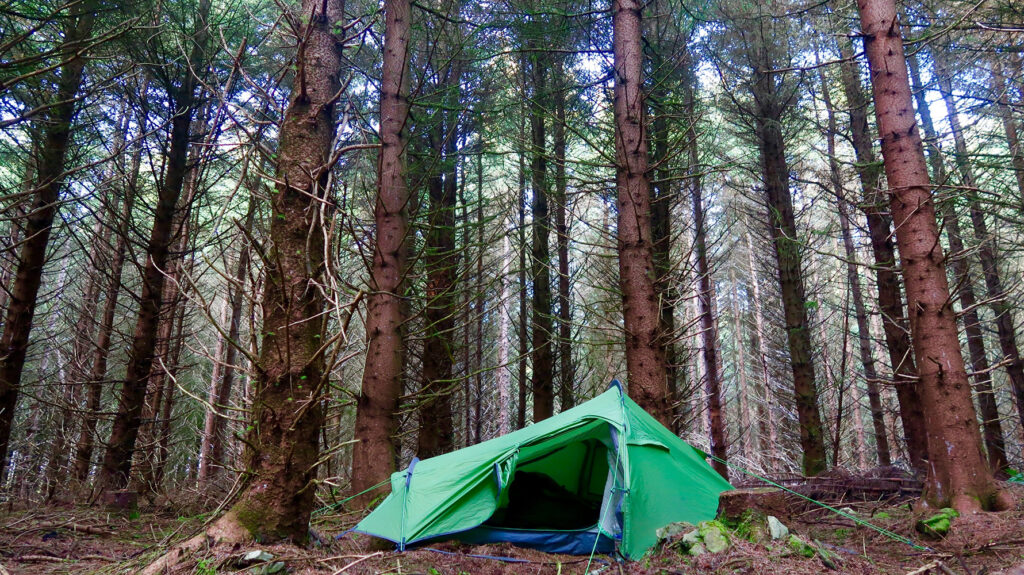
If you hike often, you’ll be familiar with this small but persistent dilemma that happens regularly – where to sit. It’s often wet or muddy in Ireland but mostly, outdoor terrain doesn’t really provide the kind of comfort you might hope for your rear end. I’ve tried sitting on my bag, folding my jacket and laying down a tarp – but it was always a hassle. I began using my foam sleeping mattress as a seat and this worked really well – until I stopped carrying one. A lightweight foam sit mat is a nice luxury without taking up space or getting in the way.

Rock N River Sit Mat

3. Soap Leaves for Hygiene on the Trail

Soap leaves are disposable and perfectly safe to use. This packaging is watertight and consists of fifty individual leaves. Each leaf has a fragrance and soap leaves are useful for international travel as they meet airport requirements. The ingredients are also more environmentally friendly than shower gels or shampoo, and the item is much lighter to carry. Either way, this is a nice small item that you can carry on a day hike. You can use it to wash your hands, feet or face in a freshwater river.

LifeVenture Soap Leaves

4. Mosquito Head-Net to Warn Off the Midges

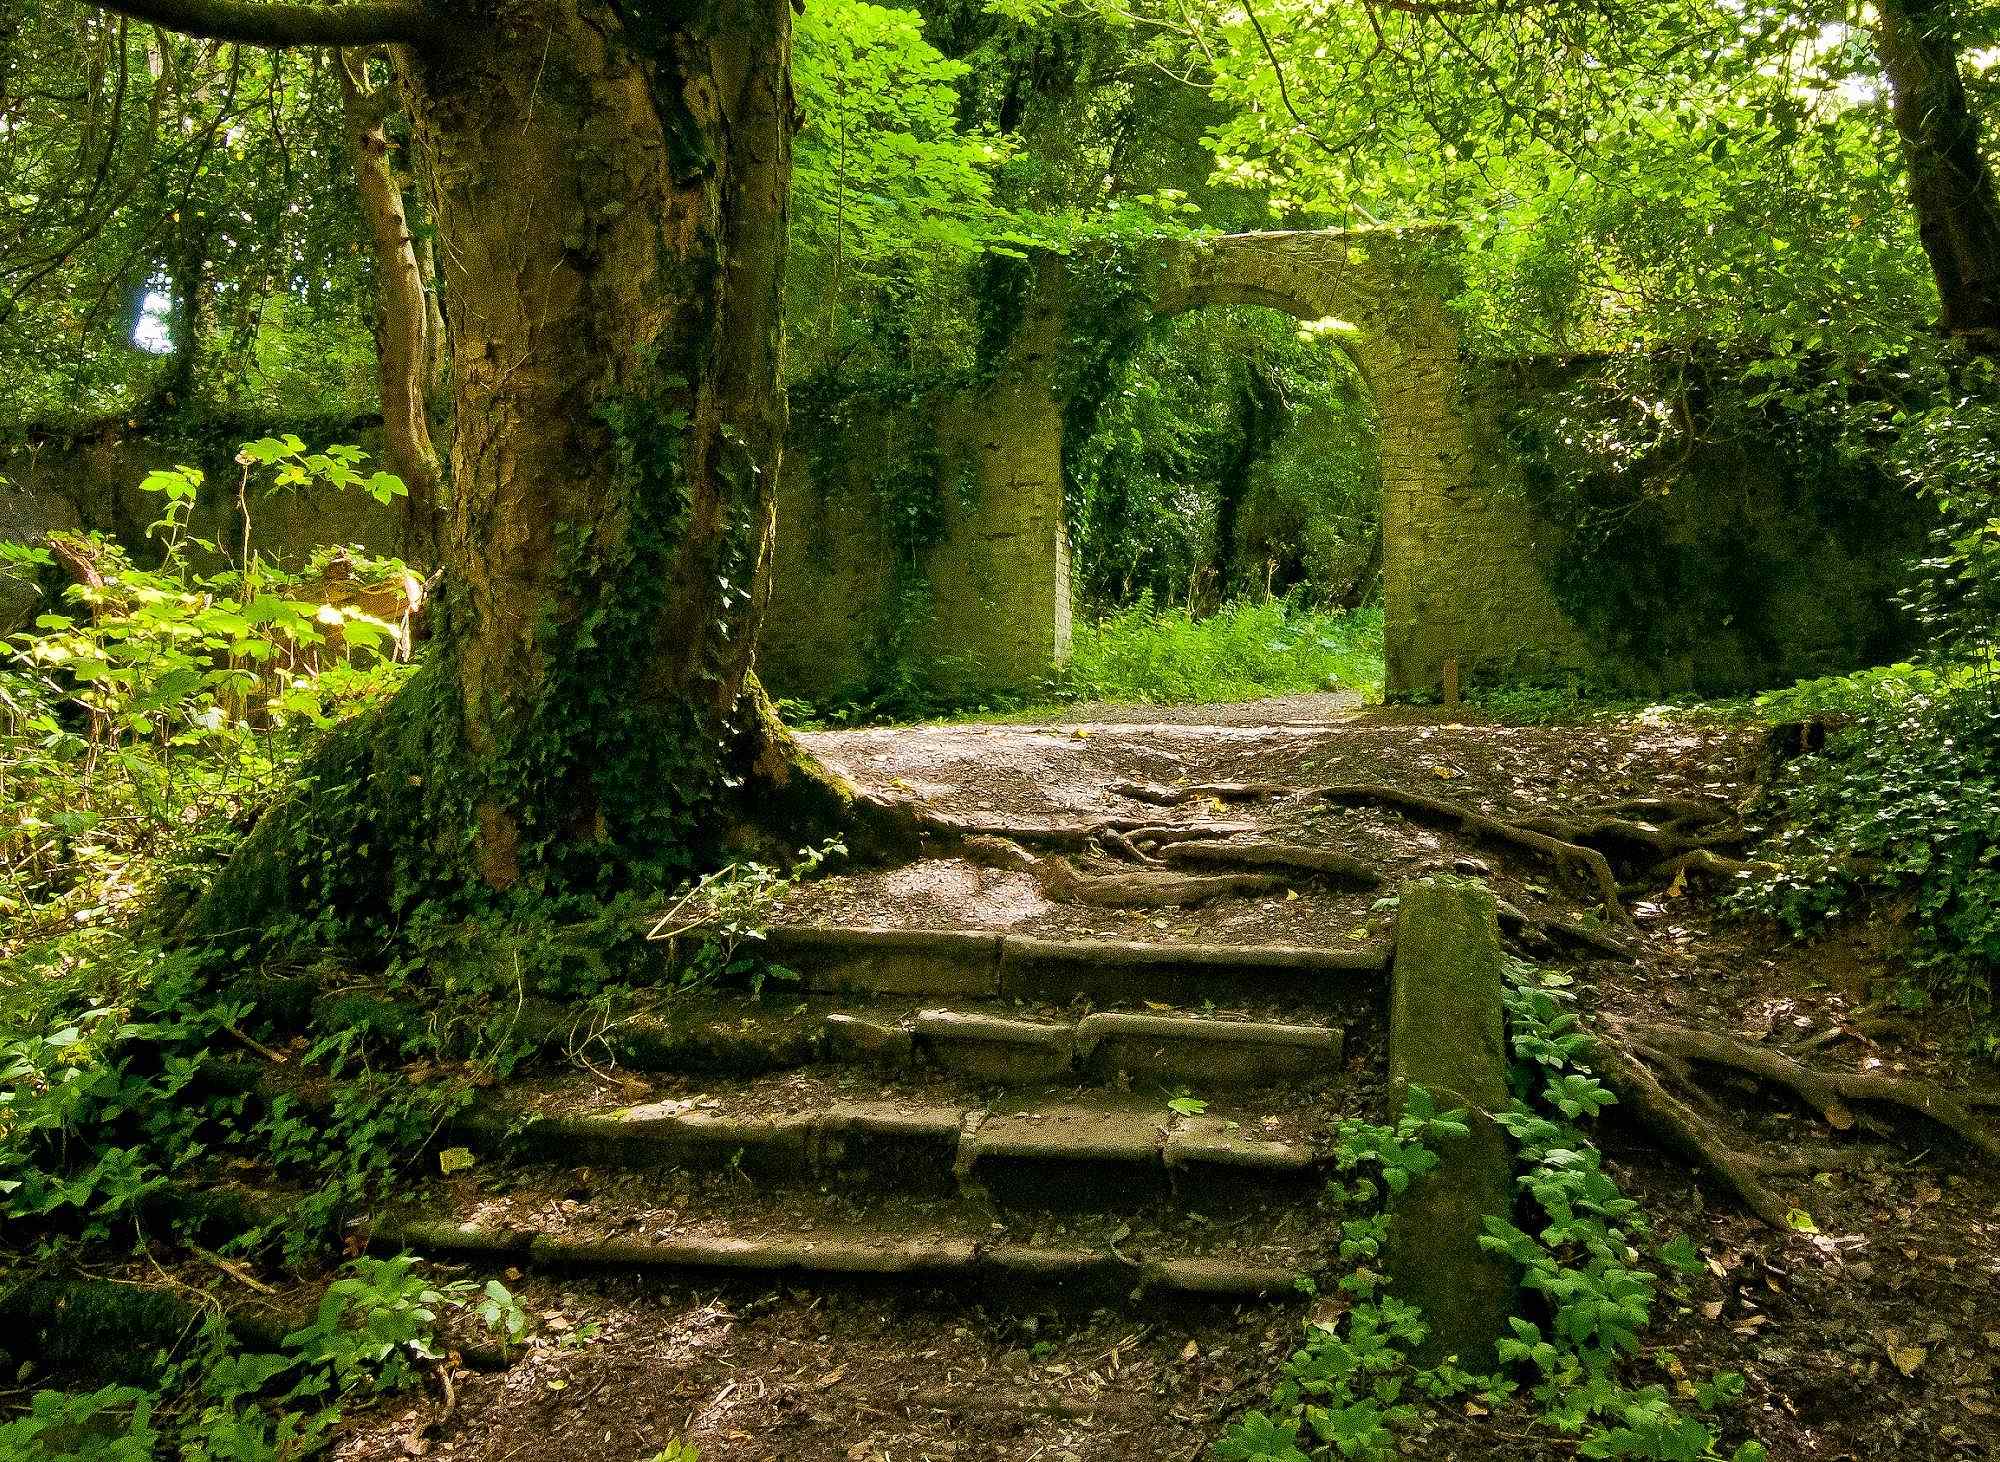
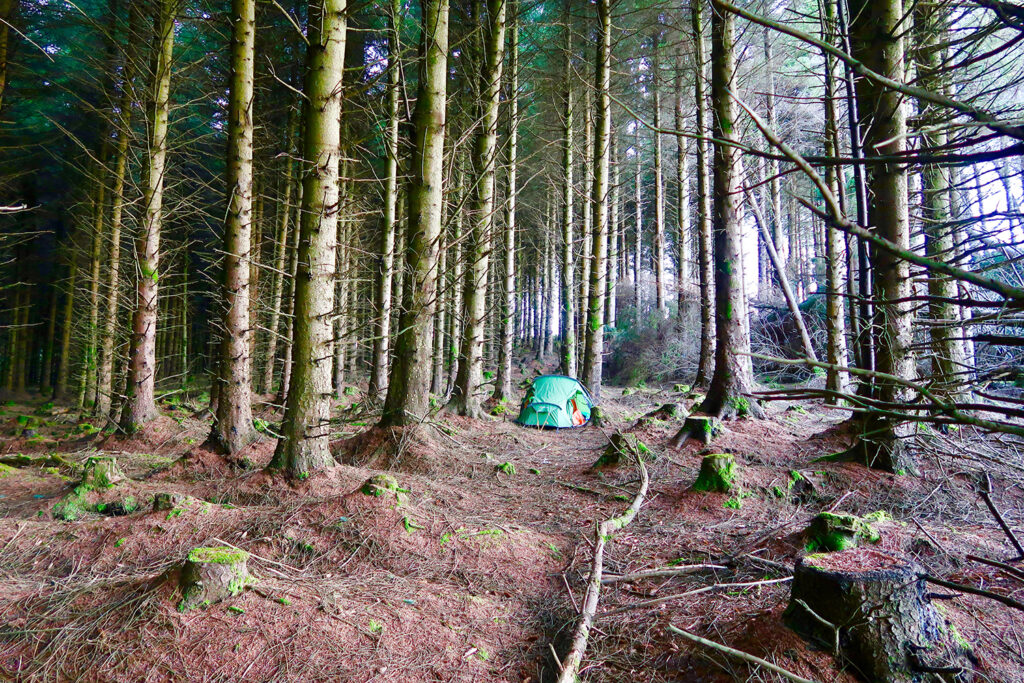
My first wild camping adventure in Wicklow was almost my last due to the obscene number of midges. At that time, the only way to avoid these pests was to out-walk them or hide behind the mesh of my tent in the evening. It’s an awful thing to try cooking around midges or even just sitting down for a break. Some hikers swear by insect repellent but my mosquito head-net is the only item I find useful in this regard. You simply pull this netting down over your head/hat and midges are unable to land on every inch of your face which is the most frustrating thing about it. As for why else you should carry one? They weigh nothing and you won’t even notice this item in your backpack. In other words, there’s no reason not to carry one!

LifeSystems Mosquito Head Net

5. Backpack Cover to Rainproof Your Gear

I’m always amazed when I see people hiking in the rain without a backpack cover. Once again, this item packs down really small and doesn’t weigh very much. I keep mentioning weight in this article but as you know, weight is everything on the trail! More importantly, even if your backpack is water-resistant, a rain cover will provide a lot more protection during periods of heavy rain. An example of great backpacks are Trespass backpacks. You can also place this cover over your bag at camp or when stopped for a break. But make sure to choose the right size cover for your backpack. Sizing is very specific to ensure a decent fit for the bag.

Trespass Rucksack Raincover

6. Bum Bag instead of a Backpack

I carry a lot less gear on my trips nowadays which is why I recently downsized to a smaller backpack (Osprey Farpoint). However, even this backpack is a bit much for a day hike. A nice in-between option is to wear a bum bag. This can offer as much as 5 litres in terms of space which is quite a lot. Believe it or not, bum bags are all the rage in America. In recent years, hikers find these tiny bags a lot more practical than carrying a small backpack. After all, you can quickly access items without having to stop and take off a backpack. These bags are ultralight and Trespass’ Vasp 5 Bum bag is just 0.18kg and comes with a bottle, too!

Trespass Vasp 5 Bum Bag

7. Affordable Hydration Bladder for Hot Days and Convenience

I use my hydration bladder on every hike but it’s always in my backpack. Carrying these bladders also beats using disposable water bottles on every trip. A hydration bladder is made from very durable material and the wide opening makes it easy to fill. They roll up really small when they’re not being used and you can attach a tube for easy access while hiking. This last bit can be so useful when hiking on a hot day. It saves you from having to take out your water bottle every few minutes in order to stay hydrated. Finally, if you intend on filtering your water outdoors, a hydration bladder is a lot more practical to use.

Which one? Check out the Flexible Water Bottle by Platypus or this affordable 2L hydration bladder.

Platypus Flexible Water Bottle

8. Mac in a Sack Overtrousers for Rainy Days

I first bought Mac in a Sac when I lost my usual pair of waterproof trousers. I was sure the originals would show up and didn’t want to spend much on a temporary replacement. However, I’ve actually continued to carry these lightweight rainpants by choice. I like how they strike a balance between size and utility.

These trousers are compact and have an elasticated waistband that makes them easy to put on quickly. The seams are taped which maintains the waterproofing and my favourite thing about them? They feel light and breathable at all times. While the Mac in a Sac Overtrousers is not ideal for extreme weather, they are handy for a rainy day!

Target Dry Mac in a Sac Overtrousers

9. Safety and Emergency Items That are Too Light not to Carry

Thankfully, many emergency-type items are rather small. A first aid kit is a necessity that you should always carry on a multi-day hike. There is a different size for each occasion including this compact first aid kit. While a poncho might not be considered an emergency item, this ultralight piece of gear is a backup for a rain jacket. Also, I sometimes use a poncho to cover my backpack in extreme weather. It’s really just another case of the item being too small, lightweight and useful not to carry.

One more item that always finds a place in my backpack is an emergency blanket. This “space blanket” actually saved me one night when all of my gear got wet in a storm. I used one of these blankets to heat myself up and stay warm.

Rock N River Emergency Blanket

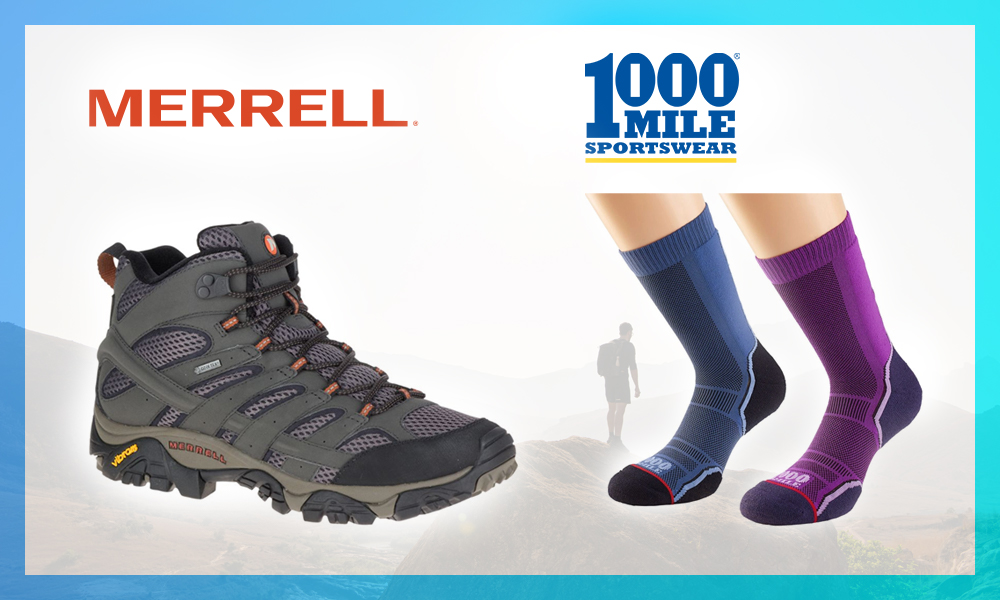
10. 1000 Mile Socks for Socks that Will Actually Last

I used up four pairs of 1000 Mile socks on my 3,000km walk around Ireland a couple of years ago. They would have lasted a bit longer, I’m sure. I was happy to replace them at the halfway point in order to have a “fresh pair of socks”. The point is, 1000 Mile socks are both durable and comfortable. They lived up to their lofty claims on the above-mentioned trip. With this in mind, these hiking socks offer amazing value to anyone that goes for regular hikes/walks – whether that be on a trail or not. You can also get two pairs as part of this Trail Sock Twin Pack by 1000 Mile.

1000 Mile Trail Sock Twin Pack

Beginners Guide to Navigation with a Map and Compass

Most people like to stick to familiar trails and areas. However, some basic navigational knowledge is necessary for longer hikes or trips off the beaten path. This navigation refers to both skills and tools but these are nothing overly complex or expensive.

Whether you want to prepare for a multi-day hike or gather some potentially life-saving knowledge for the outdoors. I’d like to take you through some basic skills and tools that should get you started with navigation in the great outdoors.

What is Orienteering Exactly?

Navigation is all about being able to read specially designed maps that illustrate the trails, vegetation and features of a landscape. This might include rivers, bogs, forests and even fences or buildings. Most OS maps (Ordinance Survey) can feel somewhat intimidating at first. A basic understanding of how to read a map will fix this issue right away. It’s also a surprisingly fun skill to learn in the right circumstances!

Just so you know, OS maps are also drawn with difference scales and these scales are illustrated to give you a sense of size on the map. In other words, everything on the map is obviously smaller than what it represents in real life and so these scales help quantify the size and distance between features. But more on that in a moment.

📷 @trcklinefieldstudies

Who Learns to Navigate?

It should go without saying that all kinds of people learn these skills. Navigation is something that can bring an added sense of confidence for hikers. While I have yet to feel lost on my hikes around Ireland, that’s not to say it cannot happen. Having a basic knowledge of navigation enables me to feel more confident.

Aside from knowing the basics in this article, courses for navigation are available for all levels of experience. Beginner courses will usually take place on marked trails and where you find notable features. Intermediate or advanced courses can take place in remote areas. Hikers need to be more precise with their skills and tools in these areas.

But Why Else Might You Want to Learn to Navigate?

Learning to navigate is fun and something that you can practice in a safe environment. There is generally no danger or pressure during this learning process. You can learn to navigate on a day hike or brief trip into the mountains. Navigation is also quite an interesting skill to learn. It involves a map and compass…and getting outdoors!!

As you may know, many people treat navigation as a sport. It’s true, orienteering is another reason why some people take their navigational skills and tools more seriously. This is an activity that combines navigational skills with the excitement of a race and forbids the use of GPS devices. But you just want to know the basics, right?

📷 @thebeardedburton

The Basics of Reading and Understanding a Map

OS maps are topographic maps that include the natural features mentioned above. They also include various landmarks such as fences, power lines etc. These maps will outline vegetation boundaries in yellow and other man-made objects in black. As for counter lines, these lines illustrate whether a section of land is either flat or steep.

Relatively flat – Counter lines are far apart

Steeper Terrain – Counter lines are close together.

There are also many symbols and hieroglyphics on OS maps. You should always take a few minutes to understand what they represent. This might sound obvious but many hikers never take time to learn these symbols and hence, cannot read a map.

So take time to familiarize yourself with the map before going out into the wild. Here’s two quick examples to help you understand the scale on OS maps:

1:10,000 – 1cm is 100m on ground

1:7,500 – 1cm on map is 75m on the ground

A Basic understanding of the Compass

Your compass should be used to determine the direction of a particular object. This bearing can help determine either your intended direction or specific location. This is important because you need to know what direction to go at all times.

On a way-marked trail, it’s easy to turn left or right at signposts. Without these way-markers, there is often indecision. This is especially the case in a forest, bog and after dark or during conditions with low visibility. Either way, a compass should be inside your backpack at all times.

Most compasses have a magnetic needle. You should notice the red tip of this needle is pointing “magnetic north” which is also shown on the lines of a map.

Here’s the definition of “magnetic north” according to Wikipedia:

“Magnetic north is the direction in which the north end of a compass needle or other freely suspended magnet will point in response to the earth’s magnetic field. It deviates from true north over time and from place to place because the earth’s magnetic poles are not fixed in relation to its axis.” – Wikipedia

But you should also remember the sun can be useful for navigation and knowing which direction you might be facing. In fact, navigation is really about using a combination of your skills and tools to read and understand the environment.

📷 @kirstyhamilton_explores

Using the Map and Compass Together

For most beginners, the tricky aspect of using a map and compass comes when trying to hold the map in such a way that it matches the view. This means you need to keep rotating the map so that whatever lies in front of you is also how it appears on the map. It’s a form of “mirroring” that ensures what you see on the map can be seen on the landscape. Now, you might not get that fully so let’s consider the following:

A compass will always point north and you should do the very same with your map. For instance, if standing in the forest facing north, hold the map so that it also faces north. If you turn to face south, rotate your map so that north on your map continues to point north. Make sense? It’s much easier when you put this into action.

One way that I keep track of my location on a map is to hold my thumb on this location. As I hike further in a particular direction, I move my thumb on the map in that same direction. Although this technique is widely used, it takes practice.

With the above in mind, proper navigation requires that you learn how to use a map and compass together. After-all, a map and compass is far more reliable and helps ”triangulate” this location. This means you can consult three different systems during the process.

Here’s a reminder of the main objectives of navigation:

1. To determine your precise location on the map.

2. To identify your next target/destination on the map.

3. To calculate the time and distance to reach this target/destination.

The first of these steps can be assisted through “mental mapping” and this is a simple process that involves observing your surroundings in order to know your location. You then use a compass to take a bearing from that location to your intended waypoint and then get moving in that direction.

And before moving onto the next section, are you familiar with “Attack points”?

Attack points are features/locations to which you can hike quickly without the use of a compass. This can be a distinctive rock, maybe a bend in a river or something that stands out on a particular landscape. Instead of walking with hope, it’s worth using these attack points as a reference point and then measuring the distance between them.

📷 @teamwalking_hillskills

Judging Time and Distance in the Outdoors

Judging the distance between two points is extremely useful in the outdoors. Most people hike at an even pace. If you know how long it takes to hike 100 metres, it’s easy to calculate how long it may take to hike multiple kilometres. However, it can take much longer to hike through marsh or unmarked areas so keep this in mind.

It takes practice to develop this skill and get better at calculating time and distance. As mentioned, you can learn these skills in a safe environment without having to worry about not getting out alive!

But what does this look like in the field?

I use my “pace count” when hiking in the mountains.

About Using Your “Pace Count” in the Field

One natural step is equal to a pace. You just need to know how many paces it might take you to walk 100 metres. You can do this by walking a measured 100-metre and count the number of steps you take and then turn around and walk back to your starting point while recounting this number of steps. The “pace count” is the average of these numbers but you should try to recreate the scenario (carry a backpack etc) and conditions (the terrain) in order to be accurate with this calculation.

You can then use this pace count to gauge time and distance in the wild. That being said, time and distance is often deceiving on the trail. It can feel as though you are hiking long distances due to challenging terrain or a heavy backpack. In reality, you might have hiked half that amount of time or distance. I think you get my point…

Have an Exit Strategy Before You Hit the Trail

There’s a lot to be said about common sense on the trail. Honestly, this is often your best way to ensure you don’t get lost. Likewise, preparation and precaution are key to staying safe. This is why you should always have a backup plan.

To be more specific, before hiking the trail, you should know exit points in the case that you might need to get off the trail. This can be a road, carpark or a trailhead that leads to a settlement of some kind. It’s quite easy to identify these exit points in Ireland because most trails or National Parks are reasonably close to towns.

📷 @thehigherhiker

3 Last Minute Tips for Navigation-Related Safety

1. Tell Someone About Your Plans

I’ve come across a lot of sad stories in my time hiking trails around the world. Many of these relate to missing hiker but there are just as many rescue stories. Many of these rescues happen because the hiker made sure to tell someone about their plans. This can mean a quick text or call can potentially save your life.

2. Slow Everything Down in a “Situation”

If you do get lost, remember that panic can cause common sense to jump out the window. Try to avoid this at all costs. Slow everything down so that you can take accurate readings with your map and compass. It’s important to check this more than once so you can make the right choices in getting back to safety.

3. Wear the Right Outdoor Gear

You really shouldn’t be hiking in the mountains without proper hiking shoes and adequate outdoor clothing. This also means you should always have your map and compass on hand along with a first aid kit and water at the very least.

I genuinely believe that common sense is the best way to stay safe outdoors. However, proper navigational skills are necessary for longer hikes or trips off-the-beaten path. A map and compass should be the first two items placed in every backpack. A basic understanding of how to use them is something fun to explore and not to ignore!

Everything You Should Know About Hiking the Wicklow Way

The Wicklow Way is my favourite long distance trail in Ireland. It was first written about in the mid-1960s by J.B Malone who set out to develop a long distance walk in Ireland. It took many years for this idea to gain much interest. The Wicklow Way is now the best known hiking trail in the country and easily accessible from Dublin.

Stretching from Marley Park in Dublin to Clonegal in Carlow, the Wicklow Way is approx 125km and split into seven “stages”. Each stage is intersected by a small town. Most hikers take up to one week to complete the trail without having to rush. In between these towns, the trail can feel surprisingly remote. It snakes its way through a series of foothills and mountains that climb more than 3,500 metres in total.

Hiking the Wicklow Way: What Should You Expect?

Most of the trail travels through Wicklow which mostly consists of mountains and hills. You will also hike stretches of paved road from time to time. These are usually quiet country roads and lanes with little-to-no traffic. It’s relatively easy to find a water source on most days (but not guaranteed). The accommodation at the end of each stage is reasonably affordable and cheerful. If you wish to wild camp, this is also possible – but more on this in a moment.

Overall, I’m always surprised with how remote it can feel on the Wicklow Way because you are always within walking distance of civilization. While the hill climbs come and go by the hour, they are rarely too steep and are accompanied by stunning views. The Wicklow Way is also well-marked and with a paper map and GPS, I believe most hikers will feel comfortable in terms of navigation. With these stunning views and favourable logistics, I think it’s an ideal long distance trail for a first-timer.

But maybe you don’t want to (or cannot) hike the full Wicklow Way?

📷 @sher_yogi

Hiking the Wicklow Way in Stages

It’s also possible to hike the Wicklow Way in stages. This makes the trail suitable for every fitness level. Some stages are much shorter than others so hikers can also pick out a specific stage, with which they feel comfortable. I’ve done this myself when short on time and if you live in Dublin, County Wicklow never feels like “a long way to go” for a hike.

What’s the Best Time of Year to Hike the Wicklow Way?

May to September is the most reliable time to hike the Wicklow Way. I would advise the less experienced not to attempt this trail close to the Winter months. Most of the accommodation (and many restaurants) are also not open outside of the Summer months. The weather is very unpredictable which is the main reason to avoid these months. In fact, I prefer to hike this trail in the shoulder months of May or September. There are less people on the trail and various attractions in between are less busy.

In case you might be asking yourself, I refer to places like Powerscourt Waterfall and Glendalough which are both highlights of hiking the Wicklow Way.

Where to Start and Finish the Wicklow Way

I should also say that you can choose to hike north to south or south to north. The main difference between each starting point is the ease of transport. That is to say, it’s easy to get to/from Marlay Park in Dublin but slightly more tricky to reach Clonegal.

There’s also the fact that starting in Clonegal will help ease you into the hike. Less climbs near the beginning when you hike south to north. While the last day presents stunning views of Dublin and the coastline.

Note: The number 16 bus travels from Dublin city centre to Marlay Park. Meanwhile, Bus Eireann stops in Kildavin which is less than 3km from Clonegal.

📷 @sallyham55

Wild Camping Vs. B&B – Where to Stay in the Wicklow Way

As for where to stay, there are B&B’s at the end of each stage on the Wicklow Way and a handful more in between. There is a nice little hostel in Knockree and another at Glendalough and three Adirondack Shelters on the trail. These shelters are small huts that were built so that hikers could take shelter from the elements. I’ve come across people wild camping beside these shelters and sleeping inside with a bivvy bag. With one or two exceptions I’ve found multiple spots to wild camp on the Wicklow Way.

You should know that wild camping is not permitted in Glendalough Valley. Hikers should always expect to either camp earlier than planned or to hike further when searching for a suitable spot. I say this because sometimes you happen across a suitable spot for a wild camp but it might be earlier than you expected to stop hiking. Likewise, it’s often necessary to keep hiking until you find a nice place to wild camp.

📷 @andreasrothphotography

Food and Water on the Wicklow Way

It’s important to carry enough food for each stage of the Wicklow Way because towns are few and far apart. There is no alternative to these towns in terms of buying food. As for water, there are many sources along the trail. There are also times when you might not come across one when needed. You should have at least two or three litres of water at all times. Remember that due to wildlife, farming and forestry, the water en-route is not always potable. With this in mind, it’s really important to pick up a water filter like the Trailshot Microilter by MSR.

For my own hikes, I always had at least one backup meal in dried food for each time of day – breakfast, lunch and dinner. I also pack many cereal bars and snacks in the case of an emergency (running out of food).

Following the Trail Signs and Navigation on the Wicklow Way

The Wicklow Way is sign-posted really well with a variety of markers that feature a “yellow man”. You will most often find them at junctions and then every half-kilometre for the long straight sections on the trail. There are also information boards from time to time but it’s best to have your own GPS, maps and apps to consult for navigation.

As a rule, if you don’t see a trail marker for more than one kilometre, it’s possible that you will need to turn around and at least check your map. I’ve mostly used offline maps (an app downloaded before hitting the trail) but in the case of my battery running out, I also have a powerbank and OS paper map of the Wicklow Way area.

📷 @courtneyshawactor

What Gear to Pack for the Wicklow Way

I’ve put together this packing list for a long distance hike which you might want to check out. It’s crucial that you also do your own due-diligence. The gear you pack will always impact how comfortable and safe you feel on the Wicklow Way. Footwear with good outsoles and support is recommended. I always use trekking poles – the importance of which many hikers seem to ignore. I won’t go into the specifics in this post but I would like to mention a few things to remember about clothing:

Layering Up – The weather on the Wicklow Way can change in a second and you need to be prepared for cold or wet weather on a hike. While it may seem like a sensible idea to take the warmest, waterproof jacket with you – the better option is to layer up. If you have both lightweight gear and several layers for underneath, this will enable you to regulate your temperature and provide you with the best of both worlds.

Avoid Cotton – When the weather is hot, cotton can cause chaffing. When the weather is wet, cotton is difficult to dry. When you are cold, wet, and wearing cotton, you are a walking recipe for hypothermia. Choose a material like merino wool, polyester or nylon which dries quickly and keeps the moisture off your skin.

Keeping Clothing Dry – It always brings me confidence to know that there is something warm and dry to wear later that night. Also, if you wake up to the sound of rain in the morning and your hiking gear is wet, resist the temptation to hike in your dry clothes. Instead, pack them up, put on the wet gear and suck it up. You’ll likely need this warm and dry gear to sleep in again that same night.

📷 @muno.explore

Day by Day Itinerary for Hiking the Wicklow Way

Let’s take a quick look at the seven stages from north to south on the Wicklow Way:

Marley Park to Knockree – 21km – Approx 8 hours walking.

Knockree to Roundwood – 18km – Approx 7 hours walking.

Roundwood to Glendalough – 12km – Approx 4 hours walking.

Glendalough to Aughavannagh – 14km – Approx 5 hours walking.

Glendalough to Glenmalure – 14km – Approx 5 hours walking.

Glenmalure to Moyne – 21km – Approx 7 hours walking.

Moyne to Shillelagh – 21km – Approx 7 hours walking.

Shillelagh to Clonegal – 19km – Approx 6 hours walking.

Some Final Points for Hiking the Wicklow Way

Carrying Your Own Backpack – Believe it or not, you don’t even need to carry all your belongings in the summer months. It’s possible to ask most B&B’s or even a local transport company to take your backpack to the next town – for a fee of course.

Consult the Weather Forecast – The Wicklow mountains are very exposed in places and rather scary in extreme weather. The weather can also change very quickly so it’s important to have an idea of what to expect and plan and pack accordingly.

Bring a Powerbank – Try to make sure that both your phone and powerbank is full charged by the time you depart each morning. Charging these items is the first thing I try to do as soon as I stop hiking for the day.

Be Careful on the Roads – Although there is little traffic on the road sections, cars can drive fast on these sections for this same reason which poses an obvious danger.

Remember to Leave no Trace – Know the principles of “Leave No Trace” and always pack out everything that you take with you on the trail. It’s also really important to respect the wildlife and local landowners and avoid starting any campfires.

📷 @philyob

Final Thoughts

You don’t need to have a high level of fitness to hike the Wicklow Way but decent preparation will always keep you safe. Early starts will also help take the pressure off in terms of covering any distances in between. I also encourage friends or family to hike the Wicklow Way alone. Yes, you can share the cost of accommodation with friends but hiking alone is a very different experience and the Wicklow Way is the perfect opportunity to experience a stunning wilderness in the “Garden of Ireland”.

My Top 6 Must-Have Hiking Accessories

If you’re like me, you think that getting outdoors is more interesting than going to the pub and you have zero regret for any money you spent on hiking gear over the years. I suppose it’s okay to enjoy both but I’m just saying – hiking gear is a much better investment. However, there are certain items in my backpack that I recommend more than others and many of these come without a hefty price tag. That’s not to say “cheaper is better” but I appreciate a bargain and don’t believe a price tag is always a reliable indication of quality or practicality. And let’s assume that you already have the shoes and backpack and focus on the hiking accessories that not everyone carries on the trail.

My Top 6 Must-Have Hiking Accessories

1. A Portable Stove for Coffee and Food on the Trail

If you’ve followed any of my social media accounts over the years, you will know that I rarely go hiking or camping without coffee and a hot meal. It just makes sense to do this and the weight is no longer an excuse with the arrival of portable stoves and lightweight pots!

I even use this portable setup on brief forays into the outdoors. For example, I often take a walk to a nearby hill and spend thirty minutes making coffee. When it rains, I have a lightweight tarp at the ready in my backpack and a warm jacket for when it gets cold. I just cannot express how much I enjoy making, eating and drinking something warm on my trips and this really does add some excitement or interest to spending time outdoors.

I bought this nifty little teapot recently but the MSR mini cook set is amazing value and I also have my eyes on this really cool toasted sandwich maker. If you just wanted a small portable stove, take a look at the MSR Pocket Rocket or something similar (and cheaper) like this tiny Rapid stove by GoSystems.

Mini Trail Solo Cook Set

2. A Tick Remover to Be on the Safe Side

Ticks are something we all hate to think about but they inhabit the wild places in Ireland. You will find these pests in moist, shady areas around Ireland. They cling to bushes and tall grass and almost always inhabit the ground level. You might have also noticed these ticks on your family

pet and this is because they enjoy spending time in gardens and next to forests or stone walls. Anyway, you get my point, you will encounter them at some point.

I was plagued by ticks while camping on the Kerry Way (Sorry, Kerry) and many more parts of the country. They are also such an unpleasant thing to find and trust me, you will be thankful to have invested in a tick remover when they come. A tick remover is a very small and simple device that can help remove these ticks quickly and safely. The stainless steel tick remover is effective but this tick remover card works just as well.

Tick Remover

3. A Portable Water Filter to Help Avoid Illness

I’ve been relatively fortunate to avoid injury on most of my hiking trips. However, I did fall ill with giardia in both America and Ireland after drinking contaminated water. I was unable to hike for several days afterward and truly regretted not having filtered my water.

In case you might not know, a lot of fresh water sources in Ireland are relatively safe but there is always a risk involved. There is also no way of knowing when or if a water source is contaminated and drinking this unfiltered water is never worth the risk.

A water filter is also something that you will keep for many years. While some of my past water filters were small, lightweight and cheap, they were often slow or somewhat unreliable. This is why I like the TrailShot filter by MSR which is so small it can fit inside a jacket pocket and can be used to drink directly from a river or bottle of unfiltered water.

Trailshot Filter

4. The 2-Litre Platypus Water Bottle for Sheer Convenience

I don’t like to preach about the environment or the principles of ‘Leave No Trace’ but, that’s not to say I don’t follow or appreciate such guidelines. In fact, I carried the same 2 litre plastic water bottle for much of my walk around Ireland and always bring my re-usable coffee cup to the shop. It’s a way for me to “do my bit for the environment” but the plastic water bottle caused problems on my walk around Ireland and other long distance trips.

It’s a health issue. Plastic water bottles have a tendency to fill up with grime/bacteria and they are simply not designed to be washed and re-used. A platypus water bottle is far more durable and easier to clean on a regular basis. And you need to pay attention to this on a multi-day trip in particular or risk falling ill – as has happened with me in the past.

But that’s just part of the story…

The Platypus water bottle holds 2-litres of water and packs down to a really small size. This means you can easily fit two of these into your backpack and you will certainly need more than two litres of water if you plan to hike or cook in the mountains/wilderness. A platypus is also very useful in hot weather, for they can attach a straw system which will save you reaching for a water bottle every few minutes and hence, keep you hydrated.

Platypus Water Bottle

5. A Head Net for Mosquitos/Midges

I’m not sure whether you know this but midges have the potential to destroy what should be a straightforward hiking trip. It’s true that both mosquitos and midges are unable to keep up while hiking but in midge-country they’re a huge nuisance anytime you stop. They’ve literally ruined more than a few of my wild camping trips and remain the biggest frustration that I can recall from any of my hiking trips in Ireland.

The worst part about it? A mosquito head net is one of the lightest and smallest items you can carry. They are also super cheap and no fancy design or style is necessary for this little life saver. In fact, I now keep one of these nets in the side pocket of each backpack to ensure I can at least stand a chance with these relentless pests in the future.

Mosquito Head Net

And the one I always tell my friends about…

6. A Pair of Adjustable Hiking Poles to Protect from Injury

I wrote an article 3 years ago in which I talked about my experiences with and without trekking poles. I used to think they were unnecessary and looked rather silly. But long story short, I came to the conclusion that trekking poles are 100% necessary for mid-long distance hiking. In fact, I would go as far as to say that the vast majority of my hiking injuries in the past were as a result of not using hiking poles. Whether you want to climb a peak or tackle a section of the Wicklow Way, hiking poles help with your posture, while reducing the amount of wear and tear in terms of your body.

By the way, I also use my hiking poles for putting up a tarp when it rains and for crossing rivers and bogs or any other time I might need some extra balance. But which poles?

I suggest the Leki Journey hiking poles or iff you are looking for a more affordable option the Rock n River twin pack. Either way, these hiking poles are adjustable which also means you can fold them up and pack them away when you’re not using them.

Leki Journey Pole

Some Other Hiking Accessories on My Wishlist

A Sit Mat – I know this seems rather silly to some hikers but I’m getting a little tired of sitting on the ground. It also makes sense that a rest-break should be comfortable and this is not always possible hiking in the mountains and certainly not when it’s raining!

High-Tech Watch – It’s certainly not essential but it would be fantastic to have a watch on which I could check the altitude or temperature.

Vibrant-Colour Rain Cover – A super bright rucksack rain cover is ideal for hiking at night and on stretches of roads in particular.

Waist Bag – You’ll appreciate this one if you carry a camera. The pockets on a backpack are rarely useful for carrying a camera and I’m eager to try this waist bag by Osprey.

Osprey Waist Bag

Aside from the wishlist, I never go hiking or camping without the above items in my backpack. While it’s true that some of these are not essential such as the platypus or portable stove, they certainly make life easier and a hiking trip – more enjoyable.

Merrell Moab 2 GTX and 1000 Mile Socks Review

I first wore Merrell back in 2013 on a year long bicycle ride through Africa. It made sense to pick a light pair of hiking shoes rather than trainers or cycling shoes. It was also the right decision, and they lasted for more than 12,000km across the continent.

Now, that’s not to say cycling is a good way to test a hiking shoe but rather to explain why I went back to this brand for my current footwear – the Merrell Moab 2 GTX.

In this article, I’d like to take you through what I think you should know about this hiking shoe before taking a look at my experience with 1000 Mile Socks…

A Quick Look at the Merrell Moab 2 GTX

The Merrell Moab 2 GTX is reasonably light and one of the most comfortable and durable hiking shoes on the market. It provides excellent traction and stability, while keeping the feet dry and comfy at all times. I’ve tried some really nice hiking boots and trail shoes over the years but none that offer the same quality features in this price range. In fact, I’m still waiting for a notable downside that might change my mind or question the near perfect experience I have found with the Merrell Moab 2 GTX.

Protection

The thickness of the Merrell Moab 2 GTX exterior does a great job of absorbing blows from rocks and sharp edges. A solid sole protects the bottom of the foot, while a sizeable bumper protects the toes. While you will find sections of ripstop mesh and fabric overlays, these both increase the durability of the shoe exterior.

Durability

I’ve been testing the Moab 2 GTX on some very rocky ground in recent months and they continue to hold up incredibly well. That is to say, aside from some superficial scrapes on the exterior, they still look and feel new, while providing the same experience as when I first got them. I’d imagine the mesh areas are susceptible to tearing at some point but I’ve yet to see this on my hikes through some very rugged terrain.

Grip and Traction

I’ve been really impressed with the traction of the Vibram rubber on the outersoles of the Moab 2 GTX. This is something which Merrell haven’t changed and you will find the same tread pattern on previous versions of the Moab. Upon closer inspection, you should also notice the range of circles, dents and patterns which add to the overall traction. I also remember this being the case with my very first pair of Moab and how the shape and condition of the sole remained for quite a long time.

Stability

I think most people that use the Moab 2 GTX will appreciate the extent of support and stability they offer. It’s more rigid and stable than any trail running shoe which makes them especially suitable for hiking on rocky or uneven terrain. That being said, even though the shoe feels planted, the flexibility of the Moab 2 GTX is also rather useful. In other words, the Moab 2 will bend etc without it feeling as though the shoe is slipping away from your feet.

Comfort

I know many hikers who agree that the Merrell Moab 2 GTX is one of the most comfortable hiking shoes out there. They often slip onto the foot and feel solid the moment you do so. With a cushioned collar and tongue and a refined insole, they feel soft around the ankles but then rigid and reliable in every other area. You’ve got nice padding on the heel and decent arch support, which is more than I could say for my three previous pairs of trail shoes.

Value

I believe this is a major reason as to why the Merrell Moab 2 GTX is such a popular hiking shoe in Ireland. They are priced the same as previous versions of the Moab and yet offer an even better product and overall performance. I also think they’re suitable for any hiking distance and just about any type of weather conditions, while the sheer strength of the material means they should potentially last for a number of years.

Weight

The Merrell Moab 2 GTX is certainly not the lightest option for hiking and weigh approximately two pounds. But this is nothing new for a hiking shoe which offers so much protection from the elements. With this in mind, I believe they strike the ideal balance between weight, flexibility, and protection, not to mention comfort and the price.

Breathability

The Moab 2 GTX are surprisingly breathable which is largely due to mesh along the top and sides. I say “surprising” as this is something you might not expect with such a durable and waterproof hiking shoe. This makes the Moab 2 ideal for hiking in warm temperatures, while ensuring an equally comfortable time in wet or muddy conditions.

And in case you might be asking yourself, it’s the Gore-Tex that makes these shoes waterproof and reasonably light at the same time.

Conclusion

The Merrell Moab 2 GTX have a really nice fit and offer lots of space for the toe box, while still fitting snug to the feet. Merrell have continued to focus on what made previous versions so good and then added some slight tweaks to improve upon the overall experience. They are ideal for warm weather hikes but also waterproof which is certainly useful while hiking in Ireland. If you wanted extra ankle support, you might choose the boot but either way, the Merrell Moab 2 is my hiking shoe for 2021.

Shop the range from Merrell

1000 Mile Trail Sock – My Choice for Long/Mid Distance Hiking

1000 Mile is a sock brand from the UK that gives a blister-free guarantee with every pair of socks which means they should last for at least 1000 miles. It’s not the reason to invest in a pair of 1000 Mile socks but testament to their strength and performance.

Trail Sock or All Terrain? Most of the socks by 1000 Mile are double layered which is great for the winter months but often too warm for the summer. For this reason, I use the Trail sock on my long distance hikes and the All Terrain option for local day hikes. While the all terrain version provides extra padding and protection for the heel etc, I just find the lightweight version to strike a better balance for longer hikes/adventures.

What I Really Like About 1000 Mile Socks

1000 Mile also use merino wool for all of their products. Merino wool dries out really quickly and can also wick away moisture with ease. The 1000 Mile socks also have a

band-like toe and midsection which helps keep them in place, and they are light and super comfortable and never itchy in my own experience.

But what else makes them so suitable for hiking in particular?

1000 Mile socks are slightly thicker than most other blister-free socks. They hold their shape nicely and fit snug to the foot. After many cycles, I can say they perform just as well after multiple washes and often live up to the blister-free guarantee. That is, I can say that not everyone I know has had such luck but they’ve certainly helped keep my own feet in pristine condition.

I personally own four pairs of 1000 Mile sock and carry at least three of these on long distance hikes. After all, socks are compact and lightweight and a priceless piece of kit when you end up with wet feet for whatever reason. They also dry quickly which means you can usually wash 1000 Mile socks on the trail and I often hang them up to dry on my backpack while I’m out hiking.

Conclusion

1000 Mile socks are my current first choice for hiking. I wore them on my 3,000km walk around Ireland and another 700km on the Camino de Santiago. They are just the best hiking socks that I have tested in Ireland and this includes socks from many of the biggest names in the outdoor industry. The truth is, when you hike long distances on a regular basis, it’s often the socks that can have a greater impact than the shoes. What’s more, the low cost of 1000 Mile socks has made these socks one of the first pieces of gear to find a home in my backpack.

Final Thoughts on My Hiking Shoes and Socks

I’ve gone through many types of hiking shoes in recent years and often stuck to trail runners in the past. Trail runners are often a hybrid between a hiking shoe and a running shoe which makes them especially light and comfortable. However, this also means they are often without the protection that comes with the Merrell Moab 2 GTX. I also find trail runners can be rather uncomfortable in wet conditions and without the traction you get with a purpose-built hiking shoe like the Merrell Moab 2 GTX. After combining 1000 Mile socks with the Moab 2, I also believe most hikers will find a light and reliable system that will not only feel good but also help keep away the blisters.

8 Best Winter Walks in Dublin

Looking for the best winter walks in Dublin? I personally believe that walking is the best and easiest way to keep active in the winter months. It’s also a way to make everyday life a bit more interesting and explore some of the places in which you have yet to set foot… until now!

But where are some of these trails?

I’m slowly learning that Dublin has far more parks, trails and walks than I have the time to explore. For this reason, I’ve been trying to mix things up as much as possible and visit new places and different trails rather than revisiting the same ones.

Let’s take a look at some of my favourite trails and the best winter walks in Dublin.

1. The Great South Wall and Poolbeg Lighthouse

In spite of growing up in Dublin, the Great South Wall escaped my attention until just a matter of months ago. Since then, I’ve walked out to Poolbeg Lighthouse at least five or six times and it’s now one of my favourite winter walks in Dublin. The lighthouse is here since 1768 and the wall stretches for more than 4 kilometres which made it the longest sea wall in the world at the time.

I like to think of this dander as being the perfect walk in Dublin to blow off the Christmas cobwebs. On a windy day, you’ll get blown sideways and the exposed nature of the wall means you’ll be out there in the elements from the moment you arrive. Aside from the impressive lighthouse, you will also find some of the best views of Dublin Bay. I also love watching the ships come in and out, while there are few better places in Dublin to enjoy the sunrise or sunset. In case you might be asking yourself, there’s plenty of parking at Pigeon House Road and it’s easy to reach the starting point of the walk. The walk is also buggy friendly and dog friendly and should take no more than one hour to complete.

2. The Bog of Frogs Loop in Howth

Most visitors to Howth seem to hug the waters edge as soon as they arrive in the village. There’s nothing wrong with this and the cliff walk is stunning. However, I believe there’s a much more interesting and varied adventure to be had on the Bog of Frogs Loop that joins up with this same cliff walk later on.

Starting at the train station, a series of purple arrows will take you through a series of hills, trails and rocky steps. There are beautiful views in this direction and the path leads through plenty of open fields and forests before joining the cliff walk at Red Rock. I often think the top of Red Rock offers the best views of Dublin and the lead up to this point uncovers a very different side of Howth to what you find in the village. From this point onward, the cliff walk will take you all the way back to “The Summit Carpark” where an old tramline walk runs back down to the village.

It’s quite a lengthy walk (12/13km) that takes approximately 3 hours but the variety on this hike is well worth the effort. Also, it’s a nice walk in terms of logistics because the Bog of Frogs loop will ensure you finish back at the starting point and all without having to go back the same way.

3. The West Pier in Dun Laoghaire

I’ve often wondered why the vast majority of people walk the East pier instead of the opposite side. That said, I didn’t even know about the other side myself until recently so maybe that’s why it’s so much quieter. You can reach the starting point from the very same parking areas and the walk itself is little more than 3 kilometres in total.

Featuring a gravel trail, I believe this is also a very different experience to the other side and feels somewhat remote with there being so few people. You can also see for more than 10km along the coastline on a clear day and it’s possible to find different viewpoints from the many boardwalks inside the harbour itself. It’s surprisingly muddy in parts so decent walking shoes are recommended and the walk is also rather exposed which can make it quite cold. Either way, as long as you wrap up warm, this is a surprisingly quiet walk that offers stunning views and an opportunity to leave the busy city behind, if only for a little while.

4. The River Dodder Walk

I grew up next to this river in Firhouse but kids in my day were always encouraged to stay away from the River Dodder. It’s changed immensely since then and the Dodder is now a popular landmark for recreation. And it’s not just the section at Firhouse which has transfigured but rather the entire length of the River Dodder. In fact, local authorities have been working hard to join up the various marked trails along the river to create a long-distance walking trail in Dublin.

There are many starting/finishing points for the walk such as Bushy Park to Terenure or Ballsbridge to Rathfarnham. Each one is rather different and the further you go, the more change you are likely to notice along the way. From herons and ducks to foxes and beavers, there is so much life in and around the River Dodder, while the foliage is some of the most luscious in all of Dublin. This means you can expect to encounter tall trees and leafy canopies at every turn and the odd waterfall in between. It’s such a beautiful stretch through a busy area and one that can feel far from Dublin when you’re sat watching a beautiful heron standing his ground quietly.

Tip – Ballsbridge to Rathfarnham is a nice stretch. However, even a looped walk in Bushy Park can take you down and around the banks of the River Dodder.

5. Cruagh Wood in the Dublin Mountains

I don’t often talk about Cruagh Wood because this is my own personal favourite winter walk in Dublin. Why? Because I want it all to myself. I’m not even joking when I say this because it’s so much quieter than Massey Woods or the Hellfire carpark nearby. It’s true that Cruagh Wood is without the majestic views in these areas or on top of Tibradden Wood nearby but there’s just something special about Cruagh Wood that makes it feel especially private and mystical.

https://www.dublinsoutdoors.ie/visit/dublin-mountains/walking-hiking/cruagh-wood/

Cruagh Wood is situated in the Dublin Mountains and not far from Killakee. It’s a granite mountain but the trails are accompanied by immense pine trees the entire way. These trails are also well marked and travel in different directions which can make for an exciting walk. If you have kids, there are some fairy signs on some of the trees near the beginning but they are not easy to find and half the fun is seeking them out.

Just so you know, it’s also possible to access both Tibradden and Massy Woods from these trails but there’s more than enough mileage in Cruagh Wood for a morning or afternoon.

6. Bohernabreena Reservoir Trail

Bohernabreena is home to another hidden gem for winter walks in Dublin. Located in Glenmasole Valley near Tallaght, this glistening reservoir is surrounded by a marked hiking trail. You will find Douglas fir and larch next to Scots Pine trees and a host of bird life including dippers, herons and kingfishers. Many nearby peaks are also within sight from the trail including the summit of Kippure. These summits are important because they are also home to remnants and archaeological sites which date back more than 5,000 years.

https://www.dublinsoutdoors.ie/do/sight-seeing/bohernabreena-reservoir/

You can reach the Bohernabreena Reservoir by travelling to Tallaght and then along the R114 until you go past Dodder Valley Park and Kiltipper.

7. Massey Woods in the Dublin Mountains

Massey Woods is located just a short distance from Cruagh Wood and opposite the Hellfire Club car park in the Dublin Mountains. Believe it or not, this trail continues all the way across the mountains as far as Marlay Park. However, there is also a beautiful loop trail within Massey Woods that is one of my favourite winter walks in Dublin.

https://www.dublinsoutdoors.ie/visit/dublin-mountains/masseys-estate/

The river that runs through Massey Woods is really beautiful and such a tranquil place to spend time. You will also find the ruins of an old house/lodge at the centre of the woods and many opportunities to step off the trail and into the trees. I’ve often used a large swing in these woods, while taking care to stay out of sight and save myself from potential embarrassment.

Anyway, Massey Woods is extremely lush and overflowing with various species of trees. The trails are quite muddy in places but decent hiking shoes will set you straight. Otherwise, it’s a short (2km) walk and a suitable trail for any kind of weather.

8. Barnaslingan Wood on the East Side of the Scalp

Barnaslingan Wood is situated on the outskirts of Dublin and close to the Enniskerry Road. As with much of Wicklow next door, “the Scalp” is a huge chasm that was formed by a glacial lake overflow during the Ice Age. You might notice remnants from this time in the form of boulders and outcrops but this walk is mostly enjoyable for the beautiful forest through which it runs.

https://www.coillte.ie/site/barnaslingan-wood/

In fact, there are two different trails in the woods as the Dublin Mountains Way passes through Barnaslingan Woods. For a short walk, you can take the Pine Loop Trail which should take approximately 25 minutes and this joins up with the Scalp Lookout Trail which has some of the most incredible views. I’m not sure why Barnaslingan is not more popular but this will work in the favour of those who might want a quieter and more immersive winter walk in Dublin.

While I have many more favourite hiking trails near the city, these are some of the best winter walks in Dublin which are easy to access and thoroughly enjoyable to explore!

Why I Use Hiking to Improve My Mental Health Every Day

I feel like hiking doesn’t get the respect it deserves when it comes to both physical and mental health. That is, running is often the poster boy for keeping active but I personally believe that hiking is more accessible or achievable and yet still delivers all the same benefits. I also say this because I’ve gotten just as fit and healthy through hiking as any other form of exercise.

And it’s not just my imagination that supports this belief…

Studies show that just thirty minutes of hiking every day can have a significant impact on both physical and mental health. For instance, hiking can strengthen bones and muscles, while increasing cardiovascular fitness. Hiking is also said to reduce the risk of heart disease, osteoporosis and certain cancers. I often need Google to remember this detail but you get the idea – hiking is scientifically proven to better our physical health.

But you know what I most appreciate about hiking?

I most appreciate the way it makes me feel.

Derek cullen Hiking
Facebook.com/derekcullenoutdoors

How I First Realized the Positive Effect of Hiking on Mental Health

I travelled to Newfoundland (Canada) back in 2016 to take my first long-distance hike on the East Coast Trail. It was an incredibly painful trip. Aside from having no fitness or hiking experience, I took all the wrong gear and ended up with a 25kg backpack!! This meant that every step was a slog and my shoulders, in particular, were deeply bruised and cut. Due to so much discomfort and pain, I also decided to cancel my plan to hike the Pacific Crest Trail a year later.

Now, in case you might be asking yourself, here are just a few of my mistakes:

– I didn’t take any hiking poles which are necessary for hiking with a heavy pack.

– I packed two pairs of footwear and wore massive boots that were not suitable for hiking.

– My backpack was not designed for hiking.

– My tent was cheap but far too big and heavy.

– I packed too much gear and luxury items.

– I carried too much food and at times, too much water.

– I pushed myself too much and hiked too many kilometres every day.

Just a couple of weeks after the trip, I began reminiscing about my time on the East Coast Trail. There were still some memorable experiences such as cooking on the campfire, sleeping under the stars and waking up surrounded by nature. There was also a feeling of purpose throughout the adventure and a sense of satisfaction after hiking more than 350km. And most importantly, I felt happy and healthy throughout the hike and fully recharged in spite of my back, feet and shoulder pains. That’s right, I was in absolute agony and forever chastising myself for bringing too much gear and yet feeling utterly content at the same time.

In fact, I even thought: that was almost the best trip of my life!

It’s true, my mental health was remarkably good for this entire trip.

When Hiking Really Began to Impact My Mental Health

I decided to take another look at the Pacific Crest Trail and do some proper research in terms of gear, logistics and advice from previous hikers. And after saving up enough money, I took aim at my shopping list for backpacking gear and travelled to the start of the trail in America.

It was a gruelling 5-month hike but also one of the happiest times in my life. I was without the immense weight from my previous trip and experiencing all those things that made me feel content. Even when the bad days came, hiking always seemed to make any unwanted feelings disappear. I just focused on the trail and when I hiked for long enough, those feelings were little more than a white, puffy cloud in the sky – that would inevitably float away.

Hiking made me feel so good about myself (and the world around me) that I saw no reason to stop taking these hiking trips. For this reason, I went on to walk the Camino de Santiago before walking all the way around Ireland. When I went back to working nine to five, I continued to hike in the evenings and found all those same feelings in smaller doses. I knew it wasn’t a coincidence that my mental health improved any time I went hiking, for studies had already proven that hiking is beneficial for both mental and physical health.

But I’d also like to tell you about how I use hiking to improve my mental health every day.

facebook.com/derekcullenoutdoors

How Hiking Began Improving the Quality of My Everyday Life

I used to experience a great sense of dread on Sunday evenings. Many people refer to this phenomenon as “the fear” which usually happens in anticipation of work or the week ahead.

While I’ve made certain lifestyle changes to eradicate this fear, I continued to experience some very extreme anxiety in many different scenarios. But what’s this got to do with hiking?

Let me explain real quick.

The limbic side of the brain essentially controls our emotions or anxiety and likes to make decisions quick and fast. But it’s possible to combat this surge of anxiety with breathing exercises and yes, you guessed it – hiking! It’s true, physical activity forces this side of the brain to switch off and engage in different parts of the brain that can ignite positive thoughts.

Now, that’s not to say I go hiking every day to deal with my problems but rather to explain how hiking significantly improves my mental health in everyday life. In fact, it’s very rare that I go one day without taking a short hike to a nearby beach or hill tip or even a walk in the park.

Before I leave you with some final words, I thought that maybe someone reading this article will be entirely new to hiking. If that’s you, here are some tips for getting started:

New to Hiking in Ireland? Here Are Some Tips for Getting Started

Focus on Making a Start – As part of a challenge called “Walk Every Day for One Month”, I help hundreds of participants form a healthy habit in the month of November. Many of these individuals had no walking “experience” so I began by encouraging them to take short achievable walks in the beginning. Some of them began by walking to the shops instead of driving, while others started taking the stairs to their apartment rather than the lift. By the end of the month, the vast majority were up the mountains and taking hiking trips that seemed impossible to them at the start of the challenge.

Think Outside the Box – I suggested to a friend of mine that he should start walking to work every day. He enjoyed his job but the daily commute left him with a serious sense of dread in the evenings. This morning routine is now something he looks forward to and one of his work colleagues also joins him from time to time. 

Remember that Hiking is not a Competition – Hiking for thirty minutes is enough to improve your health. It’s not a competition so there’s no need to compare your progress or distance or route to that of anyone else.

Don’t be Put off by the term “Hiking” – Hiking is no different than walking and requires very little gear to get started. You can also go hiking at any time of day and the time or distance is entirely up to you. You don’t even need to worry about “keeping up” because there’s no set pace and unlike running, it’s not really a rigorous exercise.

Invest in a Decent Pair of Hiking Shoes – Most of my injuries in the past were due to hiking long distances without a set of hiking poles. But the rest of my injuries were down to wearing the wrong footwear on my hikes. You don’t need to spend a fortune but the appropriate heel and arch support is essential which means you should at least invest in a reliable pair of hiking shoes that will save you from blisters and injuries on the trail.

You Can Still Achieve the Same Benefits – If you do want to lose weight or build strength, you can always hike faster. Walking fast burns more kilojoules per hour and this will still feel less rigorous than running etc.

Afraid or Nervous about Hiking Alone? – Hiking is a social activity. If you don’t want to hike alone, there are lots of clubs and Facebook groups in which you can find someone to go with you. I know many people who now consider their hiking group as their “tribe” or “trail family”.

facebook.com/derekcullenoutdoors

Final thoughts

The truth is, unlike most types of exercise, hiking doesn’t require any expensive equipment or special training, and the actual process is free. It’s the positive effect of hiking that deserves more respect and this is especially true when it comes to mental health. In fact, the Irish Times wrote an article last year about my story which was entitled “Walking Back to Happiness” and I couldn’t have said it any better – Hiking just makes me feel happy.

My Biggest Wild Camping Fails that Everyone Should Avoid

Outdoor Adventure Stores are pleased to welcome the wise, witty and honest words of Irelands’ best known Outdoor Adventurer, Derek Cullen to our blog spot. Derek tackles everything from cycling across Africa, backpacking around this Island to long distance hiking and wild camping with enthusiasm and candid good humour. Here he shares his knowledge, some hot tips and his experiences on the trail.

Wild camping in Ireland has really taken off in recent months. It’s quite a contrast to when I walked around Ireland last year when many people were asking if wild camping was safe, enjoyable or even allowed for that matter. It’s great to see because I have always tried to encourage others to try sleeping in a forest or on a nearby hilltop.

At the same time, wild camping is much different to staying at a campsite. Without facilities or any kind of “safety net”, it’s important to keep certain things in mind. Having had so many camping fails myself, I also think it’s worth taking the time to plan a bit better.  –

For this reason, I’d like to share some of my wild camping “fails” and ideas that might help others have a safe and more enjoyable experience in the wild.

Skimping on the Cost of My Sleep System

When I first took to wild camping, I spent many nights trying to keep warm and comfortable. My sleeping bag just wasn’t warm enough and my foam sleeping mat was little respite from the stones and twigs protruding into my back. While I did eventually invest in a decent sleeping bag, I went for many years with an especially thin and rather useless foam mattress.

In fact, I picked up my very first inflatable sleeping mat (Vango Trek 3 Compact Mat) earlier this year. It’s true, after eight years of wild camping, I finally realized the benefits of a comfortable sleeping mat. This also prompted me to look for a more suitable sleeping bag as my trusty North Face Kazoo was losing its warmth by the day.

I know that everyone wants to spend less but your sleep system is not the place to skimp on spending. That said, there are still some great budget sleeping bags out there for wild camping and a good nights’ sleep is worth more than the cost of a decent sleeping mat.

Takeaway – Take time to choose the right sleeping bag and invest in a proper sleeping mat.

Getting Giardiasis after Drinking Contaminated Water

I’ve taken a lot of stick online for this one and rightly so. When hiking the Pacific Crest Trail a few years ago, I got giardia – an illness that comes from drinking contaminated water. It happened because I kept on “taking a chance” and drinking straight from the rivers. Big mistake. Giardia made it near impossible to hike, and I was lucky to reach a nearby town a couple of days later in which I could recover. But did I learn my lesson? Nope.

On my walk around Ireland last year, I took this same risk while camping next to a river in Kilkenny. Next morning, after walking up the river, I happened upon a section that was filled with the feces of some nearby cows and later that day, I succumbed to giardiasis once again!

Takeaway – Always use a reliable water filter when you go camping. It takes just a couple of minutes to filter water and an illness like giardiasis is just not worth the risk.

Using an Open Bivvy Bag in Midge-Country

I can only think that midges take their holidays in County Wicklow. It’s not bad whilst hiking because they can’t keep up, but they swarm like crazy as soon as you stop for a few minutes. I made a big mistake one evening when I went wild camping in Wicklow with an open bivvy bag. Due to the number of midges, I was literally unable to cook or eat and even sit outside and resigned to pulling a sleeping bag over my head for the night.

Needless to say, midges inhabit every corner of Ireland!

Takeaway – Use a tent or closed bivvy when wild camping in areas known for midges, because without a zip/mesh lining, you will be exposed to midges. It’s also worth packing a long sleeve top and bottoms and a head-net to help keep them at bay.

Taking the Wrong Tent into the Dublin Mountains

I’ve tried wild camping in Ireland with all of my tents. However, after an especially stormy night in the Dublin mountains, I’m a lot more careful about what tent I take with me. I found it hard to sleep because the tent really struggled with the rain and wind that night. I worried my tent might collapse due to the winds and the noise during this time was irritating to say the least.

That’s why you might have noticed I always use the same tent when wild camping in Ireland – the Vango Banshee Pro 200. I have several very expensive tents but the Banshee Pro is much better suited to the weather and conditions in Ireland. It features a strong build with a low centre of gravity and strikes a nice balance between durability and weight.

Takeaway – Choose a tent that can withstand the wind and rain. If I had the money, I might upgrade to the MSR Hubba Hubba NX but the Vango Banshee Pro has never let me down.

Picking the Wrong Wild Camping Spots

I’ve had my tent flooded in the past after pitching near the bottom of a hillside. I’ve also had sleepless nights after camping right out in the open or on top of a mountain summit.

It’s important to camp away from habitation and “out of sight” to avoid any unwanted attention. However, there’s lots more to consider in terms of picking a spot for your tent:

Camp on Flat, Soft and Dry Ground – Try to pick a flat area and preferably somewhere with soft grass or pine needles.

Avoid Dead or Precarious Looking Trees – Keep an eye out for dead trees and stay away from trees or overhead branches that might look unstable.

Camp Near a Water Supply – It’s always handy to have a water supply nearby for cooking, washing and drinking.

Camp with the Morning View in Mind – You will usually find a better view higher up but either way, never underestimate the power of a remarkable view. I will often look for somewhere to camp with the view from the tent door at the forefront of my mind. Remember, you’ll wake up to this view!

Camp in a Sheltered Area – You can often get away with camping out in the open but it’s also a risky option in blustery weather. Instead, camp in the forest or on the sheltered side of a hill.

Pitch Your Tent the Right Way Around – Unless you want to be sliding around all night, pitch the tent with your head facing uphill.

Takeaway – Common sense is usually enough but the above tips should help.

Over-Packing for the East Coast Trail in Newfoundland

It’s quite funny to think back about all the gear I carried on my first hiking trip. Hiking the East Coast Trail in Newfoundland was literally one painstaking step after the next. I just didn’t enjoy that hike because I packed far too much gear and ended up with deep bruising on both shoulders. In hindsight, I should have made every effort to not only choose as much lightweight gear as possible but also to cut back on the number of items in my backpack.

For this reason, I will often pack my backpack and then try to remove half of these same contents before leaving the house. It takes experience to realize that many items are not needed for wild camping in Ireland and most people pack far too much food in particular!

Takeaway – Try to practice a minimalist approach to wild camping and pay attention to the items which you carry often but never use.

Some Last Minute Tips for Wild Camping in Ireland

The truth is, you’ll learn a lot more about wild camping through first-hand experience but here’s a few last minute tips to keep in mind for your next trip:

Wait Until Dusk to Set Up Camp – It’s not a case of hiding or trying to sneak about the place. I suggest waiting until dusk so you can 1. Avoid the risk of being moved on and 2. Rest without mistaking every rustle outside for a witch or an evil axe-murderer.

Just Keep Moving – When searching for a place to camp, just keep moving until you find a place in which you feel comfortable. It always amazes me when I keep hiking that small bit further and find the absolute perfect camping spot that I might have missed by staying-put.

Focus on Keeping Everything Dry – I’m not a fan of plastic bags and recommend keeping dry bags inside your backpack. A backpack cover is also needed and the objective is to make sure your sleeping bag and spare clothing are not exposed to the elements while hiking.

Practice LNT Principles – Leave No Trace Principles are there to protect the environment but they also help others to be more approving toward the concept of wild camping which is something we should all try to encourage.

Final Thoughts

It’s common to feel a sense of fear when you go wild camping in Ireland for the first time. However, in time, you should find that most of these fears are quite irrational. What’s more, practice and experience will bring confidence and after a few nights sleeping in the wild, you will certainly enjoy this experience a lot more than when you got started.

Dog Friendly walks and Hikes in Dublin

There is nothing more enjoyable than taking a happy, energetic and excited dog for a walk.  Our four legged friends make walking more enjoyable, increases the pace and encourages you to walk much further than on a solo trip.  Their enthusiasm is infectious and inspiring.  There are over 450,000 dog owners in Ireland. A staggering 35% of households have one or more canine member!  That’s a lot of dog treats, a lot of poop bags and a lot of walking.  Here are some suggestions for Outdoor Adventures in dog friendly places for the urban dogs of Dublin to enjoy.

dog friendly walk Dublin

Lead on!

City dwellers are tasked with getting a more interesting walk for their four legged friend, but with 15 beaches and over 1,500 hectares of parks, green spaces, Dublin has no shortage of lovely places for dog walking. Of course, most walks are on the lead and with the pooper scooper to hand.  Nevertheless, Dublin as fine offerings.

dog friendly hike Dublin

Dollymount Strand

A beautiful stretch of strand with good parking and plenty of running space.  Dogs must be kept on a lead and poop picked up.  Dollymount is accessible to most Northsiders as it’s not far from the city centre on Bull Island, a nature reserve which brings a wonderful air of the wildness to a city strand.

Phoenix Park

One of the largest enclosed parks in Europe, home to the president and his lovely dogs and offering over 1,750 acres to tire our even the most energetic of dogs.  Lots of lovely walks and plenty to sniff in the air.  A tight leash is essential as it is also home to a fine deer herd, urban foxes, rabbits and a whole zoo of wild animals.  Indeed, plenty to sniff in the air, but free roaming is not on the agenda. 

dog friendly walk Dublin

Canal Walks

A grand walk along the serene and calm pathways of the Grand Canal is perfect for doggie walks.  Plenty of ducks and water fowl to tease the mutt and lots of lovely pathways that hide the city and give the impression of being a million miles from the hustle and bustle.

Off the Lead

Urban dwellers can bring their dogs to almost any public park or beach when on a lead, but dogs off leash are a difficulty in both city parks and country walks. Some parks have come up with a solution to allow some down time for owners and their pets.

dog friendly hike Dublin

St Catherine’s Park in Lucan

…is a short car ride for most pooches.  Not only is it full of wandering path ways, squirrel smells and natural fauna to explore, it also has an enclosed dog park, where man (and woman’s) best friend can run around untethered by that pesky leash.

Marlay Park in Dún Laoghaire, Rathdown

…also boast a designated dog park, where freedom from the lead is encouraged.  The park itself offers lots of walking terrain for dog explorers and their owners and spans over 300 acres, so you can be sure of some solitude too.

dog friendly walk Dublin

St Anne’s Park, Clontarf.  A gorgeous wooded areas and acres of undergrowth for your dog to romp through and again, a dedicated area for dogs to go wild without disturbing anyone else.  These dog only areas are also perfect for pet owners to swop stories and chat and boast about how great ‘their’ dog is.

Into the wild

Sometime you just needs a change of scene and a little wildness to live up a dogs life. Try a different terrain and a new view to keep both of you fit and happy.

dog friendly hike Dublin

Killiney Hill and Dalkey Hill

Not far from Dublin City and worth the trip to put those four legs through an uphill and downhill trek workout, with amazing views for the leash holder to enjoy, Killiney and Dalkey Hill are a popular destination for two legged walkers and hikers availing of the spectacular scenery.  With Dublin to the northwest, the Irish Sea and the mountains of Wales (on a clear day) to the east and southeast, and Bray Head and the Wicklow Mountains to the south, it’s a perfect place for you and your dog to enjoy a hillwalking Outdoor Adventure, not far from your city home.

The Wicklow Way

Yes, the Wicklow way is in Wicklow, but is absolutely accessible to any Dublin dweller whether they use public transport or have a car. Ireland’s oldest marked hiking route, has infinite native oaks to sniff and miles of trails to explore together.  There is even an opportunity for owners to grab a coffee at Pamela’s Dog Park as the W.S.P.C.A. hosts public doggie playground sessions at the Sharpeshill Sanctuary.  The sanctuary’s dog park is a purpose built enclosure, complete with interesting tunnels and toys for your dog to explore, while you take a break from the lead before heading back into the wonders of the Garden of Ireland.  A perfect dog and owner hike.

dog friendly hike Dublin