My Biggest Wild Camping Fails that Everyone Should Avoid

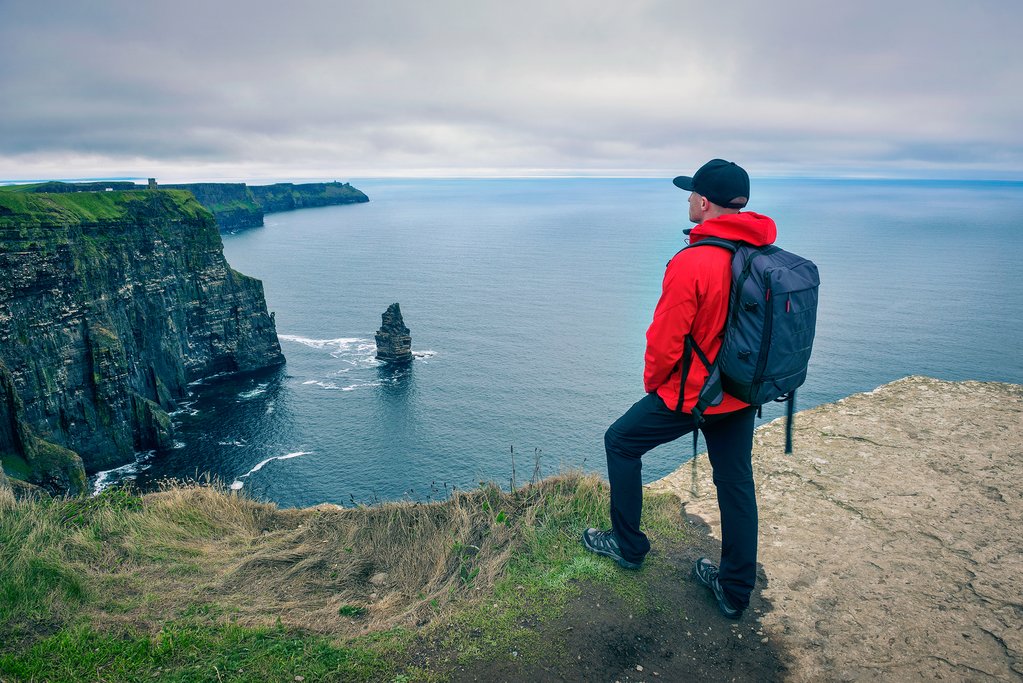
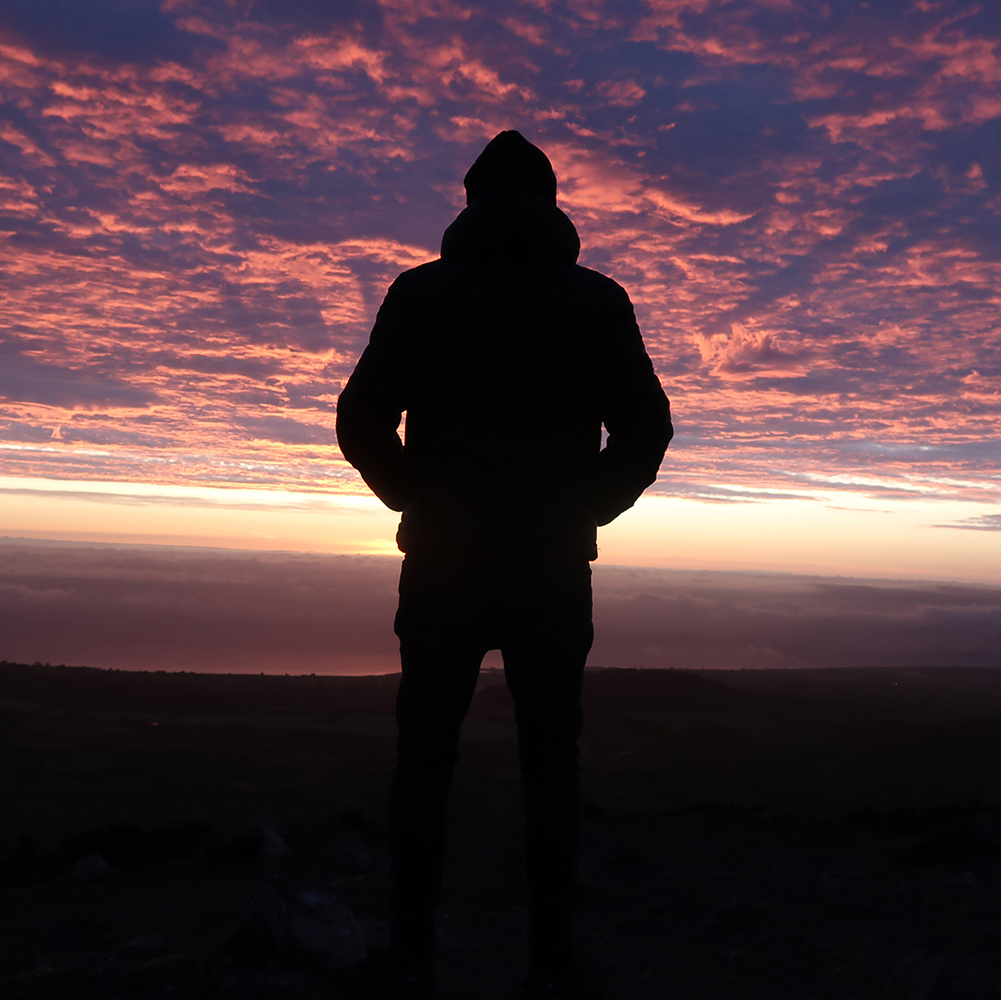
Outdoor Adventure Stores are pleased to welcome the wise, witty and honest words of Irelands’ best known Outdoor Adventurer, Derek Cullen to our blog spot. Derek tackles everything from cycling across Africa, backpacking around this Island to long distance hiking and wild camping with enthusiasm and candid good humour. Here he shares his knowledge, some hot tips and his experiences on the trail.

Wild camping in Ireland has really taken off in recent months. It’s quite a contrast to when I walked around Ireland last year when many people were asking if wild camping was safe, enjoyable or even allowed for that matter. It’s great to see because I have always tried to encourage others to try sleeping in a forest or on a nearby hilltop.

At the same time, wild camping is much different to staying at a campsite. Without facilities or any kind of “safety net”, it’s important to keep certain things in mind. Having had so many camping fails myself, I also think it’s worth taking the time to plan a bit better.  –

For this reason, I’d like to share some of my wild camping “fails” and ideas that might help others have a safe and more enjoyable experience in the wild.

Skimping on the Cost of My Sleep System

When I first took to wild camping, I spent many nights trying to keep warm and comfortable. My sleeping bag just wasn’t warm enough and my foam sleeping mat was little respite from the stones and twigs protruding into my back. While I did eventually invest in a decent sleeping bag, I went for many years with an especially thin and rather useless foam mattress.

In fact, I picked up my very first inflatable sleeping mat (Vango Trek 3 Compact Mat) earlier this year. It’s true, after eight years of wild camping, I finally realized the benefits of a comfortable sleeping mat. This also prompted me to look for a more suitable sleeping bag as my trusty North Face Kazoo was losing its warmth by the day.

I know that everyone wants to spend less but your sleep system is not the place to skimp on spending. That said, there are still some great budget sleeping bags out there for wild camping and a good nights’ sleep is worth more than the cost of a decent sleeping mat.

Takeaway – Take time to choose the right sleeping bag and invest in a proper sleeping mat.

Getting Giardiasis after Drinking Contaminated Water

I’ve taken a lot of stick online for this one and rightly so. When hiking the Pacific Crest Trail a few years ago, I got giardia – an illness that comes from drinking contaminated water. It happened because I kept on “taking a chance” and drinking straight from the rivers. Big mistake. Giardia made it near impossible to hike, and I was lucky to reach a nearby town a couple of days later in which I could recover. But did I learn my lesson? Nope.

On my walk around Ireland last year, I took this same risk while camping next to a river in Kilkenny. Next morning, after walking up the river, I happened upon a section that was filled with the feces of some nearby cows and later that day, I succumbed to giardiasis once again!

Takeaway – Always use a reliable water filter when you go camping. It takes just a couple of minutes to filter water and an illness like giardiasis is just not worth the risk.

Using an Open Bivvy Bag in Midge-Country

I can only think that midges take their holidays in County Wicklow. It’s not bad whilst hiking because they can’t keep up, but they swarm like crazy as soon as you stop for a few minutes. I made a big mistake one evening when I went wild camping in Wicklow with an open bivvy bag. Due to the number of midges, I was literally unable to cook or eat and even sit outside and resigned to pulling a sleeping bag over my head for the night.

Needless to say, midges inhabit every corner of Ireland!

Takeaway – Use a tent or closed bivvy when wild camping in areas known for midges, because without a zip/mesh lining, you will be exposed to midges. It’s also worth packing a long sleeve top and bottoms and a head-net to help keep them at bay.

Taking the Wrong Tent into the Dublin Mountains

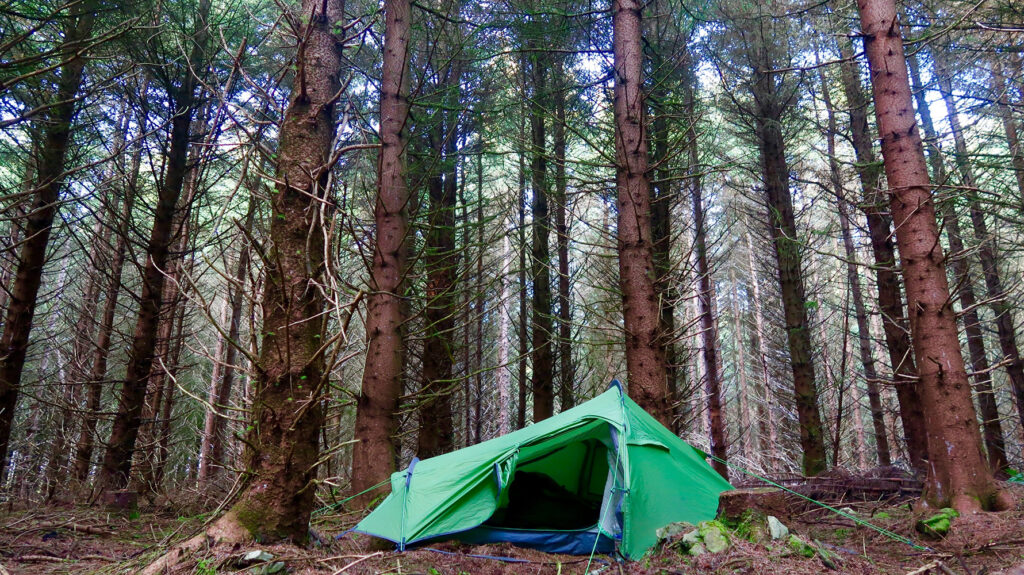
I’ve tried wild camping in Ireland with all of my tents. However, after an especially stormy night in the Dublin mountains, I’m a lot more careful about what tent I take with me. I found it hard to sleep because the tent really struggled with the rain and wind that night. I worried my tent might collapse due to the winds and the noise during this time was irritating to say the least.

That’s why you might have noticed I always use the same tent when wild camping in Ireland – the Vango Banshee Pro 200. I have several very expensive tents but the Banshee Pro is much better suited to the weather and conditions in Ireland. It features a strong build with a low centre of gravity and strikes a nice balance between durability and weight.

Takeaway – Choose a tent that can withstand the wind and rain. If I had the money, I might upgrade to the MSR Hubba Hubba NX but the Vango Banshee Pro has never let me down.

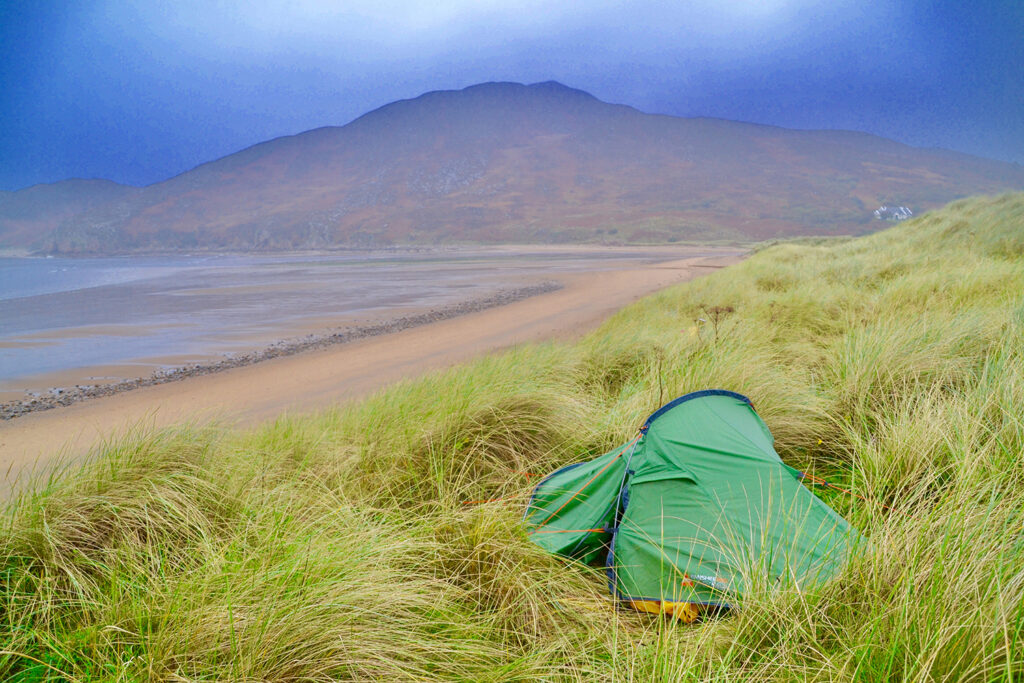
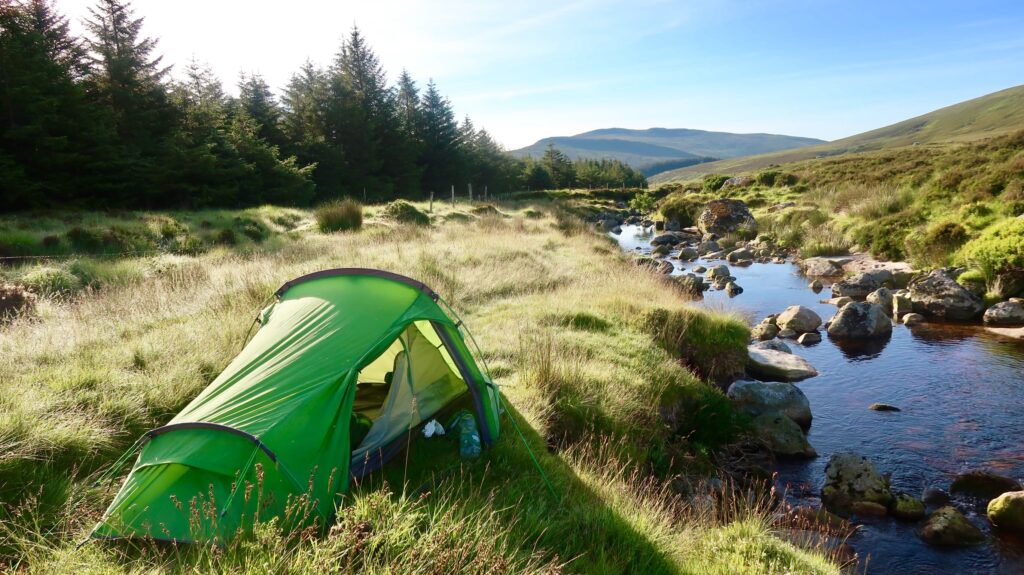
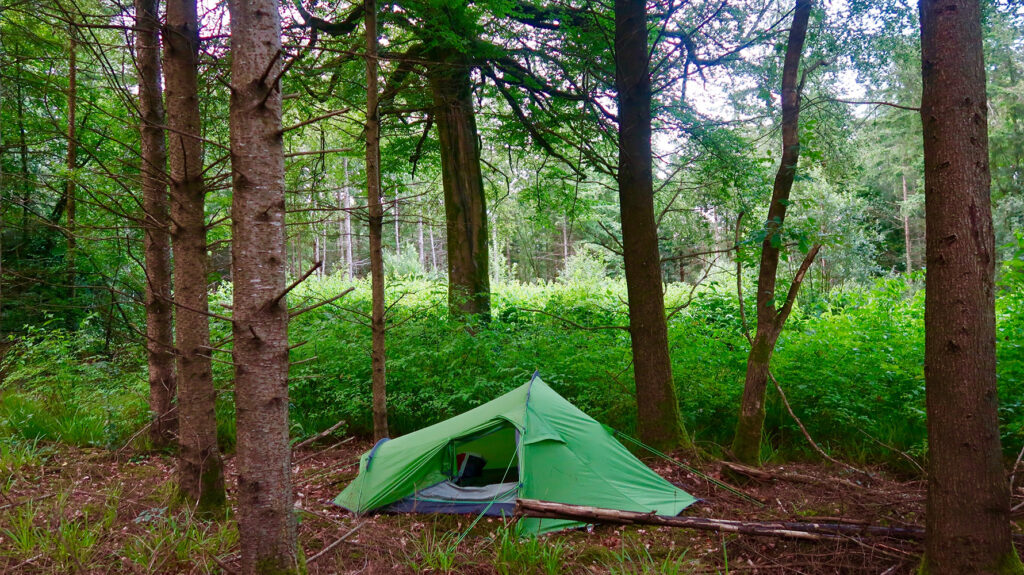
Picking the Wrong Wild Camping Spots

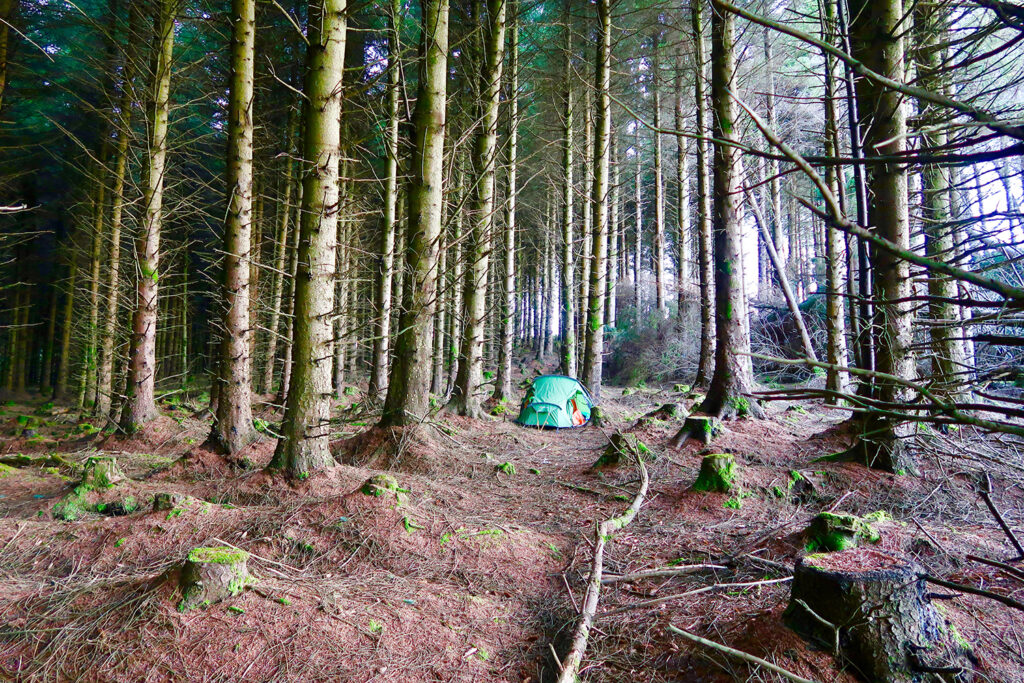
I’ve had my tent flooded in the past after pitching near the bottom of a hillside. I’ve also had sleepless nights after camping right out in the open or on top of a mountain summit.

It’s important to camp away from habitation and “out of sight” to avoid any unwanted attention. However, there’s lots more to consider in terms of picking a spot for your tent:

Camp on Flat, Soft and Dry Ground – Try to pick a flat area and preferably somewhere with soft grass or pine needles.

Avoid Dead or Precarious Looking Trees – Keep an eye out for dead trees and stay away from trees or overhead branches that might look unstable.

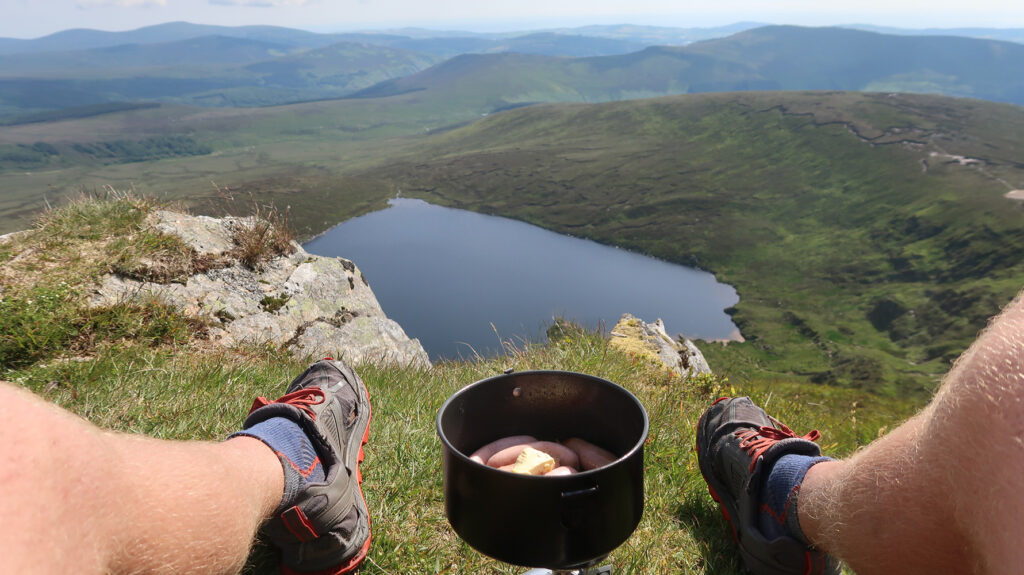
Camp Near a Water Supply – It’s always handy to have a water supply nearby for cooking, washing and drinking.

Camp with the Morning View in Mind – You will usually find a better view higher up but either way, never underestimate the power of a remarkable view. I will often look for somewhere to camp with the view from the tent door at the forefront of my mind. Remember, you’ll wake up to this view!

Camp in a Sheltered Area – You can often get away with camping out in the open but it’s also a risky option in blustery weather. Instead, camp in the forest or on the sheltered side of a hill.

Pitch Your Tent the Right Way Around – Unless you want to be sliding around all night, pitch the tent with your head facing uphill.

Takeaway – Common sense is usually enough but the above tips should help.

Over-Packing for the East Coast Trail in Newfoundland

It’s quite funny to think back about all the gear I carried on my first hiking trip. Hiking the East Coast Trail in Newfoundland was literally one painstaking step after the next. I just didn’t enjoy that hike because I packed far too much gear and ended up with deep bruising on both shoulders. In hindsight, I should have made every effort to not only choose as much lightweight gear as possible but also to cut back on the number of items in my backpack.

For this reason, I will often pack my backpack and then try to remove half of these same contents before leaving the house. It takes experience to realize that many items are not needed for wild camping in Ireland and most people pack far too much food in particular!

Takeaway – Try to practice a minimalist approach to wild camping and pay attention to the items which you carry often but never use.

Some Last Minute Tips for Wild Camping in Ireland

The truth is, you’ll learn a lot more about wild camping through first-hand experience but here’s a few last minute tips to keep in mind for your next trip:

Wait Until Dusk to Set Up Camp – It’s not a case of hiding or trying to sneak about the place. I suggest waiting until dusk so you can 1. Avoid the risk of being moved on and 2. Rest without mistaking every rustle outside for a witch or an evil axe-murderer.

Just Keep Moving – When searching for a place to camp, just keep moving until you find a place in which you feel comfortable. It always amazes me when I keep hiking that small bit further and find the absolute perfect camping spot that I might have missed by staying-put.

Focus on Keeping Everything Dry – I’m not a fan of plastic bags and recommend keeping dry bags inside your backpack. A backpack cover is also needed and the objective is to make sure your sleeping bag and spare clothing are not exposed to the elements while hiking.

Practice LNT Principles – Leave No Trace Principles are there to protect the environment but they also help others to be more approving toward the concept of wild camping which is something we should all try to encourage.

Final Thoughts

It’s common to feel a sense of fear when you go wild camping in Ireland for the first time. However, in time, you should find that most of these fears are quite irrational. What’s more, practice and experience will bring confidence and after a few nights sleeping in the wild, you will certainly enjoy this experience a lot more than when you got started.

What gear will I need for backpacking/hiking in Ireland?

In Ireland, we are blessed with a wide range of wonderful terrain for hiking and trekking. With that comes a similarly wide variety of weather to make your Outdoor Adventure even more exciting!   This can bring a dilemma when purchasing and packing the right equipment for making your day out the best experience it can be.  Wet feet or chaffing clothes can ruin the day.  The weather can change drastically from morning to afternoon, and indeed it can also present challenges as you move from sea level to mountain top.  At Outdoor Adventure Store, we appreciate the need for good equipment that combines value for money with the practicalities of hiking in Ireland. Here is a few pieces of salient advice, tried and tested by staff and customers and then a list of all you might need.  Enjoy!

Waterproofs

It doesn’t really matter whether you are hiking in January or July, you are likely to need waterproof jackets and over pants.  The weight of these items is what will change, depending on the temperature and time of year.  A good warm outdoor jacket is a must for an Irish winter regardless of whether you are just taking the dog to the park, or embarking on a treacherous trek up the mountains. There is a great variety of waterproof jackets and pull up trousers to choose from.  For the summer months, choose a lightweight ‘pop in the backpack’ brand and bulk it up for the winter.  The important thing is to not get caught out in the rain.

Shoes, boots or walking sandals

The terrain is the deciding factor when it comes to the appropriate footwear.  A good pair of hiking boots is an investment in years of outdoor adventure enjoyment. Check out our blog on how to choose the right pair of boots for you, or call into the store to avail of the expert advice of our friendly staff.  It may be that the type of hiking/hill walking that you are planning to do, would be better suited to a walking shoe or sandal.  The important thing is not to get blistered and footsore.

Base Layers

If you have never enjoyed the comfort and warmth of modern technology and common sense that comes wrapped up in base layer clothing, then you are in for a real treat.  Base layers are versatile pieces of clothing (T shirts, long sleeved tops etc.) in different fabrics that provide the buffer zone between you and certain climates and conditions. They draw moisture away from the body, so no need to feel sweaty, to stop you feeling damp and allowing cold to creep in.  Good base layer clothing is a modern day essential for outdoor activities.

Once you get the basics right, your expeditions will be transformed into great adventures,  as you concentrate on personal goals, the amazing countryside, the route and your overall sense of achievement and happiness. With the right gear, your mind will be focused where it should be… on where the foot is falling and not what that foot is wearing!  Here is a short list of essential equipment to set any intrepid hiker/backpacker/hillwalker or trekker off on the trails comfortable, happy and safe.

Hiking socks

Waterproof jacket or poncho

Waterproof over pants

 Fleece long sleeved shirts

Base layer clothing, as appropriate

Light and comfortable trousers

Appropriate foot wear/boots/sandals  

Comfortable, adjustable waterproof back pack

Walking Poles

Hat

Gloves

Snood or scarf

First aid kit

Survival blanket

Torch or Headlamp

Mobile phone

Battery pack for phone   

Sunscreen, sunglasses and sun hat (on the good days!)

Compass, map, GPS

Water Bottles/Rehydration system

Multi Tool

Food Protein Bars, chocolate, nuts etc.

All the equipment you will need for Traditional Climbing in Ireland

Ireland is the perfect place to trad-climb.  From Donegal to Kerry and from Antrim to Dalkey there is plenty of terrain that will challenge even the most fearless climber.  And trad- climbing is indeed for the fearless.  Traditional climbing is a style for rock-climbing where the climber places footholds, bolts, cams, nuts and gear to protect against falls.  So while sport climbing focuses more on the physical challenges there is also a mental challenge to trad climbing.  This form of climbing means carrying and placing protection (chocks, camming devices, bolts etc) together with your usual gear.  Trad climbers and their partners need to decide on a method of carrying this collection of climbing gear that works for both of them. We have a selection of light weight backpacks suitable for purpose.

If you are new to trad-climbing, it can be daunting and exciting in equal measure. Physically demanding and mentally challenging, this sport is not for the faint hearted, especially when you consider that a mistake can have very serious consequences.  Most people begin with a climbing group and literally follow the more experienced climbers in ‘getting to know the ropes’.  Get a good instructor and learn the basics slowly advancing as you go.  Indoor climbing walls can hone the physicality and train the mind for the heights, but the greatest thrill is always in outdoor adventure. 

The right equipment will help to ensure the best possible experience.   We have compiled a list of trad-climbing essentials which will bring you warm and dry to the rock face and upwards.  The rest is up to you. 

Gear list for Trad- climbing:

Climbing Gear Basics

Hardware and protection quantities depend entirely on the route and climb itself, but this is a general list

Personal Gear and clothing

References:

https://www.mountaineering.ie/climbing/tradclimbing/

http://climbit.ie/brians-blog/

www.climbing.ie

www.uniqueascent.ie

What you will need for the trek to Everest Base Camp

So, you are off on one of the most iconic historic treks in the world!  The infamous expedition to the base camp at the top of the world is on the bucket list of many adventurous spirits. Knowing what to take, and what to leave behind, is essential to enjoying, and successfully completing this experience.

A 45minute flight from Kathmandu to the landing strip of at Lukla brings you straight to the heart of the adventure. Breathtakingly beautiful and winding trails surround the lower lush green regions where you will pass through traditional Sherpa villages, Buddhist temples and bazaars.  

Mount Everest base camp stands at 5,364m in the shadow of the summit of highest mountain in the world, Everest( 8,848m ).  Chomolungma ‘The mother goddess of the Earth’ in Tibetan and Sagarmatha ’ sky head’ in Nepalese,  offers one of the most scenic and culturally rich treks imaginable.  Once above the 4,500 meters or so, the landscape changes and your breathing becomes more difficult as the air thins.  The views of these mountain ranges must be seen to be believed and nothing prepares you for the incredible might and awe of rock, snow and ice at the top of the world.

Most trekkers choose to travel with a trekking group, but it is possible to take the challenge on your own.  The best months to take up the challenge of Base Camp is pre-monsoon (February through to May) and post monsoon (Late September through to December).  April and May are the most crowded as those with permits to summit are acclimatizing, so it might be best to avoid those times. Your equipment or gear list is pretty much unchanged no matter what time of year you choose to trek.  That moment when you arrive at Base Camp brings an exhilaration and a sense of achievement which is unforgettable and life affirming.  Check out our gear list to ensure that your Everest experience is positive and successful.

Climbing equipment

  • Ice axes with straps
  • Crampons
  • Climbing harness
  • Locking snap hooks (2)
  • Classic snap hooks (4)
  • Blocker (Ascender). A right or a left
  • Insurer (2)
  • Climbing helmet
  • Draw strips
  • Adjustable trekking poles

Shoes

Technical clothing

For the hands

For the head

Personal equipment


Camino de Santiago – What will I need for trekking the Camino?

Walking the Camino is one of the most popular adventures, rite of passage or pilgrimage in the world.  In English it is The Way of St James and it attracted more than 327,378 pilgrims from over 200 different countries to complete the Camino last year.  That does not take into account the thousands of walkers who trekked sections of the pilgrimage route in France, Portugal and Spain.   All roads on the Camino lead to Santiago de Compostela where pilgrims who have completed the entire route are presented with their Compostela certificate

The idea of walking a pilgrim path in the 21st Century may seem a bit archaic and quaint, but the increasing crowds is testament to the benefits and popularity of walking through nature, without modern devices and in the footsteps of many.  This pilgrimage was popular in the 10th, 11th and 12th Century and then lay going wild and alone, and only began to be of interest again in the late 20th century.  Modern travellers choose the section of the Camino that best suits their activity level, the time they have allocated to complete the walk and the scenery they would most enjoy along the way. 

The most famous and popular route is the French, Camino Frances, with the Camino Portugues, originating in Portugal, as the second busiest route.  These can be busy routes, so if you prefer a quieter road, the Camino Primitivo or Original Way offers 261km of beautiful scenery and a fairly strenuous trail.  Should the  wildness of a rugged coastline appeal to your senses, then the Camino Del Notre which takes in 825km of incredible, and rigorous,  sea trails  is probably the route for you.

It is possible to do the Camino de Santiago at any time of year, although snowy mountain trails may slow you down and become dangerous in winter.  Spring and Autumn are the best times for the pilgrimage, no matter which of the trails, paths or pilgrim’s way that you choose.   

No matter which itinerary and season you chose to embark on your iconic pilgrimage, you will need the right equipment.  At Outdoor Adventure Stores, we have compiled a list of gear which are essential for a successful pilgrimage, where your thoughts are mindful of the road and the journey itself and not the pain of your blisters!  Whether you decide to camp out and need a good sleeping bag or stay in hostels and pack a good sleeping bag liner, we have listed everything for you to customise to your own pilgrimage needs.  Good walking shoes and rain ponchos or coats are a must for all.  

The Camino is more than just an amazing outdoor adventure. Those who have embraced the rigours of its dusty and arduous roads say it that for many, it holds a specific spiritual symbolism too. We think you should be well prepared and are right here to assist in any way that we can so that your Camino trail is memorable for all the right reasons.

Gear List:

Ultra-comfortable walking shoes or boots 

Good quality hiking socks (merino wool or other)

Comfortable backpack, with hip straps (30-45L will work) 

Trekking poles or walking pole

Sleeping Bag

Sleeping bag liner

2-3 light cotton shirts. (one long-sleeved, one short-sleeved- look at base layer clothing if trekking in the colder weather)

Fleece jacket

Hat and sunglasses

Good rainwear or rain poncho

2-3 trousers options (hiking pants, sweatpants, leggings, shorts, anything goes as long as you’re comfortable) 

Plastic flip-flops (hostels essential)

A large quick-dry towel

Flashlight  or headtorch

Swiss army knife

Earplugs and eye mask

A medikit   (Check out our readymade, compact and complete first aid kits)

Sunscreen

Water bottle

Guidebook

Moneybelt

Phone Charger and an adapter/converter for the outlets

Sleeping Pad – This is optional, but some people like to have them.

What gear do I need to climb Kilimanjaro?

Your essential packing guide for Tanzania’s iconic mountain.

Kilimanjaro has gorgeous views, abundant wildlife and challenging landscapes making it the perfect destination for the adventurous traveller. Luckily, Mt. Kilimanjaro is less of a technical climb and more of a long trek, making it a possible climb for those without extensive mountain-climbing experience. It is often called the ‘walk-up’ mountain.  But Africa’s highest peak is not an easy climb. It is an ascent into extreme altitudes of 5,589m on a trek that can last anything from five to nine days to complete. Statistically, less than half of all climbers on Kilimanjaro make it to the summit, although all make it some way up the mountain to enjoy the awesome views of waterfalls, lava rock formations and glaciers.  Pre-trip training and packing the right gear will increase your chances of summiting the iconic Uhuru Peak and will ensure an enjoyable, thrilling yet safe adventure that is memorable for all the right reasons.

Kilimanjaro has two rainy seasons, the first is from March through May and the second occurs in November. This means that there are two distinct trekking seasons, January-March and June-October, which give the optimum conditions for climbing. January to March is generally colder than June through to October and there is a higher probability of encountering snow on the summit. The gear list below is suitable for both climbing seasons.  

Kilimanjaro guides warn that most travellers bring too much gear. For this reason, we have kept the list to the bare minimum and to the essentials.   It is worth noting that all climbers are obliged by Tanzanian law to climb with a guide AND to hire a porter to carry equipment.

Outdoor Adventure Store staff have tried and tested all the gear we sell and are on hand to assist with your questions and gear related queries. 

We want you to enjoy your Outdoor Adventures to the absolute max!  

Climbing equipment

  • Ice axes with straps
  • Crampons
  • Climbing harness
  • Locking snap hooks (2)
  • Classic snap hooks (4)
  • Blocker (Ascender). A right or a left
  • Insurer (2)
  • Climbing helmet
  • Draw strips
  • Adjustable trekking poles

Shoes

Technical clothing

For the hands

For the head

Personal equipment

Frequently asked questions about buying hiking boots

Purchasing hiking footwear can be quite a daunting task.  At Outdoor Adventures Store we are always on hand to help our customers to ensure that the footwear they choose is sturdy, reliable, comfortable and great value for money.  We are pleased to answer some of the more usual questions about buying hiking boots.

Do I need hiking boots? 

Yes!  You do.  You need hiking shoes and boots if you want to trek long distances and upland trails comfortably and without blisters or wet feet and all the time reducing the dangers of slipping and falling.  A good pair of hiking boots are optimised for ankle support on all terrains and will protect your feet from rocks and spikey trail debris.    There is a good reason why Mountain Rescue sites repeatedly recommend wearing proper footwear to ensure comfort and safety while hiking.   The wrong shoes are simply a recipe for disaster. Those who start walking in regular footwear, often regret their decision quickly.

Should hiking boots be a size bigger than your usual shoe?

A controversial question indeed! Some manufacturers recommend going a half size up, but this is not always good advice.  The answer is very simple.  Check your foot size, length, width and arch and then purchase a boot that will fit snugly everywhere.  Look out for tight or squeezed spots and know that this is going to be the source of extreme pain in the future if you walk in that boot. You should be able to wiggle your toes.  If the boot is too loose and your foot will slip on down-hill trails, causing your toes to touch the end of the shoes and cause discomfort or even injury.   You are also likely to get blisters.  Consult the sales advisor at your store.  A general guide is that your heel should be locked in position inside the boot and won’t slide or move, as you walk. At Outdoor Adventure store, we can advise at the fitting stage, ensuring a hiking boot that will keep you comfy, safe and happy for years to come.

Do hiking boots stretch?  

Hiking boots may stretch a little with wear, but this is more a case of them becoming snug, and fitting better, after you ‘break them in’ and not a case of the boots expanding to become too loose. Leather is a natural material which responds to outside (and inside) conditions.  Stretching or easing, may happen to your boots of natural materials.

Can I wear hiking boots for regular walking? 

Yes. Hiking shoes and boots are designed for walking long distances so are perfect for regular walking. However, if walking on a hard road surface, in the sturdier, heavier hiking boots it may make the going a little tough. In fact, you will be using more energy to cover the same distance. A lighter walking shoe or trail runner is probably better suited for road walking.

Can I use hiking boots for running?  

It is not advisable to use a heavy hiking boot for trail running. Trail running has become increasingly popular over the past few years.  For this activity, it would be advisable to choose the aptly named, trail runner, if running over bumpy terrain in isolated areas is your choice of outdoor fun. Trail runners have no high ankle supports and are generally of a lighter material.  Generally, they have a narrow sole, so you are closer to the ground, reducing the chances of tripping and falling. Naturally, they are not as durable as sturdy trekking boots and will not offer the same amount of protection from debris, stones and rocks. But each boot or hiking shoe has been optimized for its designated activity.

Do I need to spend a lot of money on hiking boots?

There is no need to spend lots of cash on your first pair of hiking boots. There are a wide range of hiking boots to choose from and even those with a modest price tag offer comfort, safety and reliability on the hiking trail.  Of course, a lot depends on the type of hiking you intend to do.  If you are into extreme trekking at ridiculously low or unbearably high temperatures, then you will need to adjust your purchases to reflect the stress that you and the footwear will be experiencing.  If you are just new to the world of hill-walking, then you can purchase a good pair of sturdy, breathable, waterproof shoes to get you comfortably on the trail.  Outdoor Adventure Store shops have an incredible choice of activity footwear and can advise on what meets your needs.  Take on the trails in the Eurotrek Lite III Walking Boot by Hi-Tec. Waterproof and lightweight – they boast a Dri-Tec membrane at a very reasonable price. 

How long should hiking boots last?

This question can be answered by the previous one. Sometimes, you get what you pay for. Cheap shoes will last just a while.  Expensive, branded and tested hiking boots are more likely to be durable and hard wearing.  Some people have trusted boots for years and years.  A good guideline for quality hiking boots and trail shoes is some 500-1000 miles (805 to 1610 km). We know that is a huge range but there are many factors affecting the mileage that your boots can handle.  The terrain is very influential and firm, but soft trails, will see your boots lasting longer than those that tackle rock, bogs and scree.  Clearly, the boots will just take less of a beating on nice even trails as opposed to tough and challenging terrain.  Maintenance and care of the boots will also extend or lessen their lifespan.

Summer Hiking Gear – Your essential guide to warm weather trekking.


Summer is finally here and the mountains and trails are calling to us all.  The longer days, the (sometimes) better weather and the absolute beauty of Ireland in its full green summer bloom will always inspire to get us out and about.  

What will you need to bring with you for your day long adventure trek into the highways and byways? Traveling light is essential, particularly if the temperatures are creeping up. Yet, you will need to pack something for every eventuality that an Irish summer can bring.  Here is an essential guide to warm weather summer hiking. This simple and common sense list will cover all your needs while guaranteeing that you won’t be staggering uphill with an overweight backpack 

Essentials  

The usual rules for hiking still apply. 

Wear suitable footwear.  Unsuitable footwear is the most common reasons for slips, falls and broken ankles.  Ditch the flip flops and the fancy wedge sandals in favour of a good walking shoe or boot.  Walking sandals are perfect for some terrain, but if you plan to be off road, you may expect a few scrapes and cuts from the undergrowth. Socks and sandals may be a fashion faux pas, but they make sense on the gorse covered mountain ranges.  

Use a good, waterproof backpack that has been adjusted to suit your body. 

A walking or trekking pole, adjusted for the terrain and your own personal body type is invaluable.  

Sun

Yes, sometimes we see the sun in Ireland.  Use sunscreen.  Wear a hat and protect your eyes with a nifty pair of sunglasses.   

Rain

We often see rain and it is possible to experience a variety of climates all in the same day in Ireland. It makes sense to expect the odd downpour or two.  A lightweight pair of over trousers will take a small amount of space in the haversack and you will bless their lightweight goodness when the sideways rain comes in from the Atlantic.  A rain poncho is the perfect answer to keeping the worst of a summer rain shower off you and your backpack. Quick drying upper body clothing makes sense in the Irish climate. At Outdoor Adventure Store, we have a wide range of waterproofs and rainwear to keep you dry till those dark clouds pass.  

Water

Rehydration is a serious consideration for summer hiking. Make sure you bring enough water with you.  And then, bring some more! Consider the real convenience of a water bladder. These clever hiking essentials can contain up to 2 litres and allow you to fill up and head off on any adventure without having to worry about searching for water.

First aid

Be Prepared!  A lightweight First Aid kit will take up a small corner and add little weight to your journey. You may, hopefully, never have to use it.  But, it is always better to have one with you come rain or shine.  A comprehensive first aid kit need not be expensive and OAS have some for under €20 that can assist in almost every emergency.

Food

We all eat a little less in the heat and so, you might be tempted not to bring hearty food on a summer hike. However, you expend more energy climbing in the heat, so do not be tempted to skimp on the calories you will need.  Eat well. Stock up on high performing snacks, nuts, trail mix etc. Quality rather than quantity might be your summer watchword as you avoid melty chocolate in favour of high protein snacks.  

Torch and navigational Equipment

The sunshine makes us happier and may lull us into a false sense of security regarding wild walking and off road trekking. We may be less inclined to plan for the unfortunate things that may happen. Unfortunately, you can get lost while hiking in summer too.  A change of weather, an influx of low lying cloud or rain, can change the landscape very quickly.  Accidents or incidents may slow you down and leave you out for longer than planned. Pack your torch and whatever navigational equipment you use.  Don’t rely on the phone for directions, as coverage may be sparse.  A map and compass is still a great option in a digital age. Tell someone your route before you go out and check in on your return.

What to wear

Choose lightweight, loose-fitting, breathable clothing. Fabrics that breathes well will help your body to regulate temperature. There is a vast choice of suitable trekking gear. The Dare2B range has a tech-tee that actually moves sweat away from your skin and keeps you feeling fresh. It looks good too.   Nylon and polyester clothes are good choices. Avoid cotton.  When cotton gets wet, it takes an age to dry and it is really not suited to the warmer weather.  Avoid overheating by not wearing too much but at the same time, be aware that the top of mountains can be much colder than sea- level.  Pack for a ‘Layer up’ should you need to address dramatic changes in temperature.   Pastels are so in for hill walking dahling!  Black clothing attracts the heat so choose lighter colours; white, khaki or tan to get the cool factor.

Pack spare socks. Trust us!  You can thank us the next time you call into the shop. Spare socks are always needed.

Bite me!

Insect repellent.  Midges, mosquitos and general flying, biting, winged creatures may need to be repulsed.  Carry the necessary repulsion lotions!

All this looks like a lot to think about, but it is a relatively small list, not too bulky or heavy, and guaranteeing you a good trekking adventure, with all eventualities covered.

Now get out there and soak up those rays!!

Baby carriers for hiking

And Baby came too…

So, your life now includes a small person too!  Congratulations! 

Hiking can be just as much fun as when you were one.  As you cope with the many positive changes that this new arrival brings to you (like a new found appreciation for sleep or a meal eaten with two free hands) you can also consider your new life on the trail together.  Baby comes too! A comfortable and practical baby-carrier is the best way to bring baby with you, without fuss or bother.

Baby wearing

Carrying your baby close to you is a natural, practical and beautiful thing to do –According to the website www.babywearingireland.ie , carrying your baby in a sling offers a wealth of health benefits for both the baby and the person carrying them. It is as natural as it is practical. There are many different ways to carry your baby.  Age, weight and where you plan to travel have some influence over what you choose.  The baby wearing Ireland site not only allows you to browse a selection of stylish and comfortable baby-carriers to suit every shape and size, it also gives a link to the sling library, where you can book a ‘loaner’ carrier and try it out for a week or two.  Baby wearers report a closeness and comfort for both baby and themselves and many confess to popping baby in a sling at home to induce sleep and restfulness in a fractious infant.

Choosing your Carrier

For your first forays into the wild when baby is still a tiny bundle, it is best to use a front wrap or fabric sling.  Take care to keep the little one protected from the elements with hats, sun-cream, blankets etc. These are inexpensive and plentiful in style.  Smaller babies can enjoy the world from the closeness of these practical wrap slings.  Once baby has reached 5-6 months old and can sit up unassisted with good head/neck control, you can think about a sturdy back carrier for those longer treks and hikes.  There are lots of back carriers to ensure that all sorts of expeditions will be safe and comfortable for both you and your child. 

Soft structured carriers are one option.  These usually have a soft cloth panel which holds the baby against the wearer’s back, along with padded shoulder straps and a padded waist belt. They fasten with clips or buckles.  The positives with a Soft Back Carrier are that the baby is very close to you, so it is suitable for very young and some wearers say it feels more stable due to the low centre of gravity.  On the downside, they do not provide the same level of sun/rain protection offered by framed packs  and are often lacking in storage options for your gear (and let’s face it, you will be needing extra gear for the new adventurer).  One of the most reported difficulties with the soft fabric carriers is that they can become unbearably hot, since your bodies are close to one another, generating additional heat.

For the serious hiker and long trail trekker, a framed carrier is the best option.  At Outdoor Adventure Store, we stock the Award winning, Ranger Child Carrier as it is the lightest back carrier by British Standards on the market at just 1.7Kg.  It’s a perfect baby carrying rucksack. The Adventurer S2 child carrier is also a favourite tried and tested carrier which we like. This modernised version of the original Adventurer has updated fabrics throughout and a newly designed face pad.  Little people like the framed carrier as their face is not pressed against the back of a parent, but as they hold them high, they are free to enjoy the view just like everyone else.  They don’t suffer the same heat problems as close carriers as there is airflow between child and parent, and rain and sun accessories provide more serious protection than provided by a soft carrier.  Most importantly, baby-carriers are specifically designed for hiking so the weight distribution is ideal for wearing over a longer time.

A few tips for hiking with Baby.

Cabin fever can set in following the arrival of a wee one, especially, for those of us who are used to the wild side of life.  Hiking with your mini-me is a great way to combat those feelings and to enjoy nature and the clean fresh air together. Preparation might be a little different than your pre-baby days.  Remember to bring plenty of water and snacks! Especially if one of you is feeding the baby too.  Pack hand sanitizer, sunscreen, hat for baby, and extra baby clothes, for back packing carriers carry a small mirror for checking on baby without having to remove the carrier.  Don’t forget that baby may be at the level of small trees and guard against them getting hit by branches. Don’t be tempted to lean over while you are carrying the pack. Bend at your knees to keep your baby from falling out when you are reaching for something on the ground.

Baby steps

Becoming a parent changes many things in your life, but there is no need to forego your love of the great views, lonely trails and wilderness walks. Celebrate the great outdoors as a family.    It is probably best to gently wean yourself back into the great outdoors and not go off the beaten track for the first adventures.  Plan well and enjoy the freedom together bearing in mind that it is perfectly ok to turn around and head home at any time. Choose a comfortable and fuss free carrier and enjoy a great start to your Outdoor Adventures together.

Brighten up your world with a head torch!

Light up your life with a reliable, durable and practical head torch.

Choosing a head-torch

Running down a dark trail.  Your heart rate is pumping. You’re in the zone with legs pounding and headphones thumping as you follow the beam of light from your head torch, when suddenly, disaster strikes. The lamp goes out!

A good head torch is an essential asset for hiking, camping or running.  It’s the difference between an easy experience and a potential disaster. A good headlamp is especially needed if you enjoy sleeping under the stars and/or expeditions in deep damp caves and other dark places.   So much more practical than a hand torch, a head lamp is truly a godsend when dusk turns to an early night on your adventurous hiking trip or when camping in the wilderness.  Also, it has to be said, they are absolutely amazing if you read in bed, but your partner prefers a black out bedroom!!

For the great outdoors you need to choose a head torch that won’t leave you in the dark at a critical moment. One that is easy to wear and shines its light just as bright as you need it. 

Enjoy our short but essential guide to buying the best head torch to suit your needs.

Light Output

The light output of your torch is measured in ‘lumens’.   So, the more lumens of power, the brighter the beam. The higher the lumens, the higher the energy consumption so this needs to be taken into account when choosing your headlamp. If you need, or like, a really powerful light beam, then an extra battery pack or one of our rechargeable head torches might suit your needs. The Light output can vary on head torches and some are even smart and can tailor the output to your needs.

Beam Distance

Hiking and running need a long beam while pottering about the campsite is best suited to a short beam. After all, there is probably no need to shine a full light on tents camped a few miles away while you seek the can opener at your own fireside.  Choose an up to 50m fixed beam when running in urban partially lit streets, and an up to 150m focus if hitting the unlit trails.  Some reasonably priced headlamps offer a wide beam, which is also useful for nocturnal outdoor adventure. The Tikka head Torch offers two lighting modes that cleverly adapt the quantity of light to each situation.  Maximum brightness is 80 lumens over a distance of 50 meters, which is pretty adequate for most activities. Or upgrade to the Tikka plus, with 140-lumen, this headlamp offers both spot and flood beams, a one-touch boost for quick access to max brightness and red LEDs for night vision without eye fatigue. It also features several lighting modes suitable for long-range lighting, proximity lighting or rapid movement.

Battery Time

It’s best to make sure you have power in your torch, than lighting candles and cursing the darkness… or something like that!   For the average runner or hiker, a standard head torch will offer anything from 6 to 15 hours running time before it needs a new battery or a hook up to a power supply.  If you want long battery time, with recharging options, then choose a top of the range head torch.  Consider your options carefully before purchasing as there is little point in having excellent beam distance and massive lumens at your disposal, if the equipment is lying sad and out of power at the end of your rucksack.  If your head torch projects 10,000 lumens over 500 meters, then your battery will last a whole ten minutes!   However, that is a helluvalot of lumens and your average torch will probably beam somewhere between 60 and 750 lumens so battery life should be much more practical than this.  Our trained staff at Outdoor Adventure Store will be pleased to advise on the best choice for your needs. 

Brightness Level

All of our headlamps offer at least two lighting modes to adapt the brightness to each situation. There’s also a new breed of head torches that use a Managed Light Output. These torches use light-sensing reactive technology to monitor the incoming light and adjust brightness accordingly. The top end of this market even allows users to monitor and adapt the light output via a Bluetooth app for maximum control of output and battery management.

Keeping it Light

 Keeping it light is essential for your neck muscles!  A heavy head lamp will become uncomfortable on a long night run or as you hike long distances.  There is a head torch to meet your specific activity and it is worth considering an ultra-compact and ultra-light headlamp if a heavier light will bring you down.  

State of the Art

Among the best of the best rechargeable head torches on the market is the ACTIK CORE headlamp offering 350 lumens of power, which, combined with its mixed beam, makes it ideal for outdoor activities like mountaineering, running, hiking and backpacking. Red lighting preserves night vision and prevents blinding any other members of your group. Its reflective headband helps you to be seen when a light is shone on it, and is equipped with an emergency whistle for rescue situations.   

So, whether you are using your lamp to navigate lonely damp mountain caverns, to get an early start on the hiking trail or aid with the spring lambing, there is a head torch suited to your needs.  Weight, functionality, durability and power sources are the things you need to keep in mind and as always, Outdoor Adventure Store have a range to suit all needs and at great value too.  Lighten up with a great head torch.